


We wanted to share a success story submitted by Kevin, about his and his family’s experience using the EasyShoe Versa Grip Lights for the first time.
It’s always good to start with a little background. The horse people in this story are my wife, Claire, and my two daughters, Brianna, and Alexandra. We have been involved in endurance riding for over twenty years, primarily in the mountain region, and our horses have been “barefoot” for most of those twenty years. Claire and Brianna have each earned a Tevis Buckle. On good days, I get to ride, as well, having completed several pioneer rides myself.
We have used almost every hoof boot that EasyCare has ever made. For the last several years, we have primarily used Easyboot Glove Softs and Easyboot Glue-Ons. We have one horse in particular, Tango, that hates having anything touch his coronet band. At the suggestion of Kelly Stoneburner, DVM, we started looking at the EasyShoe Performance N/G, but we really did not want to nail anything to the foot. When the 11 Finger Tabs came out, we were eager to try them on the EasyShoe Versa Grip Light. Nothing around the coronet band, no nails, and hopefully more shock absorption with this shoe.
 Good News and Almost Bad News
Good news. It’s not as hard as it looks to get the shoes on. Bad news. It’s not quite as easy, either. As EasyCare Product Specialist, Jordan, pointed out in one of our phone calls, the videos make it look easy. Based on our first-time experience, here are my suggestions.
- Measure twice and cut once. Just like carpentry or any other craft/skill. Make sure you accurately measure the shoes and order the correct size. We needed to order up two sizes based on availability. It was definitely doable, but added challenges to getting the right fit.
- Measuring/tracing the hoof using a Sharpie-type permanent marker worked well. Because we had ordered up two sizes, I used a pair of pony nippers to trim the majority of the excess shoe away. This works very well as long as you keep the nippers straight and do not angle the cut. If you do end up cutting at an angle, you can fix it when you grind the shoe down to size.
- Our belt sander was a hand-held sander that I locked into place in a vice on my workbench. Follow the suggestion for the grit on the sandpaper. Lots of fine dust – definitely wear a mask and goggles.
- Kindergarten tracing 101 – trim/grind all the way until you do not see any of the marker.
- Melting/fusing the tabs and the shoe. This is where we did not get it right at first. As Garret mentions in his videos – make sure the tab is clear – this means it is melting. You need to melt the two pieces together. Watch the video – it helps to warm the edge of the shoe and then use the heat gun to heat the tab strip until it is clear. If it is not clear, wait! We found a large piece of aluminum to weld on – you definitely want a heavy-gauge piece of metal to work on to help hold the heat.
- Yes, it’s melting plastic – be careful. If anyone has worked with P-Tex ski base repair, you will get the right idea.
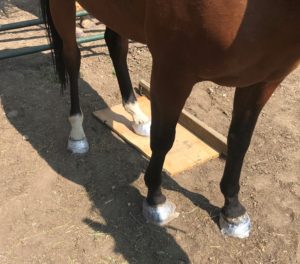
- If you have a smooth concrete surface that the horse can stand on when gluing the shoe into place, it is highly recommended. We thought we would get away with being on a large flat board, but the shoe/hoof slid just a bit and rotated before the glue had set.
- How much glue – we used enough so that the entire inside of the tabs (the part being glued to the hoof wall) looked wet.
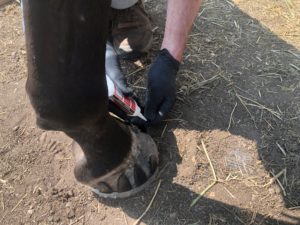
- Wrapping with plastic wrap – it’s worth buying the 3” size on the roller handle. Make sure you start low on the hoof so that it does not jut pull up and slide off the tabs. Pull the shrink wrap tight so it will press down onto the tabs.
So How Did It Go?
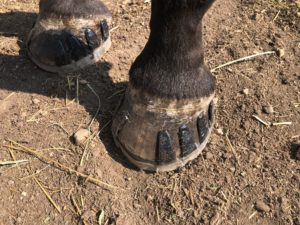
All four shoes stayed on for a very rocky, fifteen-mile ride. Tango loved the shoes and was floating down a trail he usually gets “ouchy” on.
The first shoe started coming off on day three. Yes, it was all about the weld of the tabs to the shoes. The tabs stayed on, but the shoe itself separated from the tab strip.
We are excited to try round two. We’re putting the shoes back on for the Virgin & Outlaw Pioneers ride later this month.
Huge shout out to Jordan for being helpful, and to Dave Rabe who has always helped us on the trail with all of our EasyCare products.
-Kevin, Claire, Brianna, & Alexandra Clarke
Silverthorne, Colorado


So the shoes only stay on a few days? How many times can you reuse them?
The shoes typically stay on for a full trim cycle, about six weeks on average. This customer’s first attempt only stayed on for a few days because of how he welded the tabs onto the shoe. The first attempt is always a good learning experience. You can typically reset these shoes two or three times.
Comments are closed.