


Are you interested in trying one of our glue-on EasyShoes? Or, are you a confident gluer looking to fine-tune your skills? We’ve compiled a list of tips and tricks to help you perfect your gluing work.
- You can turn any of our nail-on EasyShoes into glue-on EasyShoes by heat welding tabs on.
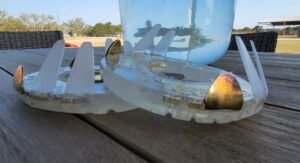
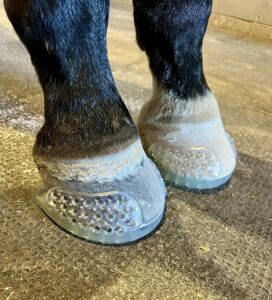
2. Having a snug, correct fit is essential for a successful application. Space between the tabs can cause the shoe to come loose before a full trim cycle. If you find yourself in a situation where only a few finger tabs have space between them, you can take a spare set of 11 Finger Tabs and Super Glue them to the inside of the shoe. This can add just enough space to make the tabs lay flat against the hoof wall.
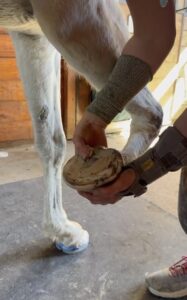
3. Hoof prep is key to a successful gluing application. A foolproof way to check your hoof prep is using a moisture meter. If you have thoroughly prepped the hooves, your moisture meter will read “0”. If not, you know that you need to prep again. You can find moisture meters at local hardware stores and Amazon.
4. Before you begin gluing, we highly recommend applying Artimud or hoof clay to prevent any bacteria growth in the grooves and frog area of the hoof. Copper Sulfate is another way to prevent bacteria. Depending on the needs of the horse, you can also add DIM mixed with copper sulfate or a copper sulfate infused pour in pad, but this is optional.
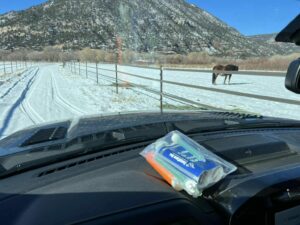
5. Try to keep your glue, shoes, and hoof wall all around the same temperature. In the summer, this is a breeze. In the winter, this will require some extra effort. We find that keeping the glue and shoes warm results in a better bond. You can keep the glue and shoes warm using a heating pad, and warm the hoof wall with a heat gun. You can also keep your shoes and glue inside a heated truck or tack room.
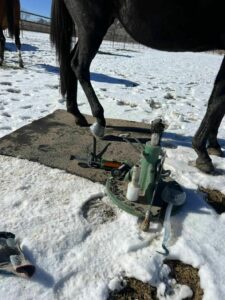
6. Working in a remote location but need a clean place to work on hooves? Keep a rubber stall mat in your truck for situations where there isn’t access to a barn or run-in shed. This will give you a clean, dry spot to prep the hooves.
7. Most commonly, our shoes are applied indirectly, meaning the glue is only applied to the hoof wall. If you are working on a fidgety horse, the shoe placement can shift during the gluing process. To prevent any shifting, apply a small amount of Super Glue to the weight bearing area of the sole, set the hoof down, then continue the gluing process like normal. The Super Glue will prevent the shoe from twisting or turning while you continue to work on the horse. This also makes it easier to wrap the hoof without fear of accidentally shifting the shoe position.
8. Keep in mind that glue will take longer to dry in the winter or cold weather. Typically, we recommend keeping the hoof wrapped for 10 minutes. In cold temperatures, we recommend 20 minutes, if possible.
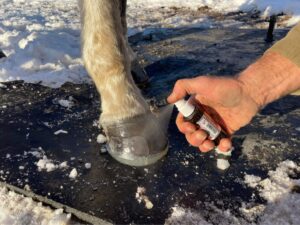
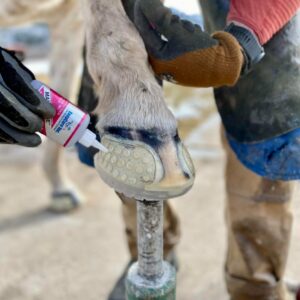
9. When using Super Glue, to speed up the drying time, we recommend using Insta Set. Insta Set dries Super Glue in 6-8 seconds rather than 10+ minutes. Spray Insta Set on the hoof AFTER you have the shoe set and Super Glue applied. This not only saves you time, but gives you peace of mind that the shoe will not shift if the horse moves.
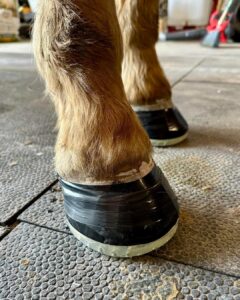
10. Many customers find that electrical tape is a great alternative to plastic wrap. Better yet, wide electrical tape. The tape is a little easier to get leverage on, allowing you to get a firm hold on the tabs. When you are done, cut the tape or unwrap.
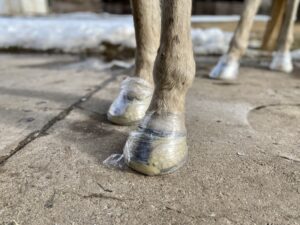
11. After your glue is dry and wrap is removed, take a little bit of Super Glue and trace over your tabs to ensure they are completely sealed. This will help prevent any tabs from coming loose. You can also take a bit of Super Glue and apply it to the entire hoof wall, even if you are using acrylic glue.


