


In “How to Nail the EasyShoe Flex Light to Go the Distance,“ I explained step-by-step how to nail on the Flex. In this follow up blog, I’m going to explore the option of filling the bottom of the Flex with a cushioning material that is designed to keep out any debris, rocks and moisture, and add some additional cushioning.
Before I explain how to properly fill the openings of the Flex with a pour-in pad, I want to stress that this step is optional. Filling the Flex is by no means essential or even necessary. I have ridden countless miles without it and have never experienced a rock getting stuck inside the opening. But, on the other hand, I am competitive in endurance races and want to avoid even the slightest chance of having that happen. And it could…unlikely…but it is a possibility. Having invested that much time and effort to get to a competitive event, I might as well make sure I am prepared for anything. So, while I don’t fill these openings for all my training rides, I do for all competitions. I am prepared to the best of my ability and nothing is left to chance.
The benefits of filling the shoe’s opening are many-fold:
- Adds cushioning for the hooves and joints of the leg
- Keeps moisture, debris and rocks out the sole, avoiding stone bruises
- Supports adhesion of the shoe to the hoof
- When filling the larger size Flex Light, it also helps prevent cupping
Pour-in pad type and durability
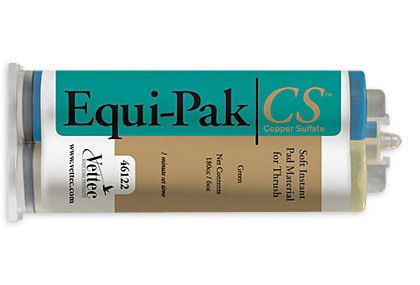
For this application, which is to fill the opening of the Flex, I use Vettec Equipak, either the regular or the Equipak CS, which is the same polyurethane as the Equipak, but with added copper sulfate as an antibacterial agent.
Polyurethane products consists of two components that set up to a stable chemical connection that is very durable and last a long time. All EasyCare hoof boots and EasyShoes are also made out of polyurethane, which is why they wear well and last so long over abrasive terrain. In my experience, I’ve ridden hundreds and hundreds of miles with the same set of boots and shoes.
One of the characteristics of this type of pour-in pad is that it adheres solidly with the first material it encounters during the setting process, which, according to outside and cartridge temperature could be anywhere from 30 seconds to 3 minutes on a cooler day. Therefore it is of utmost importance that the hoof is very clean and dry. Should there be a layer of dust, dirt or moisture on the hoof sole, the pad will adhere to that layer of contaminated material, no matter how small or even invisible it might be to the human eye. This means that the material will not bind to the sole, but instead to that very thin level of moisture, dust or mud. Ultimately, the cushioning material will fall out.
Other options for filling the opening of the Flex Light are dental impression material or Vettec Sil-Pak. These products don’t require cleaning and drying the sole, but also do not adhere to the sole, they are just fillers. However, they work well for prevention of sole bruising and cushioning. Because of the lack of adhesion to the sole, these products are not suitable for the Flex with open heel.
Decide before nailing the Flex whether you are planning to fill or not, and what type of pour-in material you’re going to use. It is very hard to prepare the sole properly after the nailing is completed.
Preparation steps after trim and prior to nailing
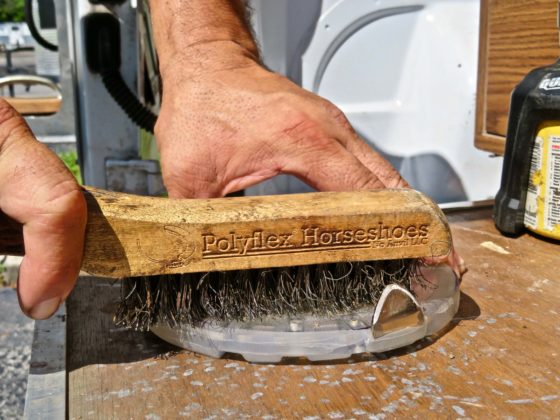
- Clean sole thoroughly with a clean wire brush.
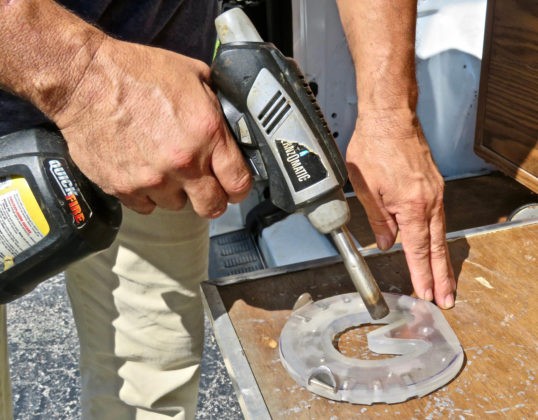
- Use a heat gun or gas flame to dry the sole. In wet areas this process needs to be repeated a few times to assure the sole is completely dry.
- Repeat brushing one more time with the wire brush.
The Flex shoe itself could also be contaminated with dust, moisture or oil from our hands while handling it. We want the pad to stick to the shoe; therefore clean and dry the shoe prior to nailing in the same way.
Nail the Flex
Now we can nail the Flex, taking great care not to touch the clean sole and shoe with bare hands. It’s best to use clean gloves while nailing. After the nailing is completed, we then can fill the bottom of the hole with our selected pour-in material.
How to fill the Flex
Start holding the cartridge at a low angle and filling first right under the edges of the Flex to allow the material to flow towards the parameter of the shoe and sole.
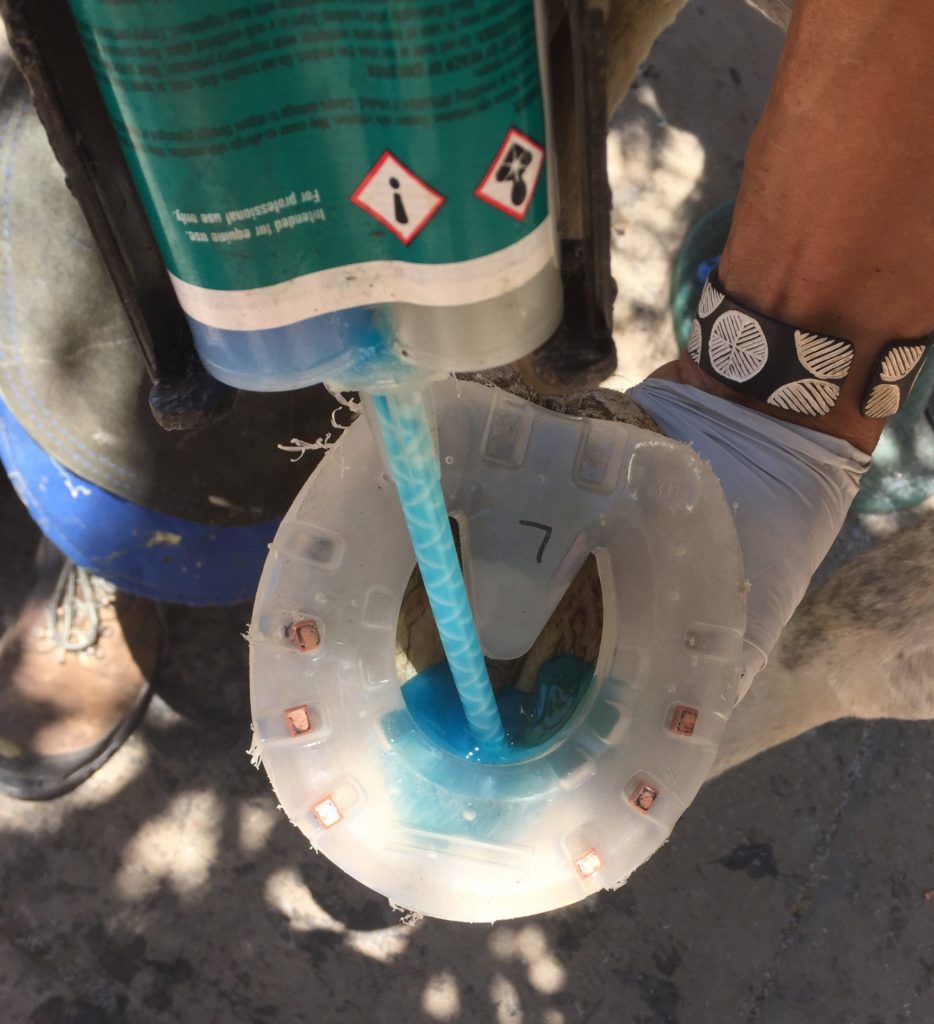
Once all the open spaces under the shoe are filled (don’t leave any air spaces), fill the main space up to the inner edge of the shoe. Avoid filling it level with the shoe to allow for better hoof mechanism and help get better traction in mud, wet grass or snow.
When properly prepared, these fillings will stay for the whole shoeing cycle.
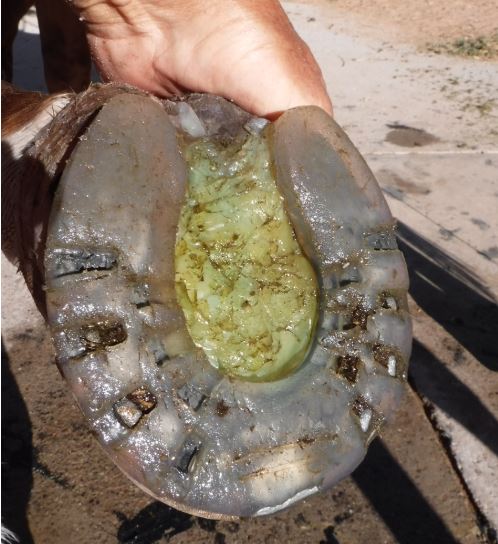
Here’s a photo of the applied Equipak after several weeks of traveling.
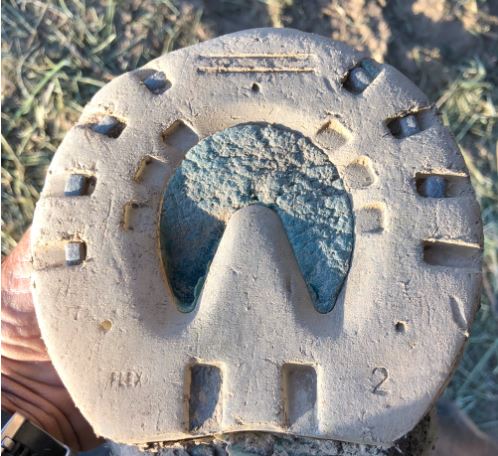
Here’s the Flex with open heel. I tapered off the pour-in pad towards the heel, giving better traction.
From the desk of the Bootmeister.


This is a great way to use the shoes, but Caution, this method DOES NOT work in muddy conditions. Too flat of a surface and the horse can’t get any grip. Experienced it.
Comments are closed.