


For clarification, we aren’t referring to the women’s magazine or the cocktail.
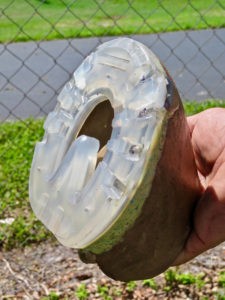
By definition, cosmopolitan means “at home all over the world”. If ever there were a more fitting shoe for the word, it’s without doubt the Easyshoe Flex. Inspired as a solution for South American taxi horses nearly three years ago, the shoe has blossomed beyond expectations as a performance all around super star. Fluently utilized in a wide variety of sport horse disciplines – the Flex has become the contemporary milestone of the year for EasyCare Inc.
Whether you have already embraced the Flex in your shoeing or are just starting to explore the stratum of its potential – a cardinal question remains relevant.
“Am I utilizing the Flex to its fullest potential?”
Whatever language of the horse industry you speak, if you haven’t added glue on technique to your Flex resume – then the answer is no!
To get started – compare and contrast your glue education to the material below. A few subtle additions to your EasyCare repertoire can make notable improvements in your work.
Why decide to glue on a Flex versus the variety of composite shoes available?
Ultimately, it all boils down to horse preference. In my experience, the Flex has proven itself to be a product that can surprise you with its versatility. As an example, a difficult bar crack case of mine recently flourished in this shoe. For the horse that needs the stability of a metal shoe but the concussion absorption of a composite – the Flex could make for a great choice. It’s wider web for sole protection & variety of styles only add to its list of advantages. For almost every discipline and its associated performance demands, the Flex offers positive features.
Hoof and Shoe Preparation…what do I need to know?
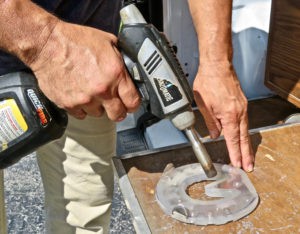
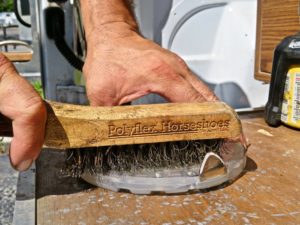
As a rule, adhere to the same principles of hoof preparation as you would for gluing any of the other EasyCare shoes or Polyflex shoes. Remember, the order of your steps matters as much as the quality of steps. Glue each shoe as if it were meant for a high level performance horse.
In regard to shoe preparation – the goal is to create an ideal bonding platform. Lightly torching the surface and wire brushing the shoe will help to score the composite material in addition to removing any residual release agent possibly left from manufacturing.
Should I fit the Flex differently if I am planning to glue?
In general, you will fit the Flex fuller when gluing then when nailing. In nailing, a fuller shoe often equates to a higher risk of catching/losing a shoe because of the medial/lateral extension. When gluing, this fuller fit is to allow you to blend and butter your heels in uniform alignment with your foot.
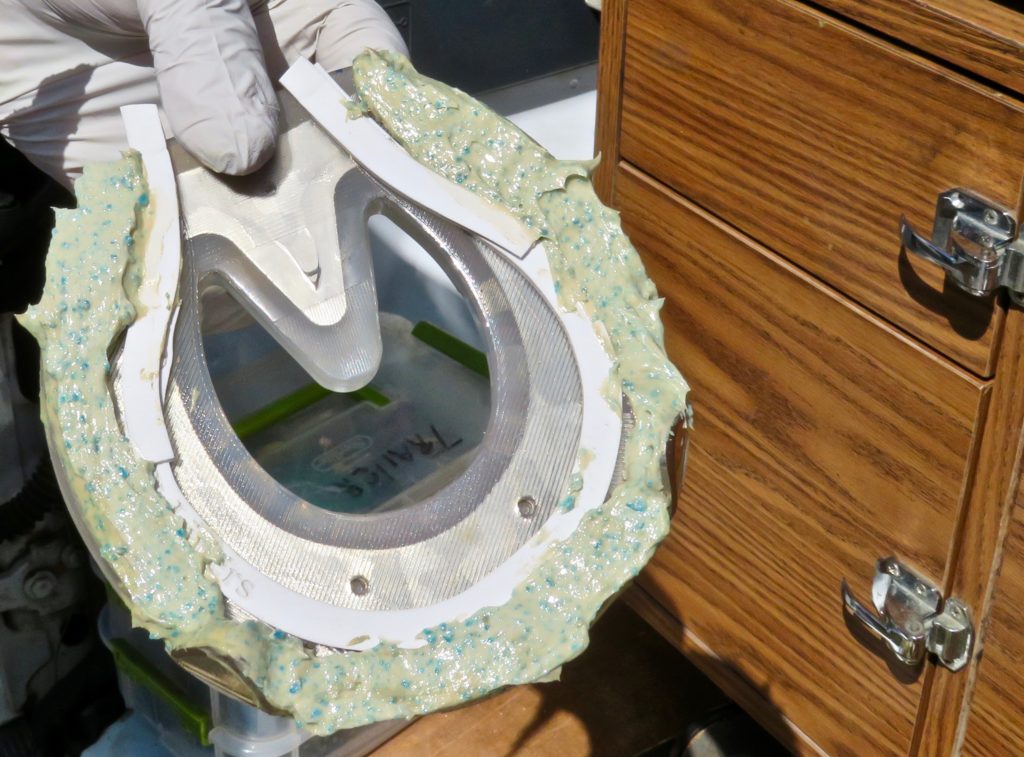
Application Technique…what changes?
There are some finer points to consider and be proactive about prior to gluing the Flex.
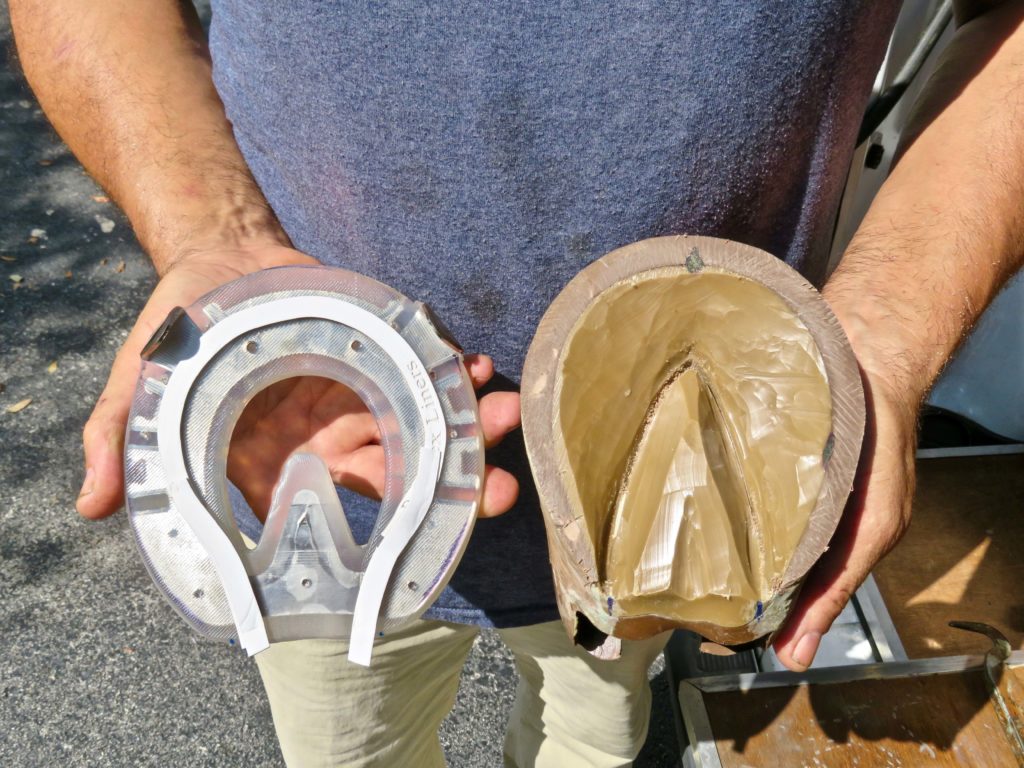
First, consider the style of shoe you are gluing before getting started. Your clips and heel design set some parameters for application. If you are using clips, remember to fit them flush with the foot prior to application. If you are applying a heart bar – you’ll soon come to realize you’re restricted to how much you can manipulate the glue on the interior collateral grooves of the foot. To prevent glue build up and pressure where you don’t want it – use Play-Doh or liners. Be mindful of your temperature as well. This shoe has the potential to retain its temperature – so on a cold/hot day use your best management practices to have your shoe, glue and foot close in temperature at the time of application. Finally, don’t let your clips fool you into wrapping and/or setting the foot down to cure! The slightest movement or twist can compromise your placement and your bond. Hold your foot until it passes the fingernail test (lightly drag your nail across the glue – if it glides without sticking, you are in the clear).
Best way to remove the Flex?
When removing an open heel design, rasp a guide in the seam of your glue and just like any composite shoe, ensure that you begin at the heels with your nippers and work evenly towards the toe – one side at a time. For the heart bar, you will need a different set of tools. After rasping your seam, use a sole knife & rubber mallet in the heel area to free the shoe safely from the foot. At that point, the option to use your nippers or continue along with the knife becomes available to you.
Happy Flexing everyone!
– Curtis


