


Written by Hoof Care Practitioner, Maia Chaput of Metta Equus
I have found the EasyShoe 3D to be useful not only for performance horses, but also as a transitional shoe, gradually increasing stimulation and mobility to the hoof. I have used this as a strategy for cases coming out of a more rigid shoe package that was temporarily needed to support injury, illness, or underdeveloped shock absorbing structures (i.e.; frog, digital cushion, and lateral cartilages). When the time is right, increased stimulation to these tissues will strengthen them, taking them one step closer to being healthy and functional.
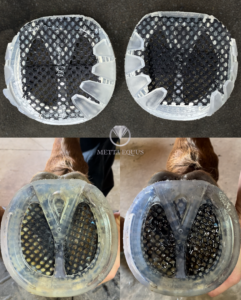
Depending on the needs of the horse, I may add sole support material like EasyShoe SoftPak. Applying a mesh to the bottom of the shoe helps the pad material stay in place over the shoeing cycle. I simply cut the mesh to fit the opening of the shoe, then tack it down with a few drops of Super Glue and accelerator before applying the shoe. The pad material is injected through the mesh after gluing on the shoe. I prefer this method to dental impression material (DIM) which must be inserted before glueing on the shoe, which can make setting the foot down on the shoe trickier as it will tend to slide around.
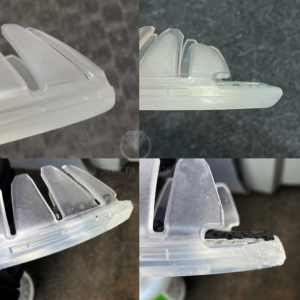
The EasyShoe 3D can be easily shaped with a rasp, nippers, or grinder. Consideration for correct shoe placement and breakover is essential to having success with any shoeing package. A bonus with composite shoes, is that breakover can be adjusted with a rasp even after the shoe has been glued on. I also like to add a bevel to the heels of the shoe, from the heel contact down. This removes any shelf-like platform sticking out past the heel contact point, with the goal of minimizing the chance of the back of the shoe getting stepped on, while still leaving a larger base of support at the ground surface.
An absolute game-changer in applying the shoes has been using electrical tape. Where plastic wrap applies a general pressure to a larger area, the electrical tape can focus pressure right where you need it, forcing the tabs to sit tightly to the foot while drying. The best part is that it peels off easily and does not stick to the glue. To remove the electrical tape, I simply score a line with a blade from the top of the wrap to the bottom, and peel it off in one complete strip. After I remove the tape, I take a close look at each tab and make sure there are no air gaps or bubbles between the tabs and the hoof wall and fix them if necessary.
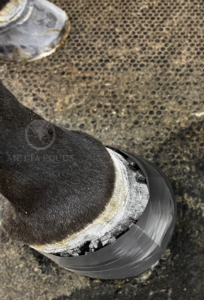
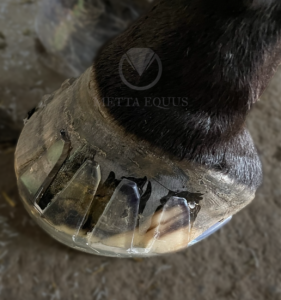
This is an example of a good bond with no bubbles or gaps. I took this photo before doing the final top coat of Super Glue.


