

This is by no means a correct protocol as to how to successfully glue boots onto horses’ feet.
Indeed, this demonstrates some of the things you probably would do better avoiding.**
If Roo was going to wear Easyboot Glue-ons for Tevis, we were going to have to try them out first. As previously mentioned, pre-Tevis mania had gripped me good and tight and everything had to be experimented with beforehand to avoid any nasty surprises on the day (I was pretty sure I was going to have enough nasty surprises foisted upon me without generating any of my own).
Luckily, I live quite close to the Western States Trail (WST) so know the type of terrain and can practice on it. Unluckily, this also means I know how tough that kind of footing can be on boots. In short – if they could come off, they would.
The second thing I wanted to do was try out glue-ons on a Proper Endurance Ride. We were due to go to the two-day Cooley Ranch Ride in Sonoma Co. in the coastal range of California in June. I’d ridden Cooley Ranch once before and knew that there was a lot of straight up and straight down trail so I figured it would be a good try out.
The weekend before the ride found me sitting picking bits of dremelled boot out of my eyes (safety glasses would have been a smart idea, eh?). Roo is slightly toe-in and tends to forge and I was worried that the normal breakover for the boots was in the wrong place for him. So in a fit of OCD, I dremelled more bevel into the front boots to speed up the breakover. This was probably a waste of time seeing as Roo’d wear the boots into the shape they needed to be as he went along, but like I say, pre-Tevis mania is strong.
In retrospect this really was OCD: although my extra bevelling was probably not detrimental, I never bothered with it again for future installations.
Gluing
Patrick was enlisted as Chief Gluer, while I would be in charge of hoof prep and application. Later that afternoon armed with everything we could possibly need, we adjourned to the barn to commence gluing (note, it is always best to glue in the late afternoon, thereby guaranteeing that you will be finishing up in the dark).
Our glue of choice was Goober Glue, necessitating only a standard caulking gun. We also had some denatured alcohol, a box of latex gloves, paper towel, a Stanley knife, a rasp, and were sure not to wear our best clothes.
It didn’t go quite as advertised on TV… I’m not even sure why I bother mentioning that at this stage, since we all knew it wouldn’t. 🙂
Tip #1 is to forget anything you ever learned about preserving the Old Growth Latex Forest. Don’t try and skimp when it comes to using the latex gloves. Put them on, apply the glue to the boot and then, before going anywhere near the horse, peel them off and put on a fresh pair. Do not go near the horse with gluey gloves on. Once you get clever and skilled and expert then you can be less wasteful, but for now, trust me, it will minimize how much glue you have to remove from said horse’s legs afterwards.
The hardest thing to balance is how long to let the Goober Glue cure in relation to how thick a layer you have used. You need to let it sit long enough to get really tacky (when it’s thick like that, it stays goobery forever), so instead of acting like glue it acts like a lubricant. Fun times. In addition, Goober Glue man, Chris Martin, always stresses the importance of giving the shells a good quarter turn twist and back once you’ve got the boot on. I think this serves to smear the layer of glue evenly and spread it better, ensuring better setting. Easier said than done, however, when you’ve finally achieved that elusive snug-fit.
Before we were done, Roo had twisted the front boots off-center a few times and completely stepped out of the right front boot. He also wanted to continually cock his back foot, so the heel-part of the shell kept sliding off. And when I pushed on his hip to make him stand square, he’d twist the front boots. <grrr>
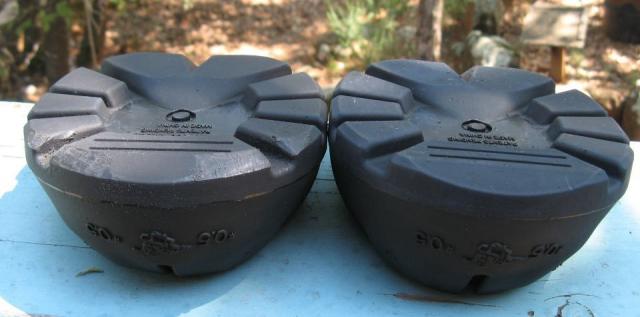
 | Pretty prep-work. I rasped him diligently beforehand, so he’d have a lovely trim job. Then I “dry fitted” the boot and drew around the top with a felt-tip to show which area I had to rough up. At that point, I discovered he had too much flare to be able to rough the hoof, so I gave him an even more diligent touch up so he was perfect. Knowing what I know now, I didn’t rough up his hoof walls aggressively enough. I was thinking “rough up the hoof wall to create a clean surface onto which the glue will adhere”, where I should have been thinking more along the lines of “rasp some grooves into the hoof wall for the glue to grab hold of”. |
 | Pretty prep on all four feet… |
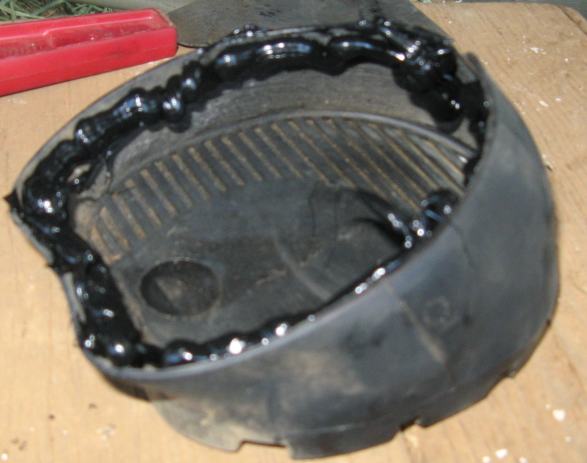
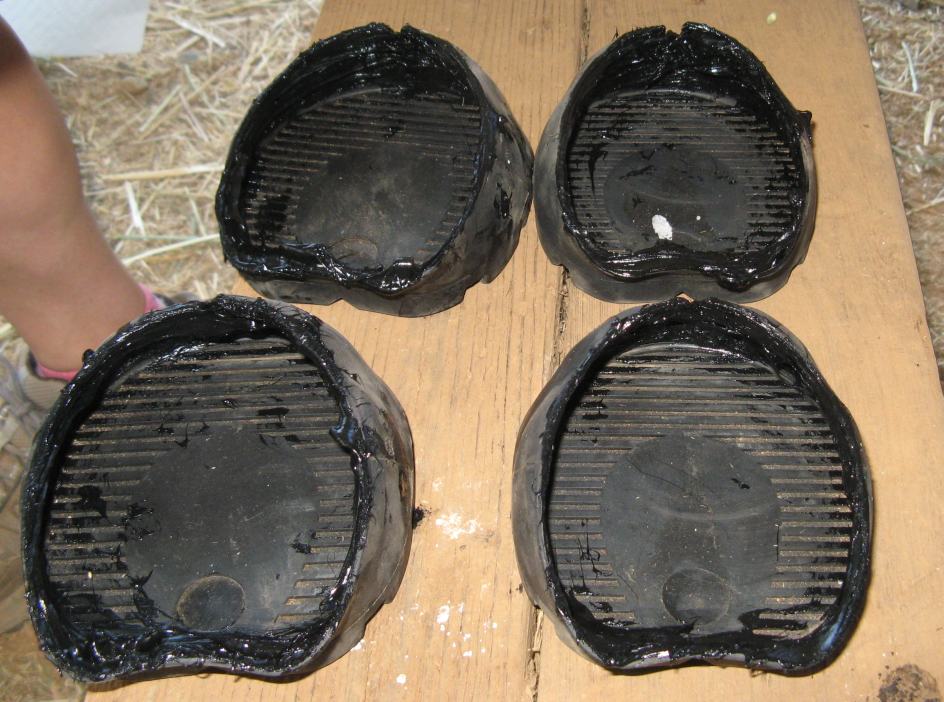 | First we glooped the Goober Glue on all four boots. I wanted a really thick layer so it would fill in any gaps. Great idea, Lucy… note comment above about using too much glue and it not setting properly or quickly as a result. More is not always better. |
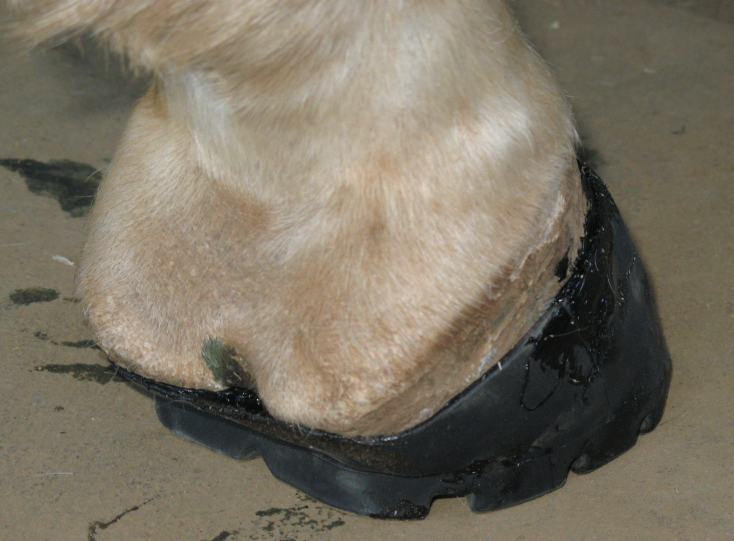
 | We paid special attention to the heels, glopping in as much stuff as we could so it would seal any gap in the back. In retrospect, it’s probably easier to squirt glue into the gap once the boots are applied to the feet. |
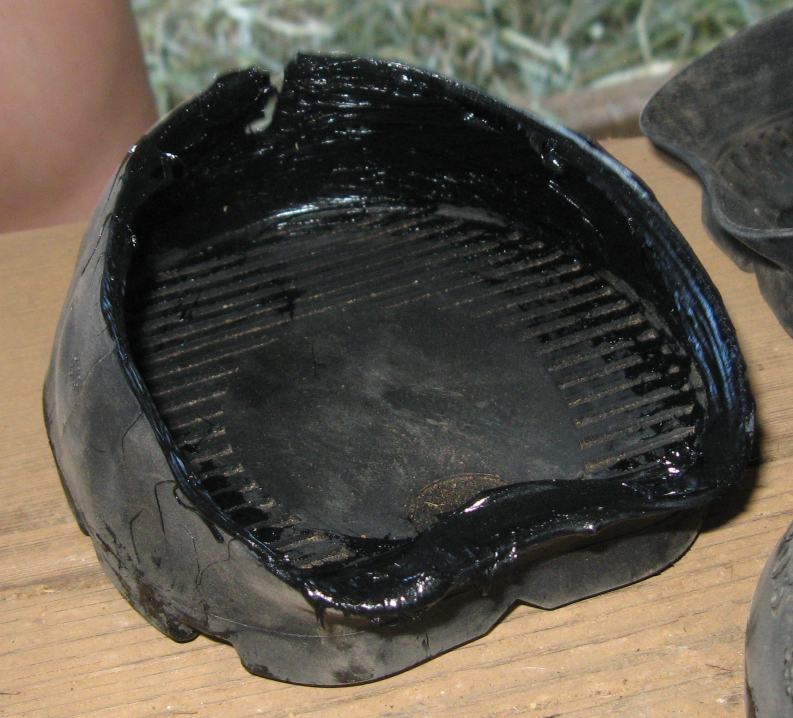
 | This one’s a little blurry, but this is the bead we put all around the inside of the boot, then added more in the toe area. |
| Goober Glue is really sticky and hard to smear. When you try, all that happens is it sticks to your finger and you smear it all over the outside of the boot and yourself by mistake. | |
 | Three boots on. Lots of goop on Roo’s leg from him stepping out of the boot and me having to dash in and do an emergency reapply. |
| Notice how he’s got his rear foot cocked. He did this a lot and each time he did it, the not-yet-glued boot heel would slip off the the foot. The main thing I’ve discovered while dealing with boots is that the right rear foot on a horse does all the work. The other three legs are really just there for show, to look attractive and to make the horse look more balanced. That right rear tromps about the countryside pushing up the hills, while the other three legs just trail along behind looking ornamental. After we’d finished gluing, Roo’s right rear boot would make air-slurping noises when he walked on it suggesting that he probably wasn’t properly attached to it. This suggestion proved correct, but I didn’t find that out for sure until the Ride. | |
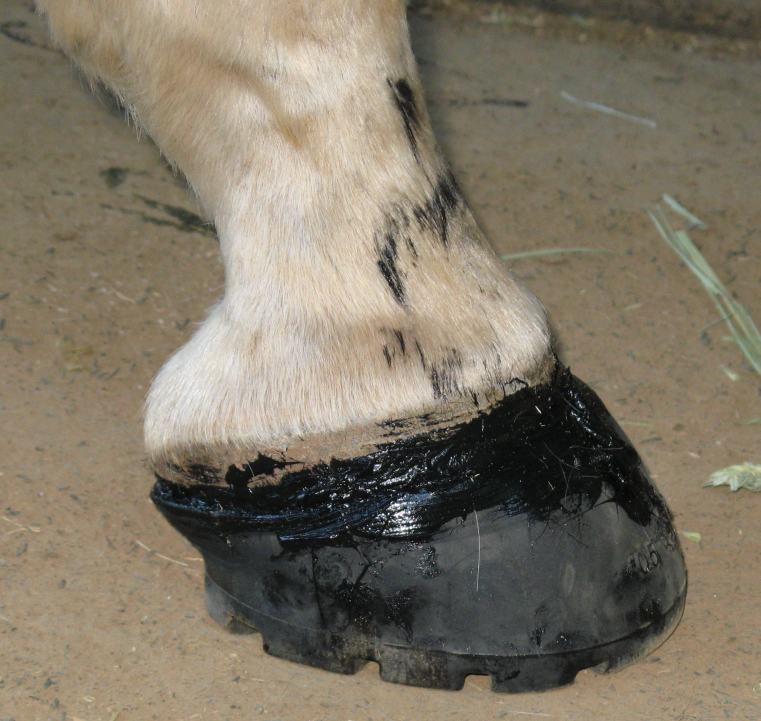
 | Right front – this was the boot he stepped completely out of. There was an air space you could prod in the front of the boot, so I wasn’t convinced this one was very well attached. Lots of glue was stuffed in the back since it was his smaller foot so there was more lip sticking out the back – and therefore more for his back foot to grab hold of and pull off. Note – all of the above should have shown me blatantly obviously that this boot was too big. But if something doesn’t work first time, it’s best to keep trying the same thing and being surprised that you get the identical result, no? <slap forehead> Remember Roo’s smaller right front? Yup, I was still trying to put the larger size shell on it with the same result – the boot still doesn’t stay on. |
 | Right rear boot. I had to twist it back to center after about 30 minutes. The left one (that we let cure longer) seemed relatively solid. |
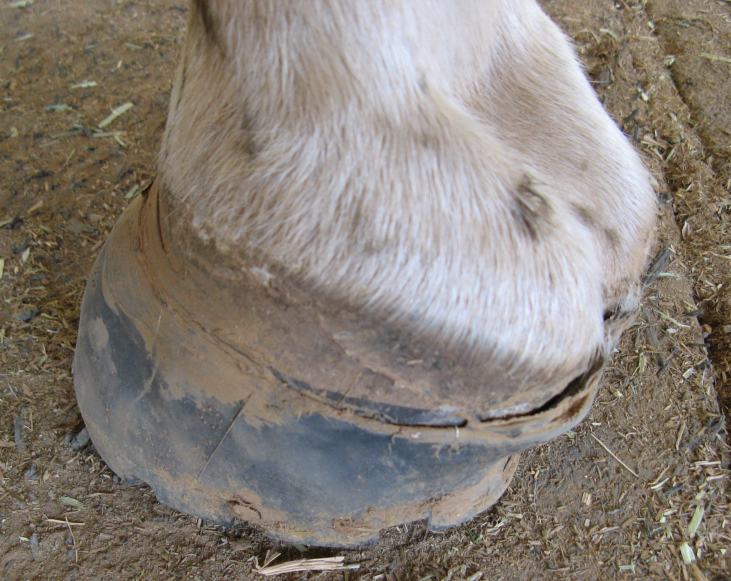
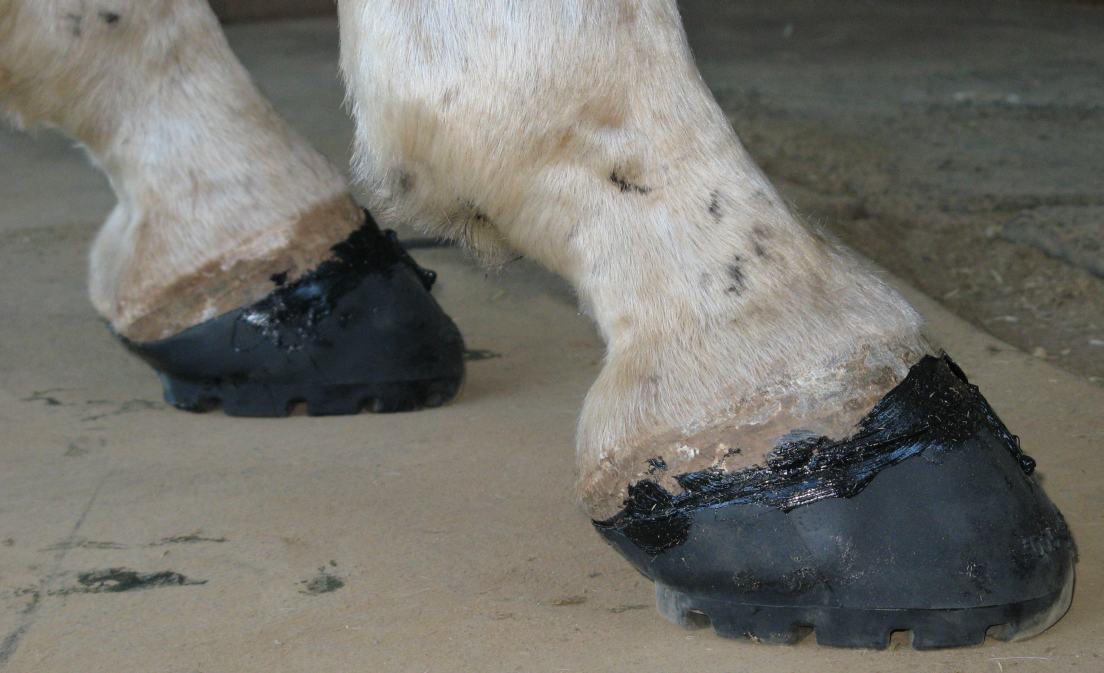 | Goopy front boots from the side. They weren’t perfectly centered… but then again, neither are Roo’s feet. |
 | I tried to smear the top glue around to make a bead with mixed results. |
Part of my clever plan was that by gluing the boots on the weekend before the ride, it meant that I’d have plenty of time to:
a) ride up Dead Truck Hill on Tuesday (my personal litmus test on boots – if they’ll stay on for that, there’s a good chance they’ll stay on for anything)
and
b) if they didn’t stay on, I still had a few more days to glue them back on again…
Monday Inspection
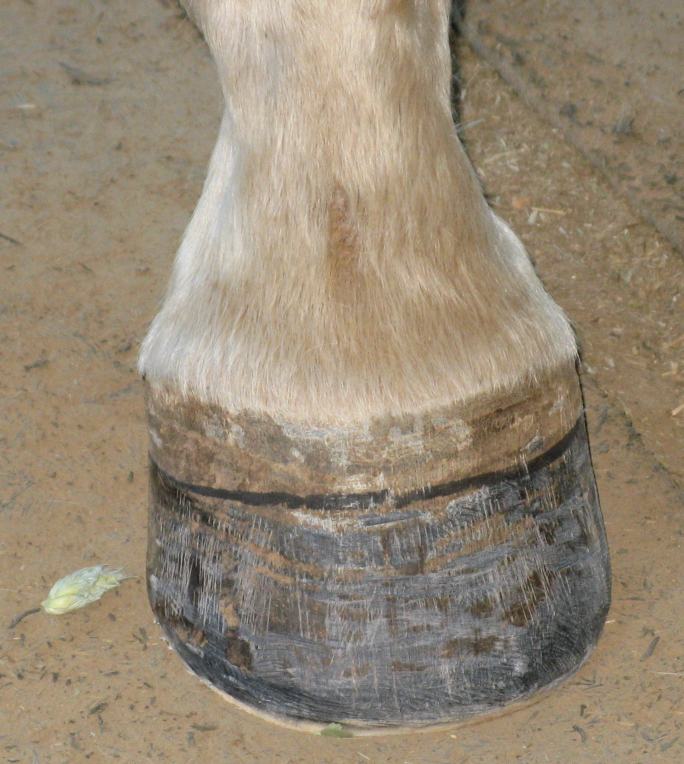
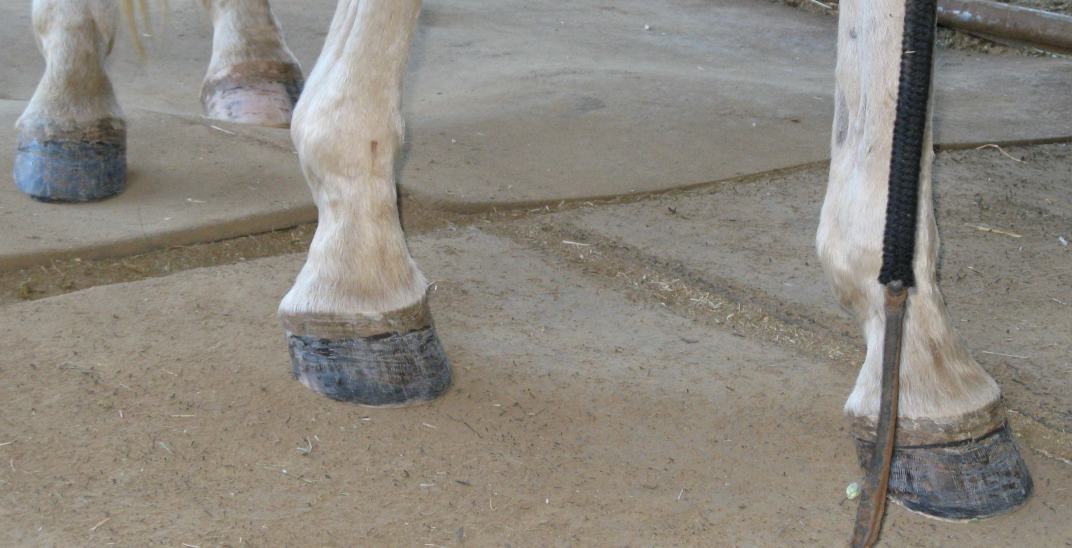
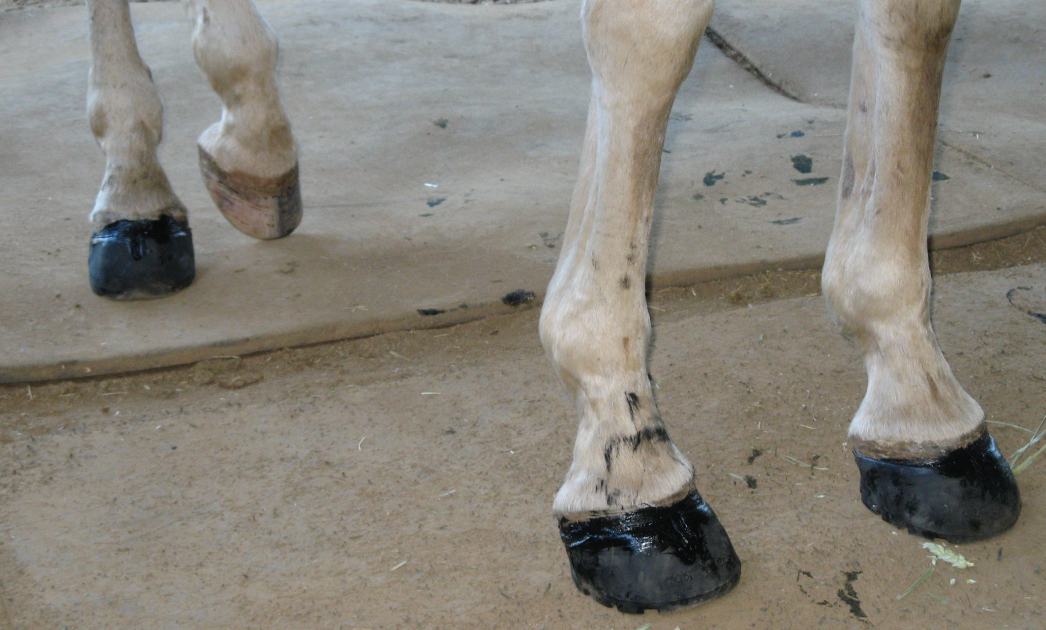
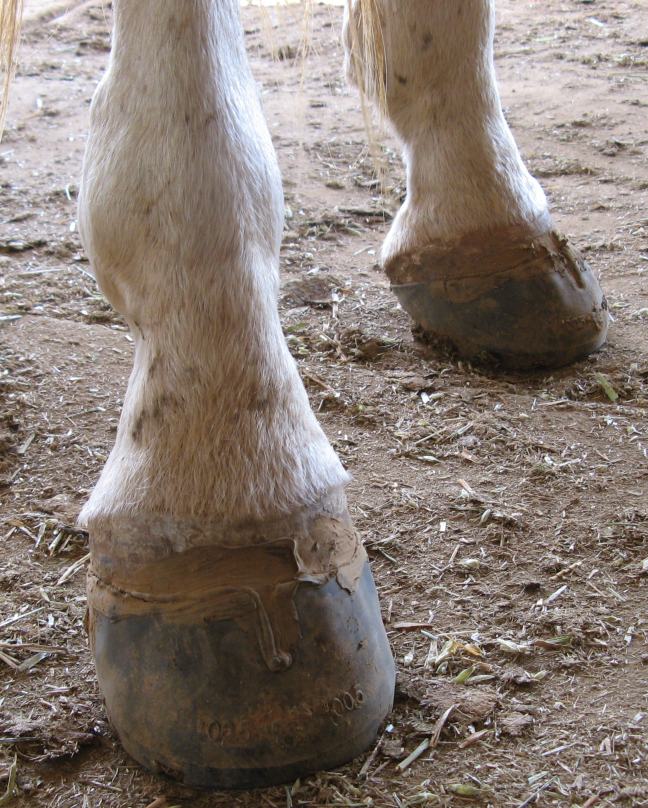
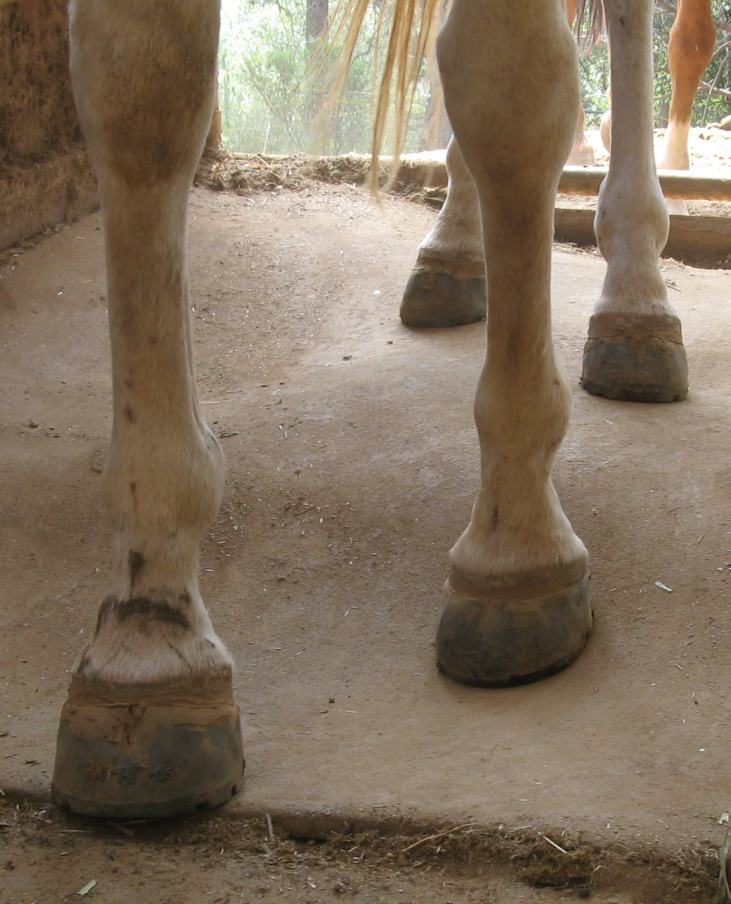 | From afar, you could barely see he had anything on his feet (which means there’s no way you’ll be able to tell if these things were still on or not while you’re riding along). Hard to tell how much of the apparent toe-in of the boots in this picture is Roo’s actual toed-in-ness and how much from twisted boots, but upon rechecking, his left front was nicely centered, while the right front was slightly off. |
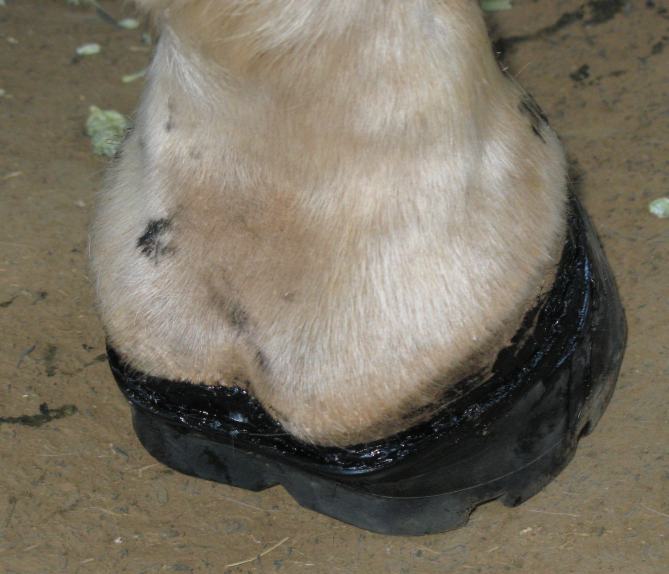
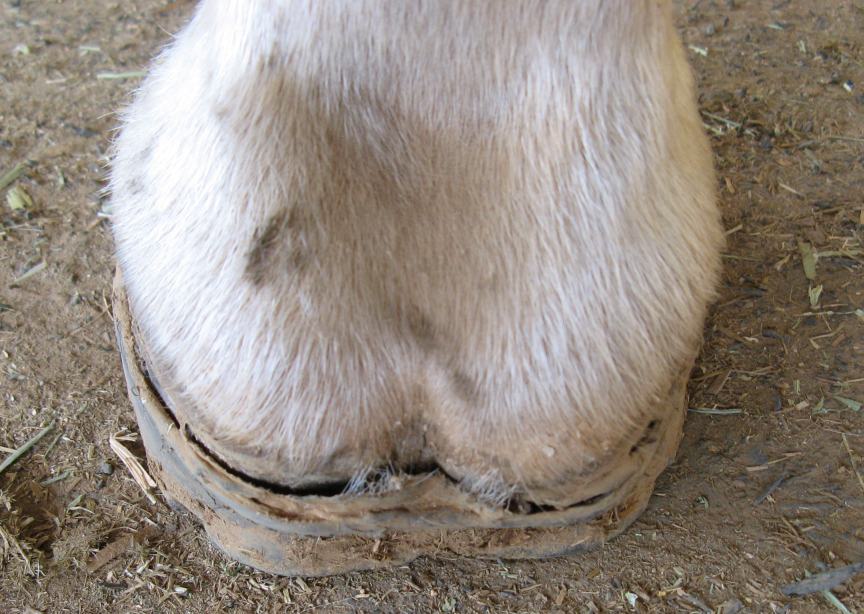
 | His back feet actually looked pretty solid – more so than I thought they would. They are such a nice tight fit to start with, this probably helps. <fingers crossed> that these would work out, otherwise he’d be wearing shoes in the back for Tevis. |
 | Right rear – this was one of the ones I was concerned about, since we had difficulty keeping him seated in the boot (he kept wanting to cock his foot), but it actually seemed quite solid. Hah. |
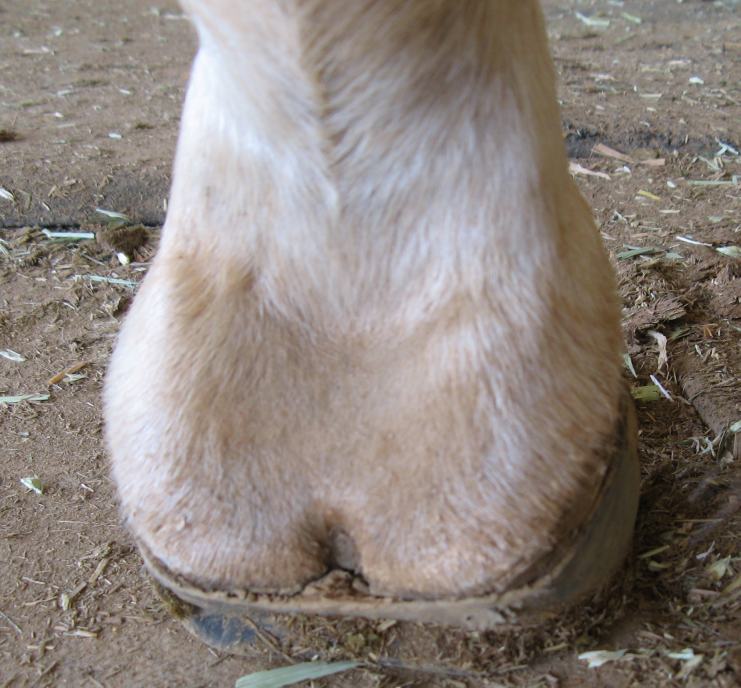 | The fit was really nice and snug around the back on his rear feet and the glue is rubbery enough that it wasn’t causing any hard lump in the bulb area. |
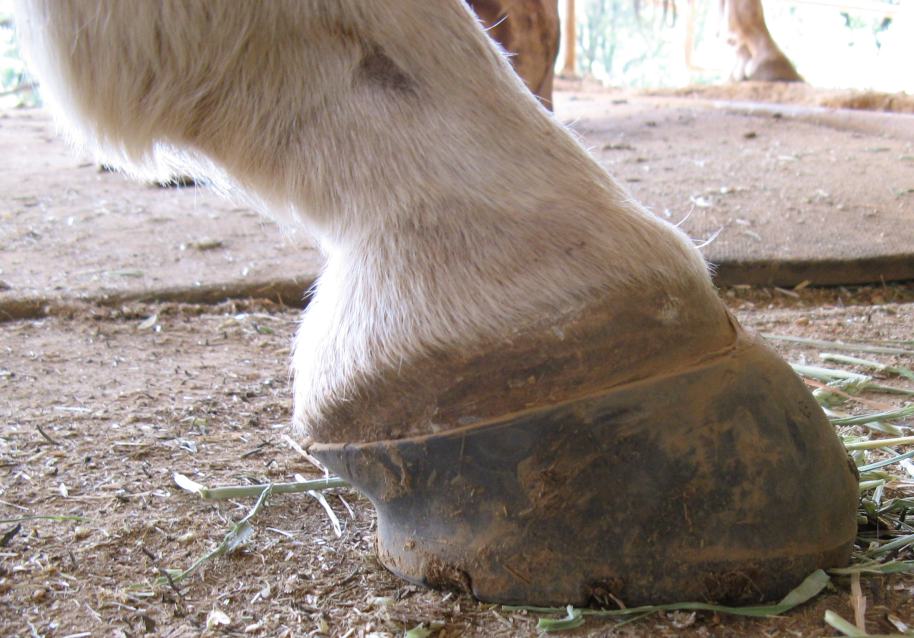 | Left front – this is his bigger foot and seemed good and solid also. |
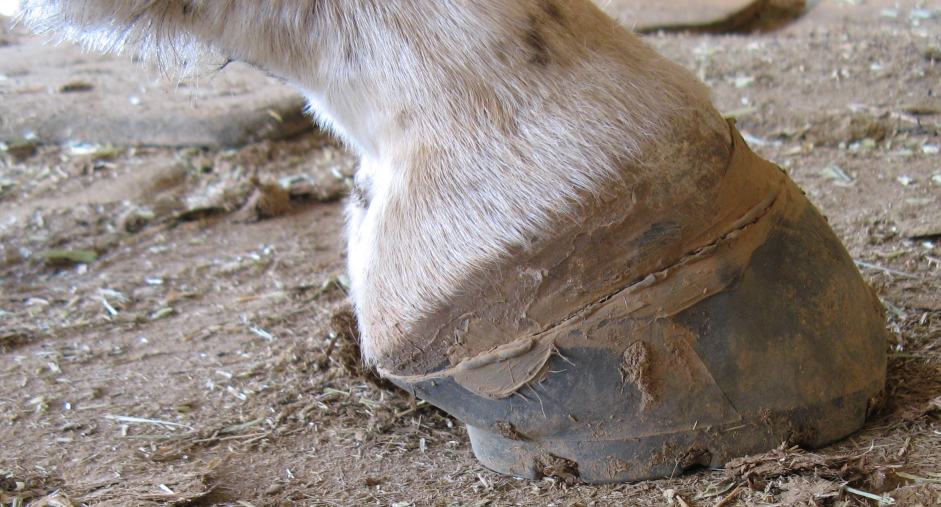
 | Right front – this was the boot I was least happy with. Having taken off a bunch of flare just before fitting the boot, I’d made the hoof even smaller (nice trim job, though). |
 | Ignoring any thoughts about how well the boot may or may not be attached, the boot was also slightly twisted. After this inspection, I started to think that this one would have to come off and be re-glued before the weekend.
|
Tuesday Ride
Took Roo for a spin on Tuesday evening to try the boots out. As I was tacking him up, I noticed that he wasn’t even wearing the left rear one any more. Initially thought he’d lost it in the trailer ride, but no, apparently it didn’t make it out of the paddock.
This was the boot we let sit and cure the longest, but when I found it and inspected it, it really didn’t look like it had much glue in it which was puzzling, so I’m not sure what the problem was. It’s hard to put the shell on the foot without wiping off a lot of the glue at the quarters and pushing the glue you have on the sides down into the bottom.
Slapped a Glove on the left rear for our ride and off we went. Dead Truck Hill didn’t claim any of the remaining three Glue-ons, even the right front which felt loose and was a bit rotated.
Wednesday – Regluing
Got home from work at 8:30 pm and started re-gluing the left rear back on again, paying special attention to LOTS of glue application and careful cleaning of hoof with rasp, sand-paper and alcohol (which I hadn’t done first time around, just rasped). Got the left rear seated nicely and decided “what the heck, if I was re-gluing, I might as well redo that right front since it was ‘loose’ and a tad twisted”.
Started to prise it off. The back part of the boot came off relatively easily …good that I opted to do this… but I couldn’t get the front part off since it was welded to his foot. Lots of tugging and grunting and squeaking, finally got it off. That glue has a great seal and just because part of it may not be secure, it’ll definitely hold the rest of the boot to foot very nicely. It was good to see how well it holds, even if I was pulling it off.
Re-glued the right front shell on, adding [post-curing and post-installation] some pumps of the schnozzle through the V in the front to fill the air void in the toe area…
(At this point it was about 10 pm and my brain had evidently stopped working so I didn’t really think about the air void… or the blatant signs that this shell didn’t fit… or about how I said I was going to glue on the next smaller size shell…? Repeat after me: “Roo’s right front is his small foot”.)
Went out at 11:30 pm to release Roo from his stall-prison and was confronted with a single front boot sitting lonely in the middle of the stall with Roo standing next to it. Apparently adding vast amounts of wet glue to the toe area isn’t a great idea, along with gluing a boot on that is too big… twice…
Went to bed a bit sad, but glad I’d started the gluing process so early, so I could work through it and still have time for operator error [read: “stupidity”].
Thursday Regluing
In the morning I dug out the next size smaller Glove that I’d used earlier in the year on Roo’s back feet (which were too big for his back feet) and removed the gaiter and accompanying hardware and dry fitted it to Roo’s (smaller) right front foot and it looked like we had a winner!
Later Thursday Evening
Got home from work late Thursday and glued on the smaller shell. Success! It worked much better and he didn’t move in it from the time I put it on, despite all the other horses escaping out of the paddock 20 minutes before the end of the curing process – meaning Roo had to jump up and down, paw the ground, shriek and generally make a fuss. Boot still in place and not twisted. It looked promising.
So, to recap, what did I learn?
- Roo’s right front foot is still smaller. Put a smaller shell on it, dummy
- Use lots of latex gloves
- More is not always better when it comes to Goober Glue
- Do not let the boot cure too long before putting it on the foot
- Roo is a Fidget Bottom and not a great candidate for basic GG application. In the future, I plan to experiment with leaving the gaiters on the Gloves and using the gaiters to hold the boot in place during the curing process. Once set, I can unscrew the gaiters, leaving the brass doodads inside the boot for later retrieval. I’ll be sure to chronicle this when I get around to trying it.
Next Time: How we got on at the Cooley Ranch Ride


This is a great post Lucy – thank you! I know there are some die-hard gluers out there who are fully committed to using only Goober Glue and no Adhere on the shell walls. My personal opinion is that things are a lot more dependable if you use both. That is to say Goober Glue on the sole and Adhere on the shell walls. I just rode 200 miles at Mt. Carmel with no problems. We glued on 52 boots there using the double gluing method and it worked very well.
Lucy, always love your stories; thanks for all the gory details! Curious to know if you were using "new" GG or the regular hoof pack. I’m going to do my trial glue run this weekend; a tad nervous because I know one of the shells does not fit perfectly and because my gelding is also a Fidget Bottom and just loves to cock his hind leg too!
Comments are closed.