


This blog is not intended to teach you how to nail without hands-on instruction and is intended for hoof care practiotioners who wish to expand their practice into nailing composite shoes. Unless you are a trained professional, please do not attempt nailing on composite shoes. In nine years of working with composite shoes, I’ve learned to appreciate a couple of well-placed nails, especially when used in combination with some glue, the nails aren’t hard on the foot, and when needed, have more advantages than disadvantages.
For a healthy foot I also like the simplicity of straight-nailing shoes as well: less expense for the owner and a less complicated application for the farrier. My most common application is with clips removed, acrylic glue and two nails. The nails add just a bit of extra security in case of glue failure (doesn’t happen often, but can), or an act of God (the horse spooks and steps on himself so hard he rips a shoe off).
If you don’t currently know how to nail, it can feel very intimidating to learn. Here are a few tips and tricks to get you started:
Nails have four main components:
- Head: seats the nail into the shoe for security.
- Blade: can vary in thickness and length depending on use.
- Maker’s Mark: not only identifies who made the nail but also helps the user know which way to turn the nail before driving into the foot.
- Taper: turns the nail as it’s going through the foot
The maker’s mark should be turned towards the interior of the foot, which ensures the taper turns the nail the correct direction: Out of the foot.
![]()
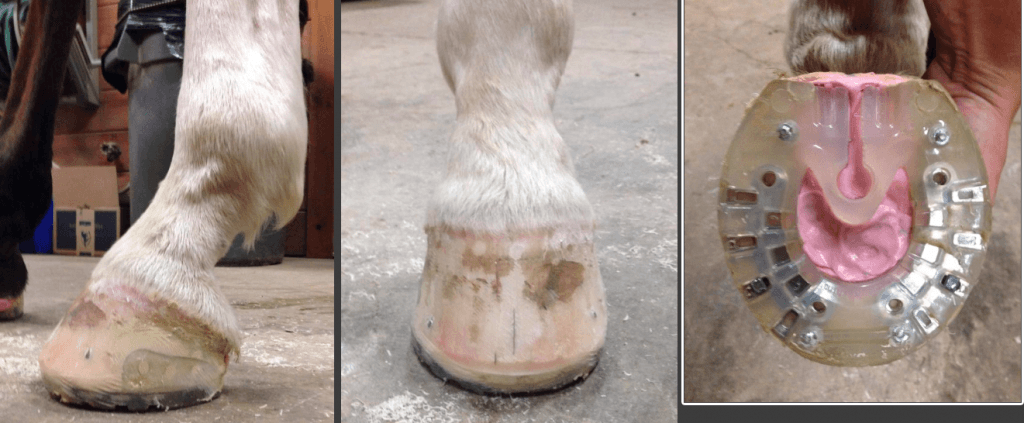
The best nail for composite shoeing is some kind of combo nail, meaning the nail will have a larger more square head with a slim blade. The larger head of the combo nail is beneficial because it will seat down into the tread of the composite shoe. The EasyShoe Performance N/G specifically has an integrated metal plate in the shoe designed to aid in nail stability and shoe retention. You can see the silver metal plate in the EasyShoe Performance N/G here:
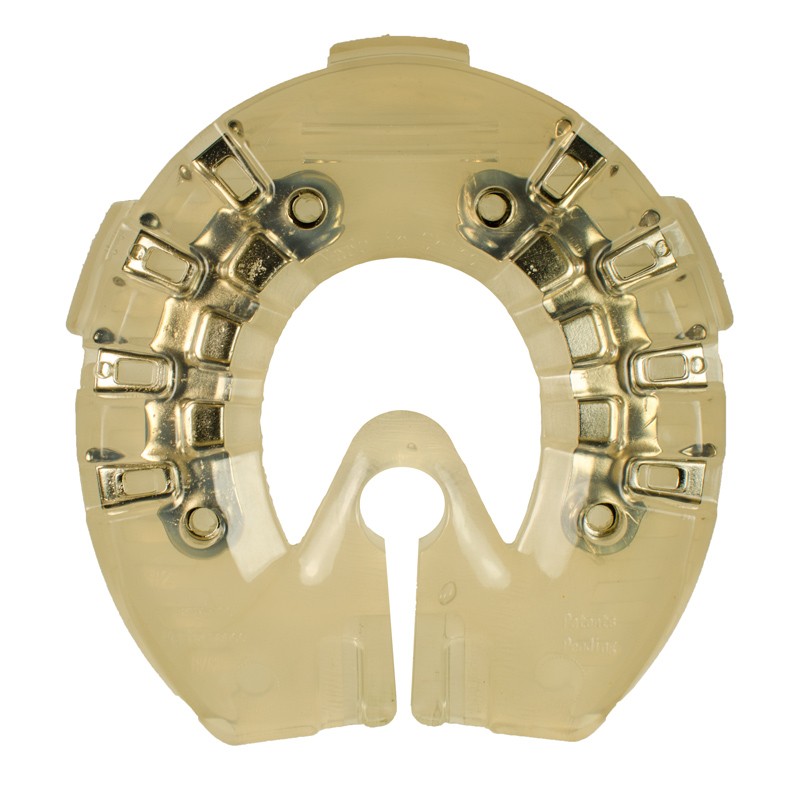
![]()
Best practice would be to check each nail you plan on using before driving into the foot. You’ll want to check for straightness of the nail, and confirm that the taper is turning the nail away from the internal structures of the foot. Don’t assume that the maker’s mark is stamped on the correct side of the nail.
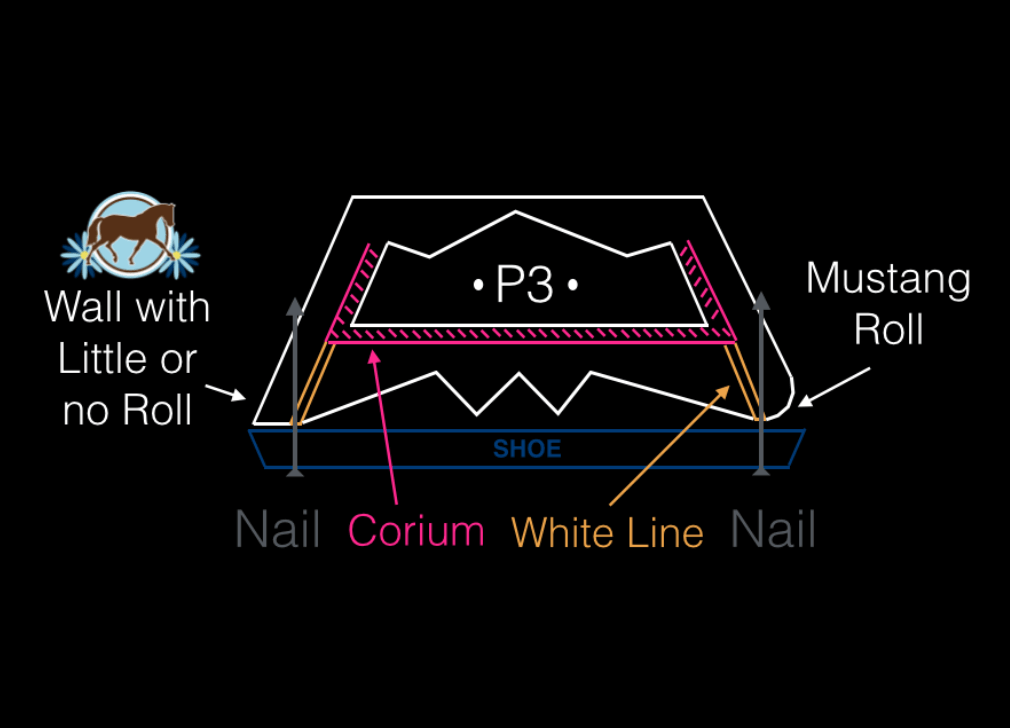
Nails should ideally be driven into the white line/inner wall region of the foot. One of the benefits of glue-on shoes is that they are very forgiving of different trim styles. Therefore, one consideration in trimming the foot for a shoe with nails is possibly leaving more wall on the ground, which allows the nail more wall to grab into.
There are many different techniques for nailing shoes on horses. If you talk to ten different farriers, you’ll get ten different techniques. While this blog cannot explain all the nuances of all the different techniques, I can share with you what I use day to day. Click here for a previous blog that shows my composite nailing technique. Here are the tools I like to use:
![]()
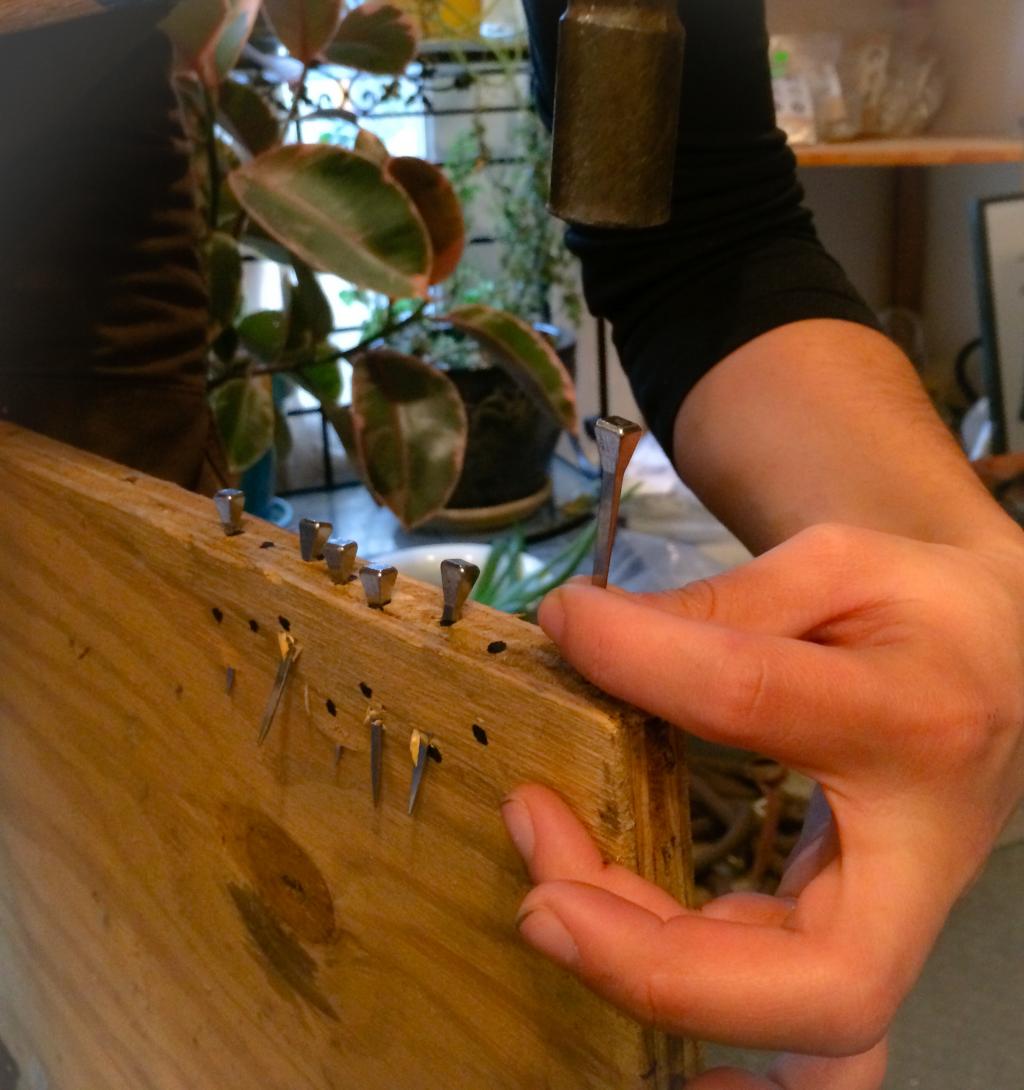
When you’re ready to start driving nails, I’d definitely recommend you start with something inanimate. I’ve taught a lot of people how to nail, and one of the best ways to get practice is either on cadaver hooves or a piece of 2′ x 4′ x 3/4″ plywood. Plywood is great because you can drive a lot of nails to get the feel for swinging the hammer, how the nail turns, and the force needed. Try drawing dots on the top and side of the board as shown here and aim for those dots when nailing to help with accuracy. Some find placing their middle or ring finger where you want the nail to go helps with accuracy as well due to the proprioception. Just don’t prick your finger when the nail comes through.
A few last tips:
- When driving nails; the harder you hit the nail, the faster it turns, coming out lower compared to a nail set at the same pitch hit more softly.
- When gluing with nails, keep a map in your head where you want your nails before the shoe is glued on. That way, when the shoe is applied, and the glue covers the white line, you still know where you want your nails to go.
- Your nails only need to be as high as they need to be. A good guideline is 3/4″-1″ above the bottom of the wall, especially when gluing.
- When you feel ready to nail on a live horse, choose a horse with more angle to their wall. Straighter-walled horses are harder to nail.
If you decide to use nails in your shoeing work, I hope the above tips and tricks will prove helpful. With the right tools, some practice, and a coach to keep you safe in the beginning, you’ll find nailing adds versatility to your work in helping the horse.


