


The rocks and hills we typically ride in. Newt and me at the Pipe Creek Christmas ride. Photo by Mark Limsky
I’m sharing a few things I have learned over the last few years using protective hoof boots. Newt, my horse, and I have tried many different boots. We have found it depends on the type of riding we have planned as to which boot I choose.
We live in a relatively flat, sandy area so most of our riding around home does not require boots. When we go camping or to competitive trail rides we need some kind of hoof protection. I absolutely love using Easyboot Gloves. The Gloves have such a low profile that he rarely gets his feet tangled up with the boots. The Gloves have superb traction and most of our competitive trail rides are in the Hill Country of Texas where there are lots of exposed caliche rock. He never slips on those bald rock surfaces with his Gloves on. It scares me when I hear those horses with metal shoes slipping and scrambling on that rock. In fact, that is why so many of my friends have switched to barefoot so they can wear the boots and feel safe and secure on the rocks.
When I first arrive at camp, I put on a set of Easyboot Trails just for a easy ride around camp to allow Newt to stretch, move about after the long trailer ride, and relax. I do not like these boots for competition as they have a larger profile and seem like Newt is wearing house-slippers for a track meet. I have friends who do compete in short (6-10 mile) rides in these type of boots and their horses seem plenty comfortable.
When you convert to barefoot, be prepared for your horses’ hooves to change shape. Sometimes the boot you bought a year ago no longer fits. I think a boot like the Easyboot Trail or maybe the Easyboot Back Country might a good first boot. It is easy to apply and allows some room for hoof shape changes. I think pads could also help.
Always take some time to allow your horse get used to the boots. Just walk him around for 5-10 minutes the first time to let him get used to the feel of them. Allow their pasterns and heels some time to toughen up so you don’t get rubs on your first long ride. You might even like to use the gaiters to help protect their skin at first. It may take some horses several weeks of increasing boot wear time to get them used to the balance of the new boot. Practice your turns, side passes, and gaits so your horse learns how to get his feet around that new bulk you added to his foot.
Get the Fit Kit if you are getting the Gloves or the Back Country boots. I don’t care how well you measure, the fit of the boots always seems a little different to me. Well worth the $8.50.
The hoof should be as clean as possible before putting on the boots. Drying the hoof wall will help the boot slide on easier. I always carry a couple of old towels to dry the hoof if it’s wet or muddy. If conditions are really muddy, having the horse stand on a clean mat or tarp will help keep the hooves clean as you you prepare them for booting.
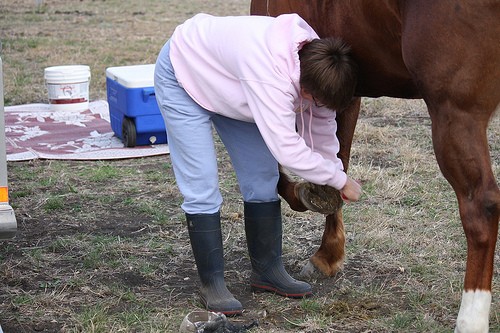
Cleaning the hoof. Notice the Glove with the gaiter rolled down, ready for application. Photo by Mark Limsky
I use a little baby powder in our Gloves to help them slide on a little easier. I used to let Newt put his toe down to help seat the boot, but using a few taps from the rubber mallet definitely works better for us. If the boots are cold, they get stiff and hard to apply. Warm them by putting them in front of the heater for a few minutes.
Always clean and dry the boots before you re-use them. Dirty boots boots and gaiters are unhealthy and can cause lots of irritation. I do not add soap or disinfectant. I just soak the boots in water and scrub them with the brush end of the hoof pick. Be sure to get the mud out of the screw heads so you can check if they are still tight before the next use. I dry the boots in the sun. It is surprising how fast they dry. Having a second set of boots is great because you can alternate days you use them, allowing them plenty of time to dry and air out between use.
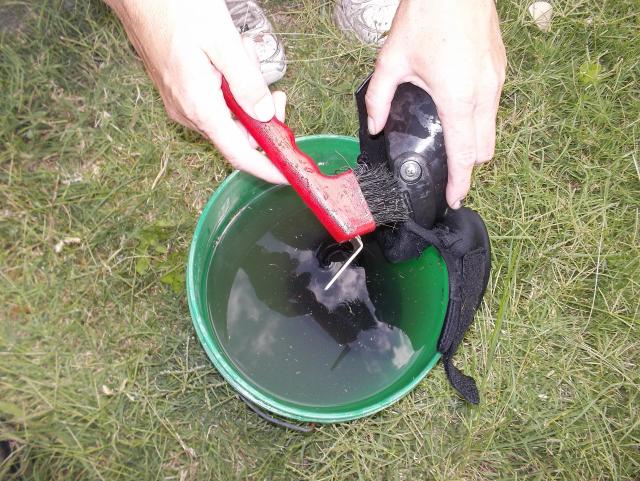
Using my favorite hoof pick with brush to clean the boot. Get all of the dirt out of the screw head. Once it dries, it is very difficult to get out.
When ordering replacement gaiters for the Glove, it is easier to put the new gaiter on the old boot if it is 1/2 size larger than the boot size. I have not had any problems with that arrangement. I think the boot stretches and it is difficult to get the same sized gaiter on. The smaller gaiter seems to form a wrinkle on the sides of the old hoof boot. Or maybe the boot size is wrong for my horse. I am trying the Glove Wides next time.
Save your old screws and washers when you change out your gaiters. They make great spares in case of an emergency repair. I have also noticed that sometimes the screws are slightly different lengths. If the new screw is too long, you can replace it with the old screw.
This may be old news, but I learned it the hard way.
Submitted by Carol Warren, Team Easyboot 2012 Member


