


Submitted by Tennessee Lane, Team Easyboot 2015 Member
This past weekend I had the pleasure of having my EasyShoe Sports applied by Derick Vaughn. I just want to share some pics I took during the process and make note of some tricks that I, personally, had not yet picked up on, although it was pointed out to me that “it’s all in the pamphlet,” LOL. These pictures were taken at this past weekend’s Antelope Island Endurance Ride. The horse (Bluff,) did the 100-miler there wearing these EasyShoe Sports and finished strong and sound. He encountered everything from steep to flat and extremely rocky terrain (like REALLY rocky,) to hard packed roads, to perfectly shallow sand, to deep sand, to firm dirt. He covered the 100 miles of diverse terrain at all gaits, steady slow climbs and descents, galloping climbs, long cantering sessions, long trotting sessions, even some sideways running through boulder fields and sagebrush (because he’s still learning, and we might have had some disagreements on pace, and so briefly lost brakes and power steering on a few occasions until we came to an understanding.)
I have glued this product on several times before with great success using only adhere and a rasp, they have protected my horses’ feet through several multidays and 100’s that way. That’s easy and awesome but Derick did an AMAZING job so here are the main differences… (Pictures will follow with corresponding #s.) If you haven’t already been through this process then you should consider watching the application videos for this product, because I’m not going through it all here, I’m just noting a few things that definitely got my attention while watching a pro turn my simple trim into a work of art. I thought I would share since some of you might want to raise the bar on your process.
My observations: #1 He used Adhere (fast set up) on the bottom and Bond (slower set up) on the wings. #2 He used a “Buffy” power tool that greatly reduces work/time while improving everything from functionality to aesthetics. I’ve been thinking that I could live with out one, but I was wrong, it’s official, I can’t live without one. #3 He used a hoof nail, driven into the toe of the EasyShoe, to prevent the hoof from slipping forward when it was first set down after the bottom was glued. He was sure to place that nail in such a way that the breakover was exactly where he wanted it. (This was the most important trick I picked up on, I’m not sure how I missed that on the first go’round.) #4 Did I mention the Buffy? #5 He sealed the edges with super glue to prevent “the beginning of the end,” and keep all the bond-to-hoof edges sealed tight. Beautiful overkill and much appreciated by Bluff and I. Thank you, Derick, for your attention to detail and for enlightening me! You’re an artist!
#1 The white glue used on the wings is the Bond (finished product shown)

#2 Using the Buffy as an extra step in the hoof prep routine, it was later used to clean up the glue job once everything had setup.

#3 The nail keeps the hoof from sliding forward for that brief second when it’s still wet and they put weight on it, where you place it allows you to adjust breakover.
#4 The Buffy beautifies…

#5 Super Glue polish job

Absolutely beautiful!
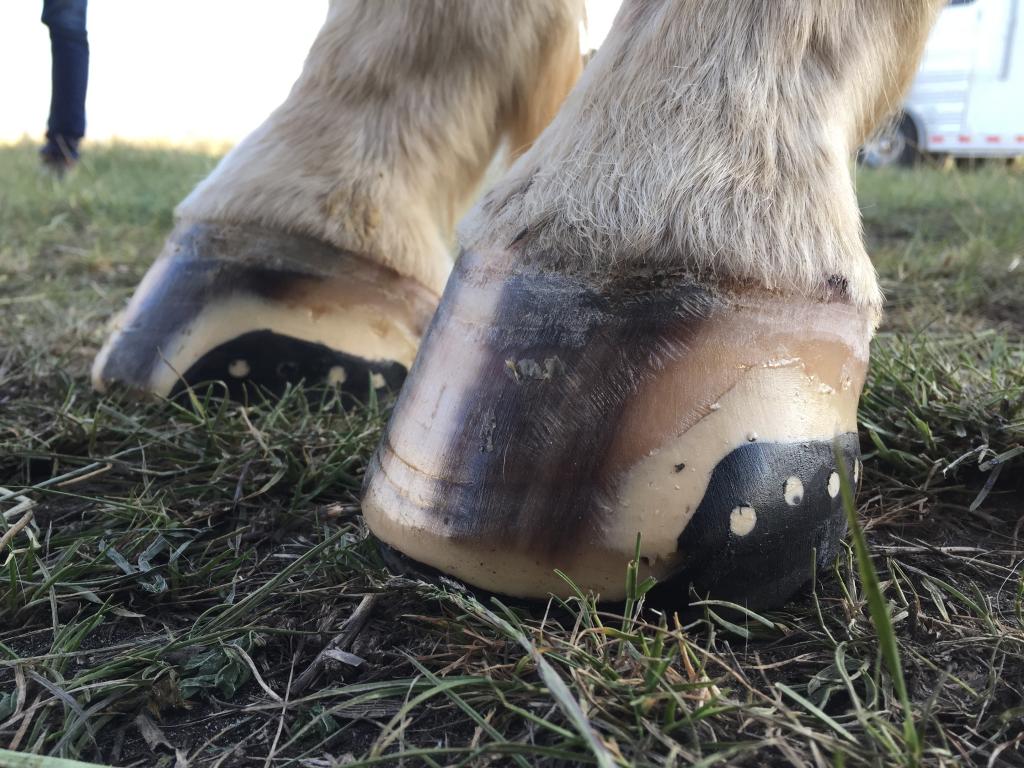
AND IMMEDIATELY AFTER 100 MILES…still fabulous!

The “Sports” are an awesome product, I’ve been testing them for a year or so now and I plan to use them them again, and often. I did feel a bit naked on the rocks, with his little frogs and soles unprotected and unsupported, when they usually are protected and supported in products like Gloves, Glue-Ons and the EasyShoe Performance. Regardless, they protected my horse’s hooves in extremely rocky conditions very successfully so I STILL have no complaints to think of. I would especially consider them at rides where, instead of worrying about rocks, I’m worried about traction on turf, or in mud, snow or sand. They’re also great to leave on for a full trim cycle. Love them!


