


Believe it or not, super glue will hold a horse shoe for a 6-8 week trim cycle! I personally didn’t believe it at first, but I started playing with some of the glue-on tab concepts on the market. With some trial and error, I started having success and ended up making our own tab system based on the results. This concept not only worked, but I was able to get three 8-week resets out of the same set of shoes and tabs! During those three resets, not even one tab was loose or compromised. I became a believer.
Through this process, I made a bunch of mistakes and developed a system that works well. Here is the method that worked best for me.
Items Needed for Successful Installation
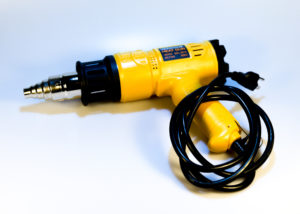
- Heat Gun with 9mm reducer (Important). If you don’t have one, check out Amazon.com. Don’t try to weld the tabs to the shoe without a reducer.
- Hoof Buffy with 60 Grit Paper or rasp.
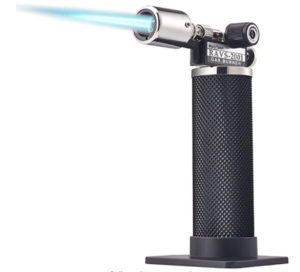
- Butane Torch.
Installation Instructions
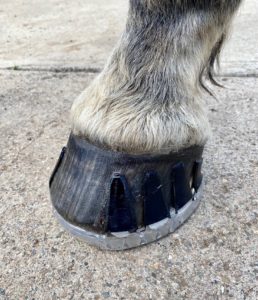
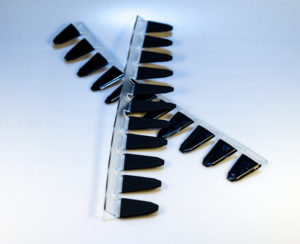
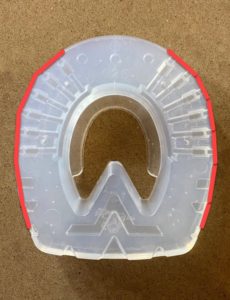
Step 1. Determine how many tabs are needed and where you want them located on the hoof. Tabs can be applied in the toe area or moved to the sides, depending on breakover. Look at the hoof as a clock (where the center of the toe is 12 o’clock). We recommend tabs being placed between 11 o’clock and 7 o’clock on the left, and between 1 o’clock and 5 o’clock on the right. This is normally accomplished with 4 tabs on each side of a medium size hoof (Versa sizes 130mm to 150mm). Using 3 tabs on each side works well on a small hoof (Versa sizes 102mm to 126mm), and using 5 tabs on each side works well on a large hoof (Versa sizes 150mm+). Tabs work well in the red areas in the photo below.
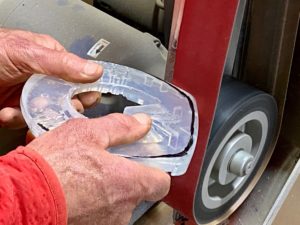
Step 2. Prepare the shoe by sizing.
Step 3. Remove any excess material to achieve a proper fit.
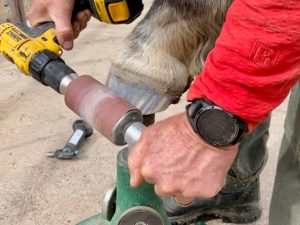
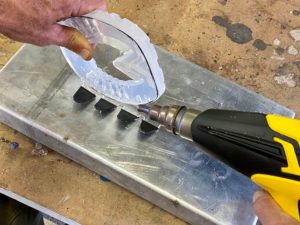
Step 4. Weld the tab or tabs to the shoe. Make sure to use a heat gun with a reducer. A good weld is imperative for success. If a good weld is achieved, the bond area will be very clear. A milk-colored bond area indicates that not enough heat was applied.
- Heat the shoe and tab. The shoe and tab will start to turn clear when you approach the proper temperature. The video below shows how to cut the tabs and weld the tabs onto the shoe.
- Start at the toe area, and press the shoe and tab together.
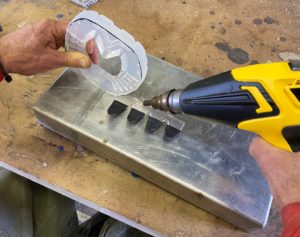
- Slowly roll the shoe backward while heat is applied.
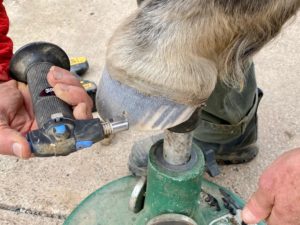
Step 5. Prep and clean the hoof. We believe a Hoof Buffy with 60 grit paper is the best tool for the job.
Step 6. Use a torch (lightly) to remove any surface moisture.
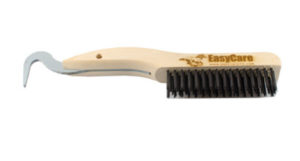
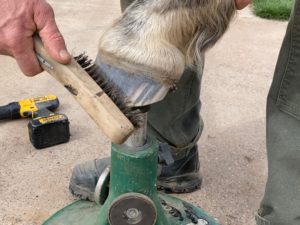
Step 7. Wire brush the hoof wall to create a clean gluing surface.
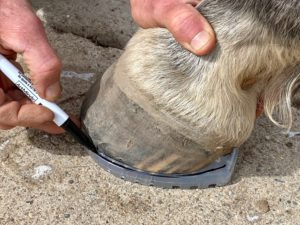
Step 8. Slide the shoe on the hoof. Make sure to position it on the hoof correctly. The horse will be standing in the shoe.

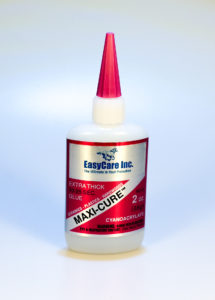
Step 9. While the horse is standing, cover the inside of each tab with a thin layer of Maxi-Cure adhesive.
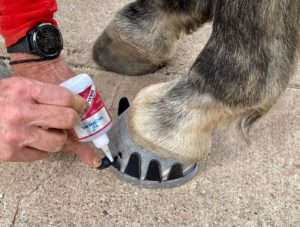
Step 10. Make sure all portions of the rubber are covered and wet with superglue. No need to go too thick, but cover all portions of rubber to the point that they look wet. See photo below.

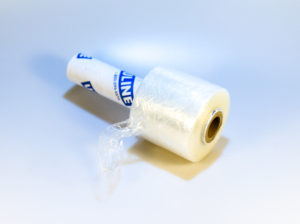
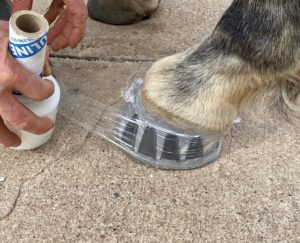
Step 11. With the hoof on the ground or picked up, use plastic stretch wrap to pull all tabs flat and tight against the hoof wall. When the hoof is covered in stretch wrap, place it back on the ground.
Here’s a quick video demonstrating Steps 9, 10, and 11.
Step 12. Let the horse stand for 10 minutes while feet are covered in plastic wrap.
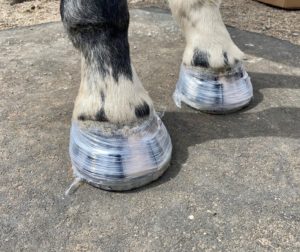
Step 13. Remove plastic stretch wrap.
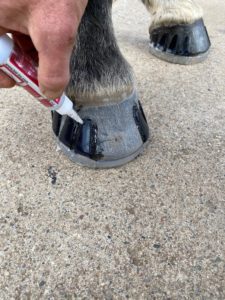
Step 14. Trace the edges of each tab with Maxi-Cure adhesive to help seal all the edges.
Here’s a quick video demonstrating Steps 12, 13, and 14.
Step 15. Give your horse an hour to rest and the glue time to set. After an hour, you’ll be ready to ride or turn the horse out in a pasture.
Removal of the tabs is easy. If your horse will stand for it, a vibration cutter works very well. For the more sensitive horses, a hoof knife is also a great solution.
Give these a try. You will be impressed.


What are the possibilities of removing the tabs and reapplying new ones? I purchased these to try on my thin soled mare and the shoes will receive very little wear.
You can re-use the same tabs on the same shoe, for sure. If you wanted to, you could probably cut the tabs off and weld new ones on, as well. We have not yet experimented with welding new tabs onto the same shoe multiple times, but you can certainly try it.
Would 80grit buffy paper work or is 60 ideal?
80 grit will work, too.
Garrett, why are you supporting 8 week trimming intervals? The thickness of the shoe already alters the biomechanics, then hood growth over 8 weeks exacerbates that.
To maintain optimal hoof mechanism & biomechanics, 4 weekly trims are necessary.
Hoof growth, sorry, not hood growth!
Steve, I’m not. For testing purposes was trying to see how well the tabs kept the shoe in place. 8 weeks is much too long and I try to keep my Tevis Cup winners at 2 week trim cycles.
A video has just been added demonstrating the removal of the tabs.
Wow! how do you take them off? Thanks! Very intrigued!
The video removing is added to the end of the blog.
Comments are closed.