


Written by Hannah Nichols, of Hannah’s Horse and Hoof
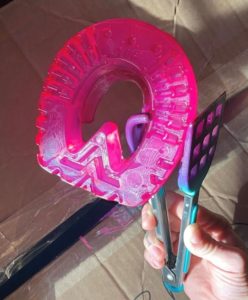
I saw Taryn’s post shared through EasyCare’s Instagram account and was instantly intrigued. Her pink Versa Grip Light looked incredible and I got in contact with her that minute to ask for her process. (Read Taryn’s post here.)
I have been trying to figure out how to incorporate colors into my glue-ons for a while. Before the Versa Grip Glue came out, the best I could find was to use an acrylic powder stain and apply it to the glue after placement. Even then, it only stayed on the glue at the top of the shoe and not the shoe itself. I even tried heating the shells to make them slightly porous to accept the stain, but had no success.
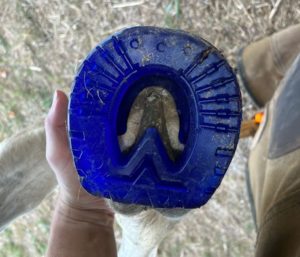
Since the Versa Grip Glue’s release, I have been utilizing them as my standard glue-on shoe for my clients. Since collaborating with Taryn, we chipped away at a good set of directions for our process. We still don’t know how long the color will last as this is a first set for both of us. Taryn discovered it penetrates 5mm, which is really quite deep (the equivalent of the diameter of a pencil eraser). I feel that the color should stay well through a full cycle of five weeks.
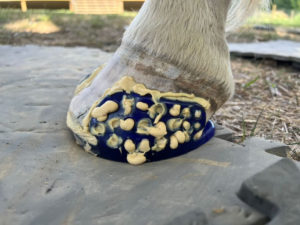
After dyeing my first pair of Versa Grip Glues, I wasn’t too worried about the dye messing with the glue bond, but I was not about to chance it with a full set of shoes. They turned out great and the dye didn’t leave any residue on the shoes.
I was worried that during the final dress of the cuffs with the Hoof Buffy they might fade, but they didn’t! The dye penetrated all the way through the cuffs. So even if you got a little too deep on one area, the color is still there.

We are still in the beta-phase of testing to ensure there are no issues with the glue bond throughout the cycle, but I have high hopes this is a legitimate way to add a pop of color to this awesome product!
Materials Needed
- Versas (any style)
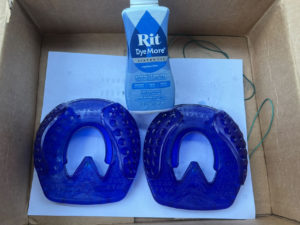
- Rit DyeMore Synthetic (color of your choice)
- Stainless steel pot, granite ware pot
- String or roasting pan rack
- Stainless steel Tongs
- Salt
- Water
- Stove top

I use an old 12”x16” Graniteware Roasting pan, which can fit four Versa Grip Glues without any stacking. I also purchased a roasting rack that sits low in the pan to allow for complete submersion while elevating the shoes off the bottom of the pan to prevent damage to the shoes from excessive heat.
Directions
- Fill your pot with approximately 2.5 gallons of water.
- Add 1 tbsp of salt and stir to dissolve.
- Bring water to just under a rolling boil and maintain.
- Add 1/4 cup of dye and stir.
- Add the shoes. Option 1 (recommended): Place your roasting rack in the bottom of the pot, add shoes, and make sure there is minimal touching between shoes. Option 2: Suspend the shoes in the mixture using string. Fishing line works great, but any thinner string also works well. Make sure the shoes are not touching the bottom of the pot and that they are completely submerged.
- Maintain heat and circulate water for a minimum of 10 minutes. Move the shoes in the mixture a few times to make sure all areas of the shoes are exposed to dye.
- Remove shoes and check color. If a deeper/darker color is desired, repeat step 6 for an additional 5 minutes.
- Allow shoes to cool down on a flat surface.
Tips and Additional Insights
Don’t skip the salt! The salt is important to add because it allows the water to increase in temperature without coming to a boil.
The string method will not deform the cuffs, unless undue pressure is used.
Taryn and I are collaborating to make lighter colors, including pink, and she has some awesome ideas about creating designs and doing multiple colors per shoe, as well! Stay tuned for updates.
This product will dye your hands, clothes, stovetop, and countertops. Be sure to protect your things from splash back.


