In my EasyCare blog last month I discussed how to get accurately acquired, measurable radiographs (X-rays). So now that you have your fabulous radiographs what do you do with them? Many veterinarians don’t think to offer radiographs for hoof balancing to the farrier because they believe the farrier doesn’t know what to do with them, and they might be right. You probably don’t need radiographs for all of your horses, but you’d be surprised how much radiographs can help you be more effective for many of the feet you work on. Sometimes you just don’t know what you don’t know. Radiographs give you objective information about the relationship of the internal and external structures.
Here are some tips and tricks to help you get the most out of your radiographs. Remember a radiograph takes a three-dimensional form and turns it into a two-dimensional image:
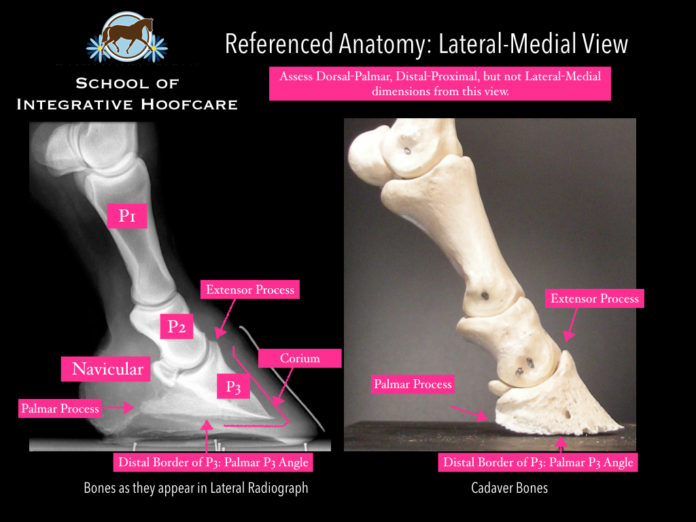
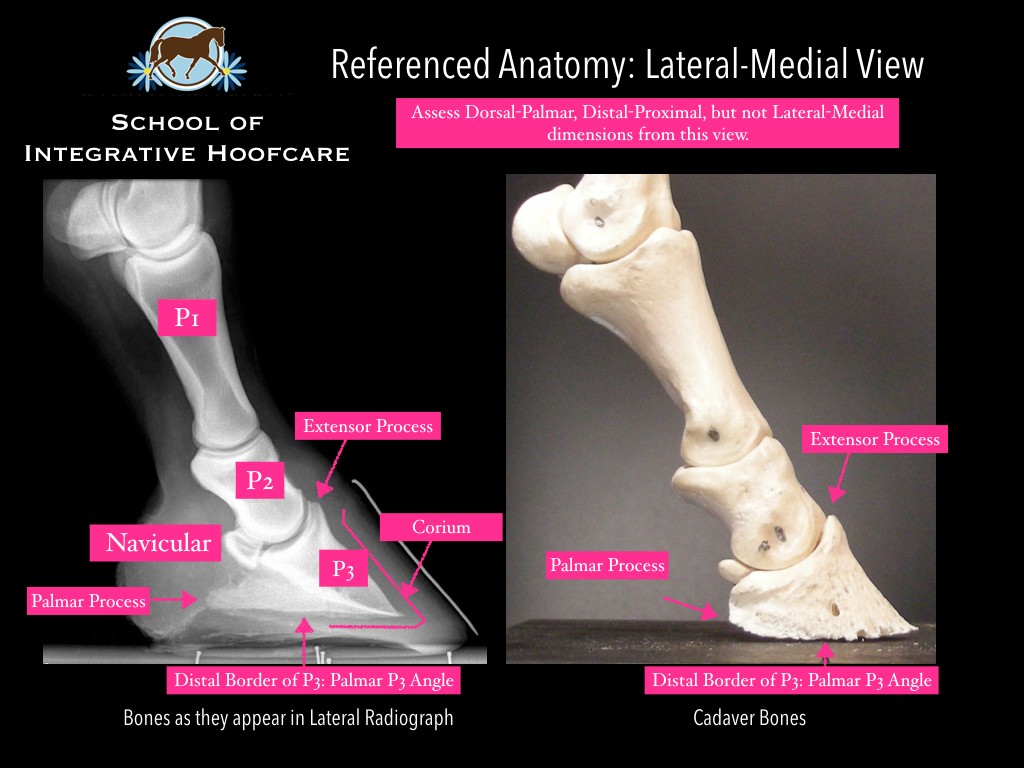
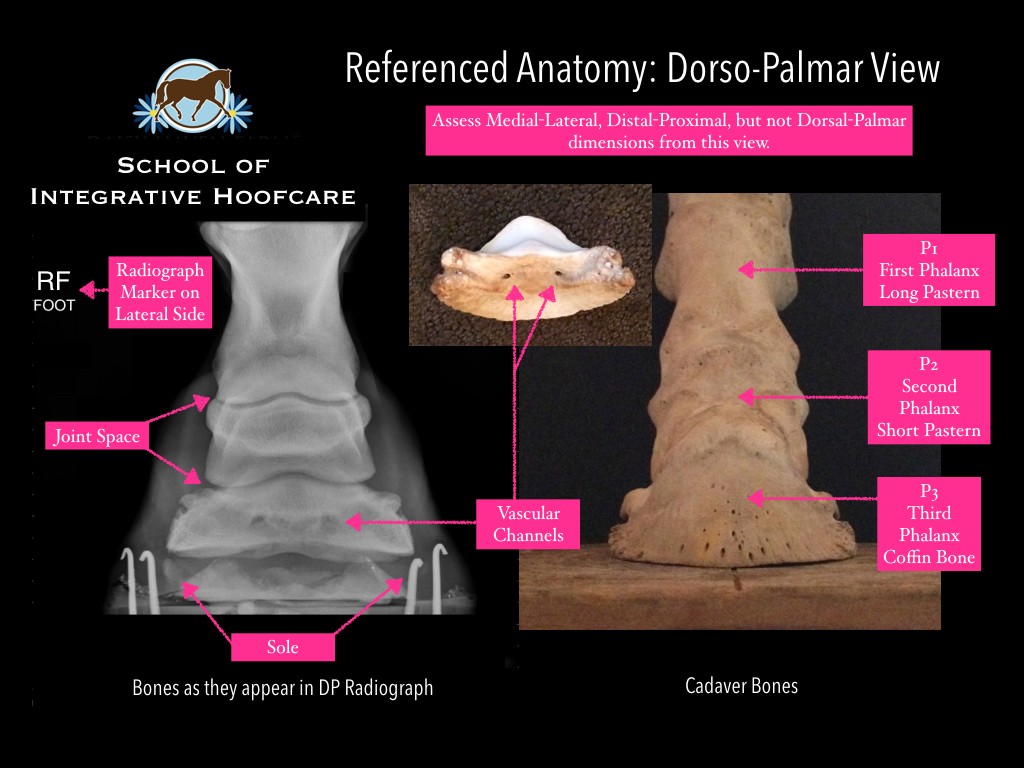
It’s often helpful to have more than one view of the foot you’re looking at in order to be able to orient yourself three-dimensionally especially for hoof balancing radiographs. As discussed in the previous blog, typically lateral and dorso-palmar (DP) radiographs are most helpful. Wrapping your brain around the three-dimensional anatomy and how it relates to a two-dimensional image can be tricky. With practice it gets easier, so look at lots of radiographs and ask lots of questions to those that know how to read them. Here is an explanation of some of the relative anatomy on those two views to help you orient yourself. Keep in mind the cadaver bones pictured are not from the radiographs next to them:
In the lateral view, it’s important to remember that you can only assess dorsal-palmar and distal-proximal balance, not medial-lateral balance. The medial-lateral dimension is flattened in the image.
In the DP view, it’s important to remember that you can only assess medial-lateral and distal-proximal balance, not dorsal-palmar balance. The dorsal-palmar dimension is flattened in the image.
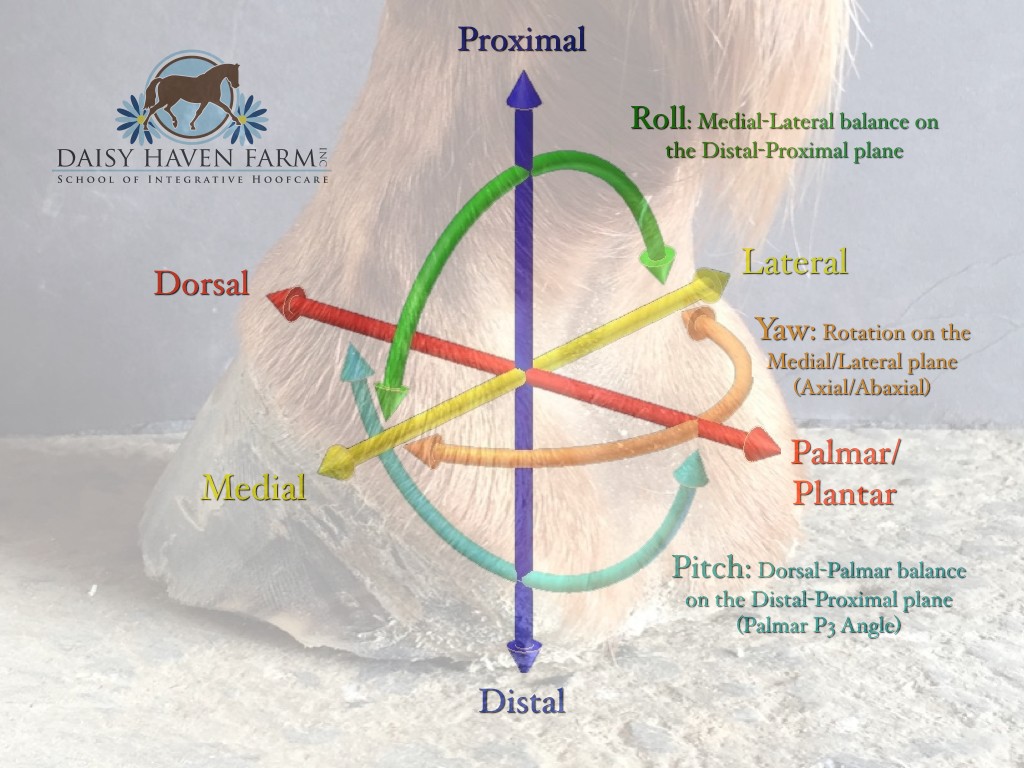
My hoof balancing guidelines as I’ve described in previous blogs are based on four criteria as a starting point:
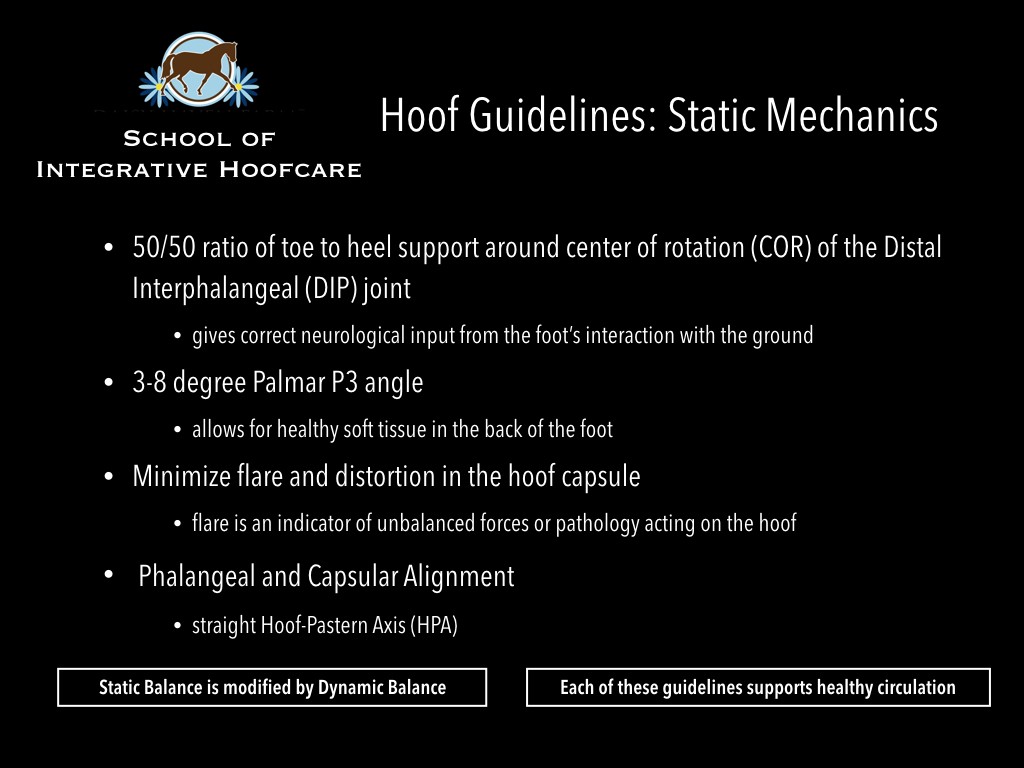
Of course there are always exceptions to those guidelines due to movement considerations and needs of the individual animal. These hoof balancing guidelines are easy to assess in the radiograph and compare to the foot in front of you.
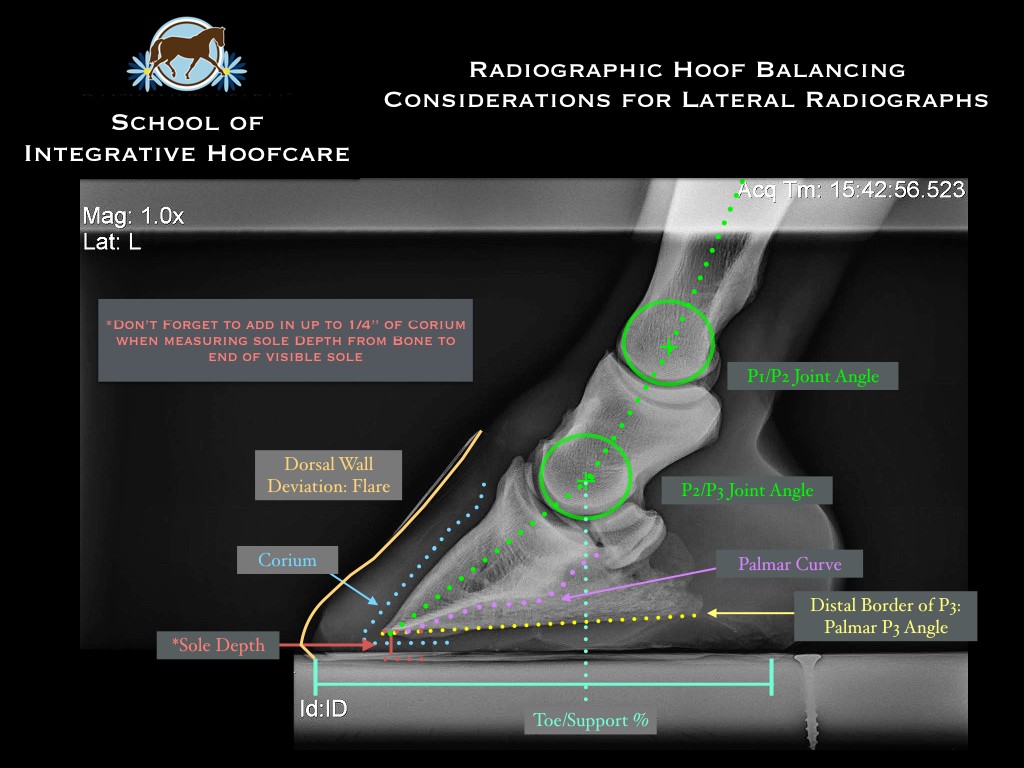
For hoof balancing and shoe placement purposes there are many things you might look at on the x-ray in front of you. On the lateral radiograph I look at these parameters when judging how to trim and where I want to place any shoe I might be applying:
- Palmar P3 Angle: Bottom of P3 in relation to the ground
- P1/P2 Joint Angle, P2/P3 Joint Angle, and Dorsal Wall Deviation/Flare to judge capsular and phalangeal alignment.
- Judging sole depth and corium location if you can see it helps keep you safe.
- Palmar curve gives you some information about the potential for concavity for the foot, and helps me decide if a horse can be sound barefoot or might need a composite shoe.
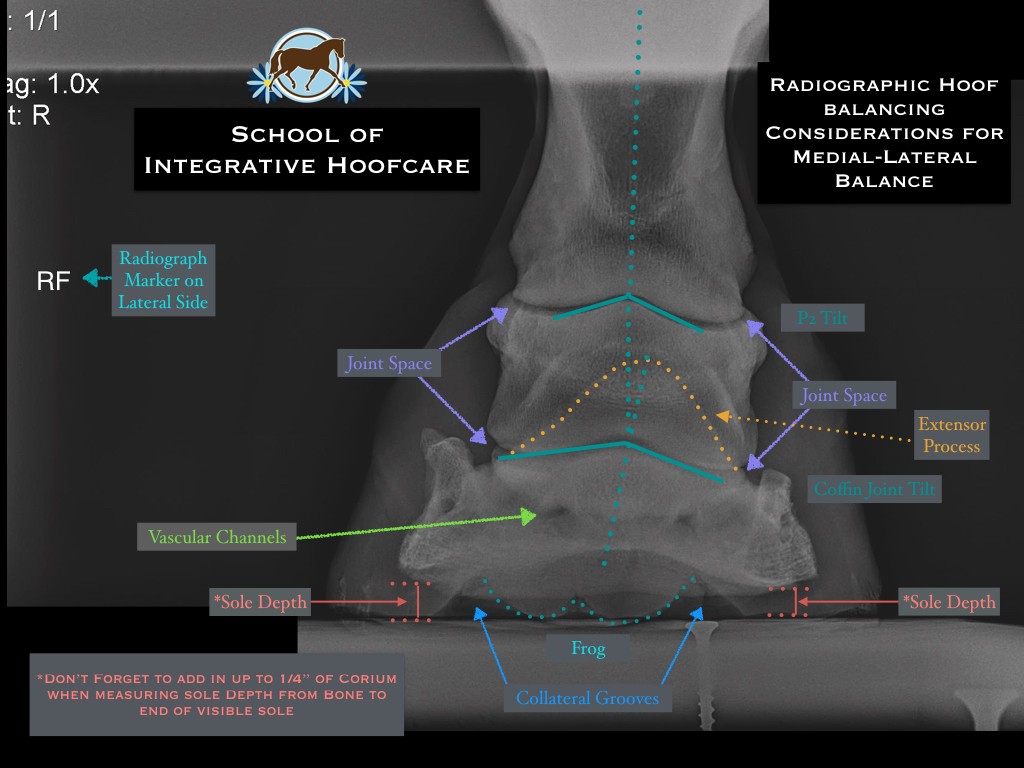
On the DP radiograph I consider the following parameters:
- Comparing joint space from one side to another: is one side closer together than another?
- Comparing the midline of each bone and the tilt of the joint compared to the plane of vascular channels of P3: while no horse is straight, the AVERAGE sum of those planes should be flat landing.
- Compare the relative sole depth on each side of P3: this parameter can be problematic as the bottom of P3 can model.
- Consider the location of the frog and central sulcus and shape and size of the collateral grooves, this can provide valuable information as to the yaw and roll of the limb.
Whether you’re the kind of person who likes to look at measurements, angles, and ratios or the kind of person who prefers a more organic assessment of symmetry and form, radiographs will do a lot to help you with your work. In Part Three of this series on radiographs, I will use a case study to demonstrate where radiographs gave me surprising, yet critical information which helped make the decisions to help the horse.


