


I have been gluing composite shoes of one kind or another since 2005, and have gotten very comfortable using the tools I have. After jumping into using the new EasyShoe, I am finding it really simplifies many aspects of the composite shoeing process. Like all new things however there is certainly a learning curve involved! I have been exploring the nuances of EasyShoe application, and am getting pretty happy with my application process. Here is an example of a horse I worked on a few weeks ago, with excellent results.
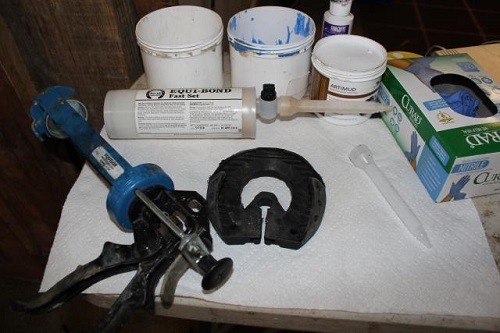
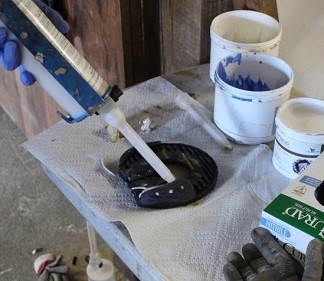
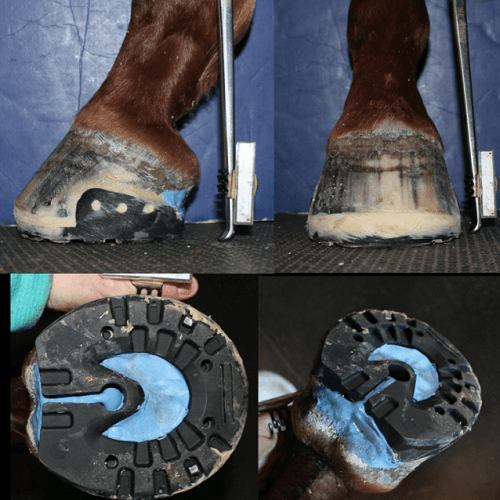
I am using Equilox/Equibond glue, hoof disinfectants such as Artimud and Fungidye, and dental impression material to pack the frog and sole. I have modified this EasyShoe by removing the 3 clips that are in front of the rear cuff as this horse doesn’t need them. I am planning on gluing and nailing this shoe onto the horse’s foot.
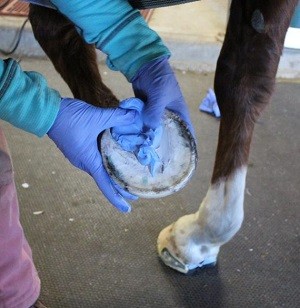
My feet are prepped by trimming and removing all exfoliating material from the glue surface area. In this horse’s case, I used a heat gun to dry her foot thoroughly before gluing.
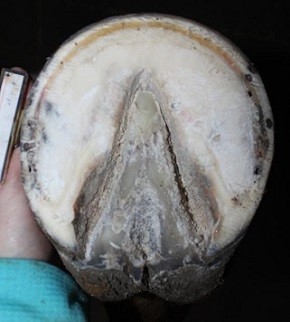
I also prepare the foot by applying Artimud around the frog to prevent foot funk from growing under the shoe, and Fungidye in the white line and any nail holes to prevent infection from growing in those areas.
Next I prepare and apply glue to the shoe. I have dental impression material mixed and ready to apply to the frog as well. I heat the shoe a bit before applying glue as this day the weather was 19 degrees Fahrenheit with a wind chill of 8 degrees. The colder it gets the more I have to heat my materials. I also had the glue in a heating pad to warm it up before application.

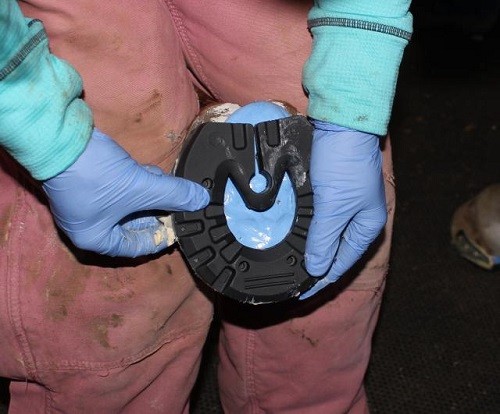
When applying the glue to the shoe, I pay special attention to ensure the glue completely fill the cuffs on the side of the shoe. I used a lot of glue on this shoe, and have learned that I don’t need quite this much on most applications. I’m also going to move some of that glue into the inside of the cuff before application to the foot.

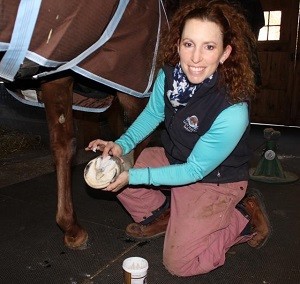
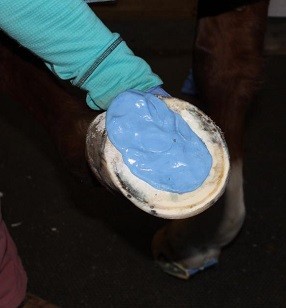
I’ve brought the shoe over to the foot, and will apply the dental impression material just before the shoe. The dental impression material also acts as a dam and prevents the glue from going too far in on the sole.
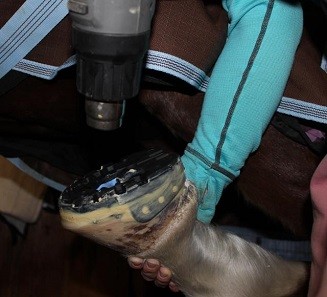
I have figured out I need to get under the horse to apply the shoe. I’ve tried applying the shoe from the side of the horse, but found I’m more successful if I have two hands free. I apply the shoe from lateral to medial, not from the front, paying close attention to how the cuff is laying on the wall.
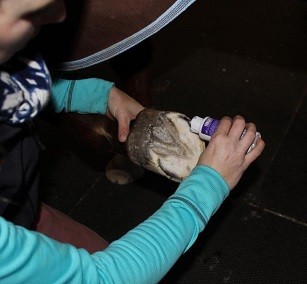
I press down evenly and smooth the glue with my finger around the foot, shoe and cuff. I’ve found it advantageous to get out of under the horse at this point and work from the side. I don’t want the horse pulling their leg at an inopportune moment and removing the shoe in the process! In my experience you haven’t glued enough shoes until you’ve actually glued one to your leg. Not something you do twice! I’ll also use the heat gun on the shoe and glue in this cold weather to help the glue set quickly.
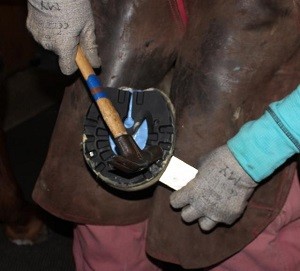
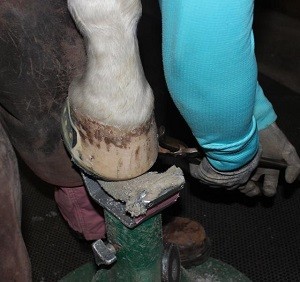
For this horse I also applied two nails to each foot, one on each side just in front of the cuff. The nails go easily through the shoe, glue and foot, and are easy to set and clinch. I have been using the corner of the hammer head to set the nail into the shoe tread. Blocking and clinching is easy too.


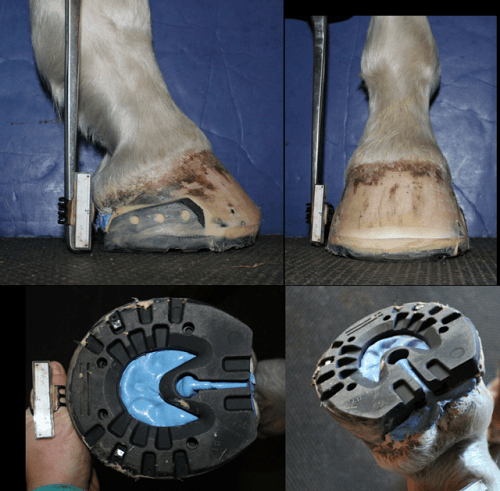
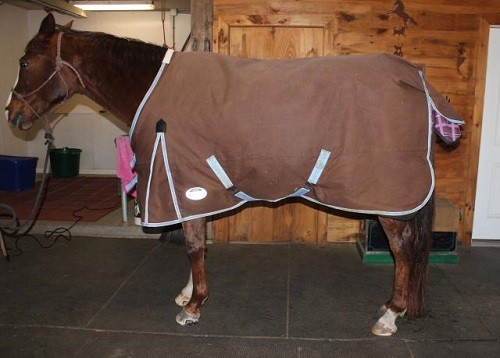
Here is the final product which I am very happy with! This horse is ridden on the trail and in the ring several times a week and participates in many clinics throughout the year. She’s loving her EasyShoes.
For more information on Daisy Haven Farm, the horses we work on, and the clinics we offer, please see:


