

Now that you’ve selected your hoof knife, nippers and rasp, you’re ready to actually use them. But for a lot of folks, the first trims feel really awkward, and the tools unwieldy. Natural hoof care websites show us plenty of examples of what a healthy bare hoof looks like. It’s harder to find good instruction on how to use traditional farrier’s tools to achieve that healthy hoof. But learning how to handle and make the best use of your trimming tools will make trimming easier, and make it easier to achieve a balanced trim.
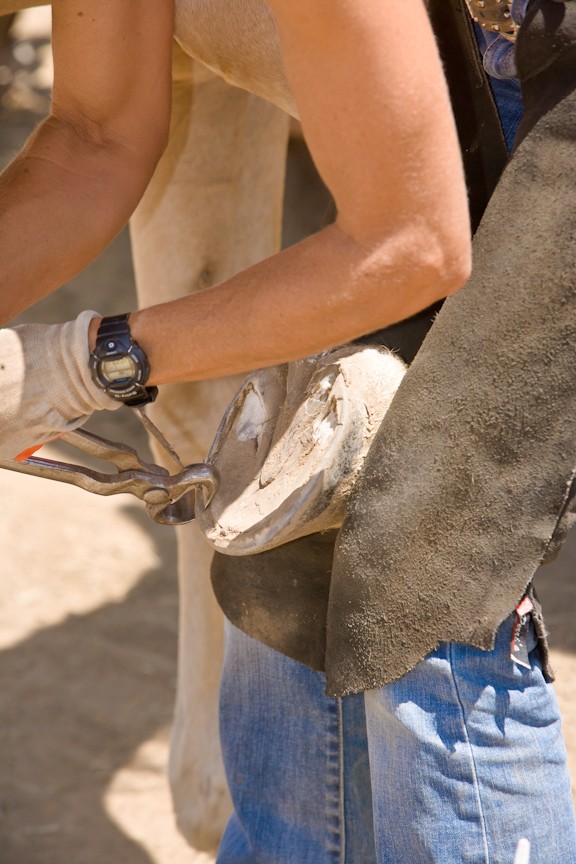
Nippers do the heavy work. They are best used for removing wall when the wall is relatively long. They are also handy for coaxing out large sections of exfoliating sole, as well as overgrown bars, but be conservative when doing so. In addition, trimming shedding frog or excessive frog height is easiest using nippers.
When nipping hoof wall, I start at one heel, and work my way around to the toe; then go to the other heel, and work my way back to the toe until I’ve nippered all the way around. ALWAYS nipper off less material than you think is ultimately necessary. You will come back with your rasp and clean things up, and additional wall height can be removed with the rasp.
Nipping the wall flat.
Nipper the wall flat first. After your first cut, overlapping the cuts will make the job easier. It will also help you keep your nippers even, and your cut level. Don’t worry about trimming to the sole through the quarters; you’ll relieve the quarters with your rasp if needed.
I usually use my rasp to bevel the wall, but on especially thick-walled horses, I sometimes start my bevel using nippers. But until you become proficient with your hoof nippers, always nipper the wall height flat to begin with — never nipper a bevel at the first pass!
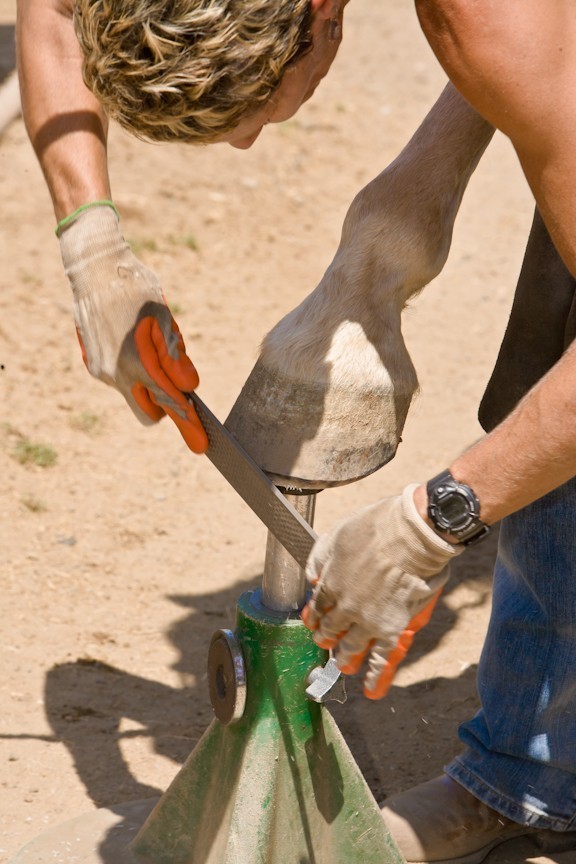
The hoof rasp does the detail work. Use the rasp to level the foot. The best way to do this is to imagine the bottom of the foot is the face of a clock: the central sulcus of the frog is 6 o’clock. The center of the toe is 12 o’clock. Begin at the heel (either 5:00 or 7:00), and rasping OUTWARD, work your way around from the heel to the toe on both sides of the foot. Never attempt to rasp both sides of the foot at once.
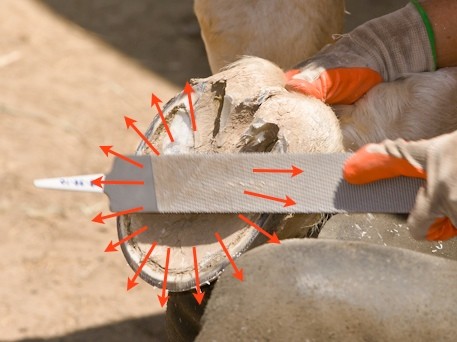
Leveling the wall by rasping “around the clock.”
To rasp the bevel, I usually work from the bottom first, using the coarse side of the rasp, and applying a 45 degree angle starting at the waterline. Then bevel from the top, applying a 45 degree angle in relation to the wall. You can use either the coarse or the fine side to bevel from the top — it just depends how thick and tough the wall is — and the fine side to clean things up. The fine, or file, side of the rasp can be used to reduce flares if necessary.
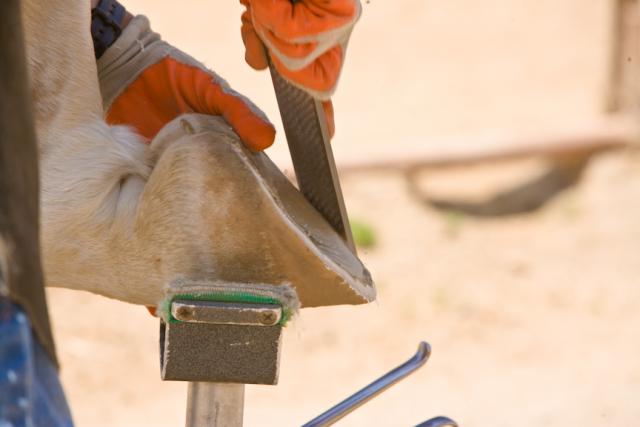
Beveling from the bottom.
Beveling from the top.
Always let the weight of the rasp do the work, and be sure to take long strokes, using the full length of the rasp, instead of short, choppy strokes.
It may take you a while to feel confident enough in your knowledge of the hoof to put your hoof knife to use. The knife is best used to clean up exfoliating sole, to trim shedding frog, and to sculpt the bars. Hold your hand out in front of you, palm facing down. Now grasp the knife handle, with the blade coming out the pinky side of your fist, and pointing away from you. I make a habit of working the blade away from my body; not everybody does this, but you’ll shed less blood that way! You can use the thumb of your other hand to push the blade. To trim rubbery frog, use a slight sawing motion.

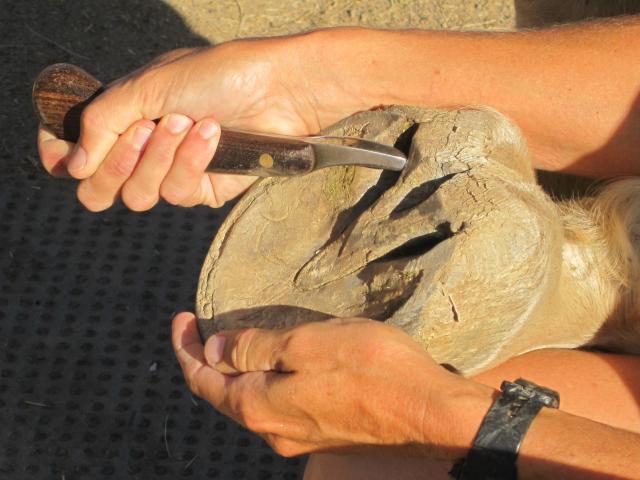
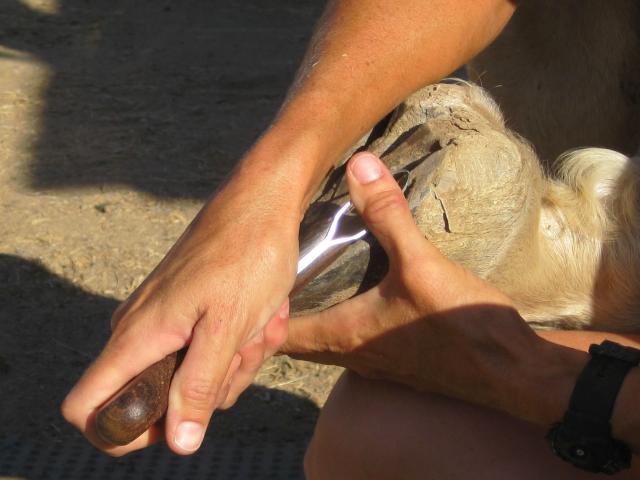
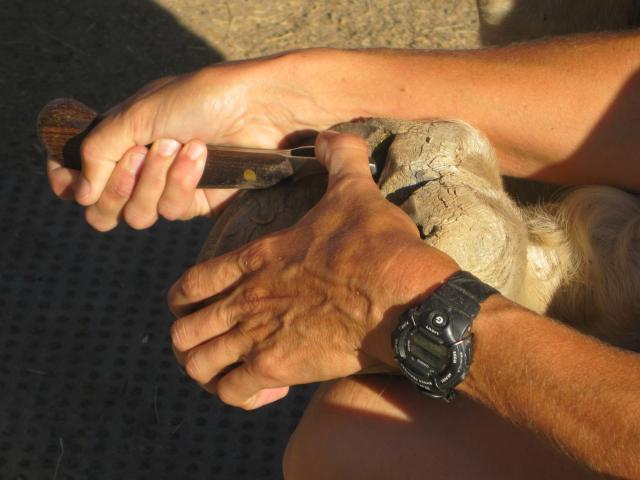
Hold your knife with the blade AWAY from your body. Use the thumb of your other hand to help push the blade.
Those are the basics. We all find different techniques that work for us, but this is a good leg up on learning to use your tools, and letting your tools work for you.


