


How to use glue and composite shoes 101:
- Study the materials and hoof preparation steps
- Gather the necessary materials and tools
- Select the best shoe size for the foot in front of you
- Apply the shoe and glue with attention to detail.
These steps will lead you to success! The shoe will stay on, and your horse will have excellent foot protection.
I often ask myself: Did I do everything I can to help the horse? Some horses may need more than a basic application. One of the biggest components of glue and composite shoes, like the EasyShoe, is the height they provide to the foot and shoeing package. That height needs to be considered when applying the shoe, it can be used to benefit the horse in a myriad of ways in performance and therapeutic applications.
You may remember a quote from Dr. Hilary Clayton at the PHCP Conference I blogged about before:
“If the Reaction Force vector does not pass through the center of rotation of the joint it creates a torque around the joint that the soft tissue has to oppose”. Dr Hillary Clayton, PHCP Conference 2016
In a large portion of the horses I work on, small details of shoe placement and leverage can greatly impact their short and long term level of soundness. This especially helps horses diagnosed with navicular and arthritis. If the break over is a bit too far forward, or leverage is extended medial to lateral, the horse may not be comfortable, let alone sound.
This horse is a good example of how leverage reduction, determined by using the Krosscheck Leverage Testing Kit, can greatly help the farrier determine how to help the horse best: Broken Down May Not Be So Broken. This horse is still sound and being ridden, jumped and evented now, three years after that blog was written.

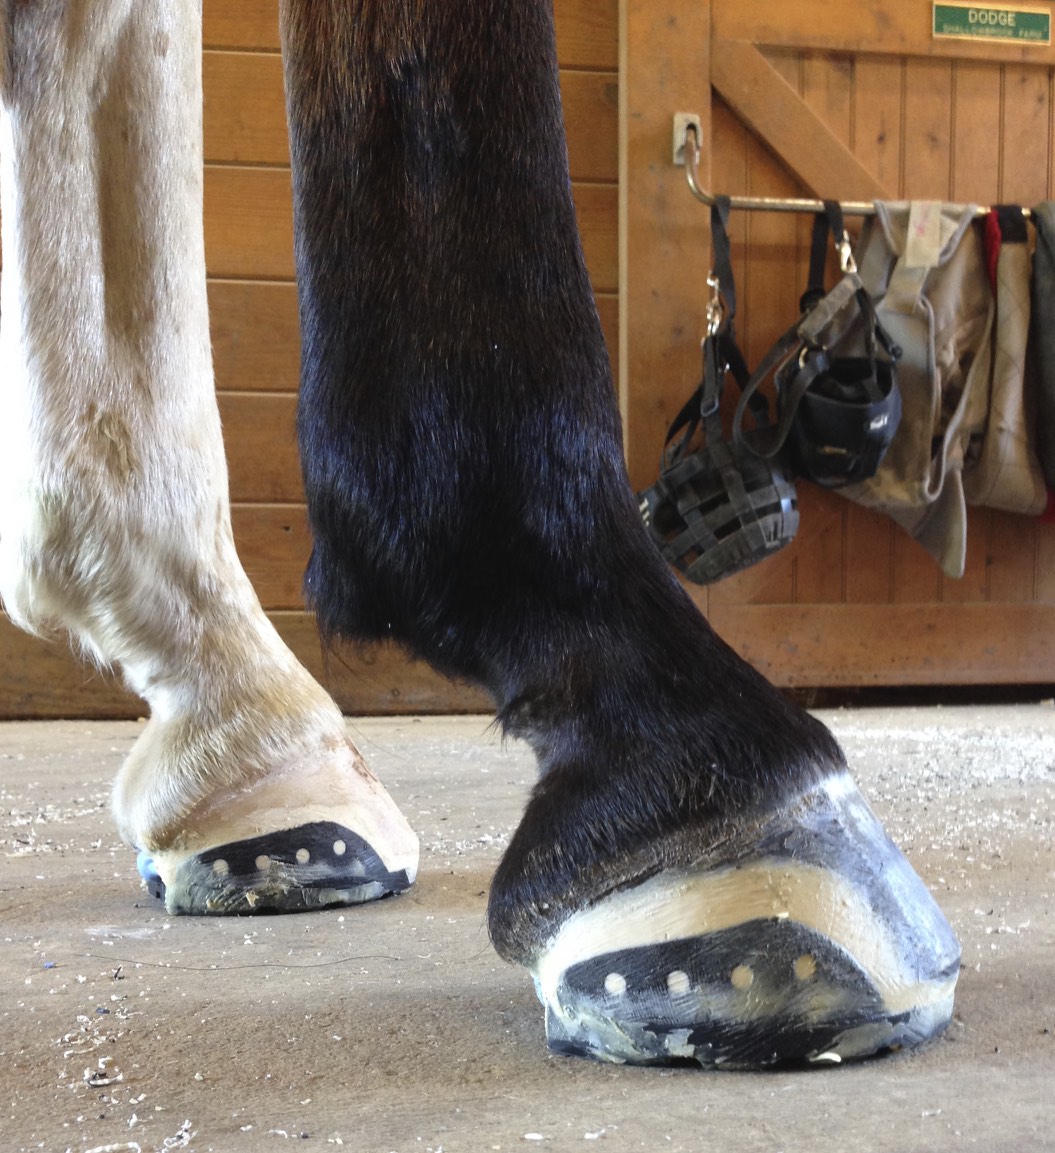
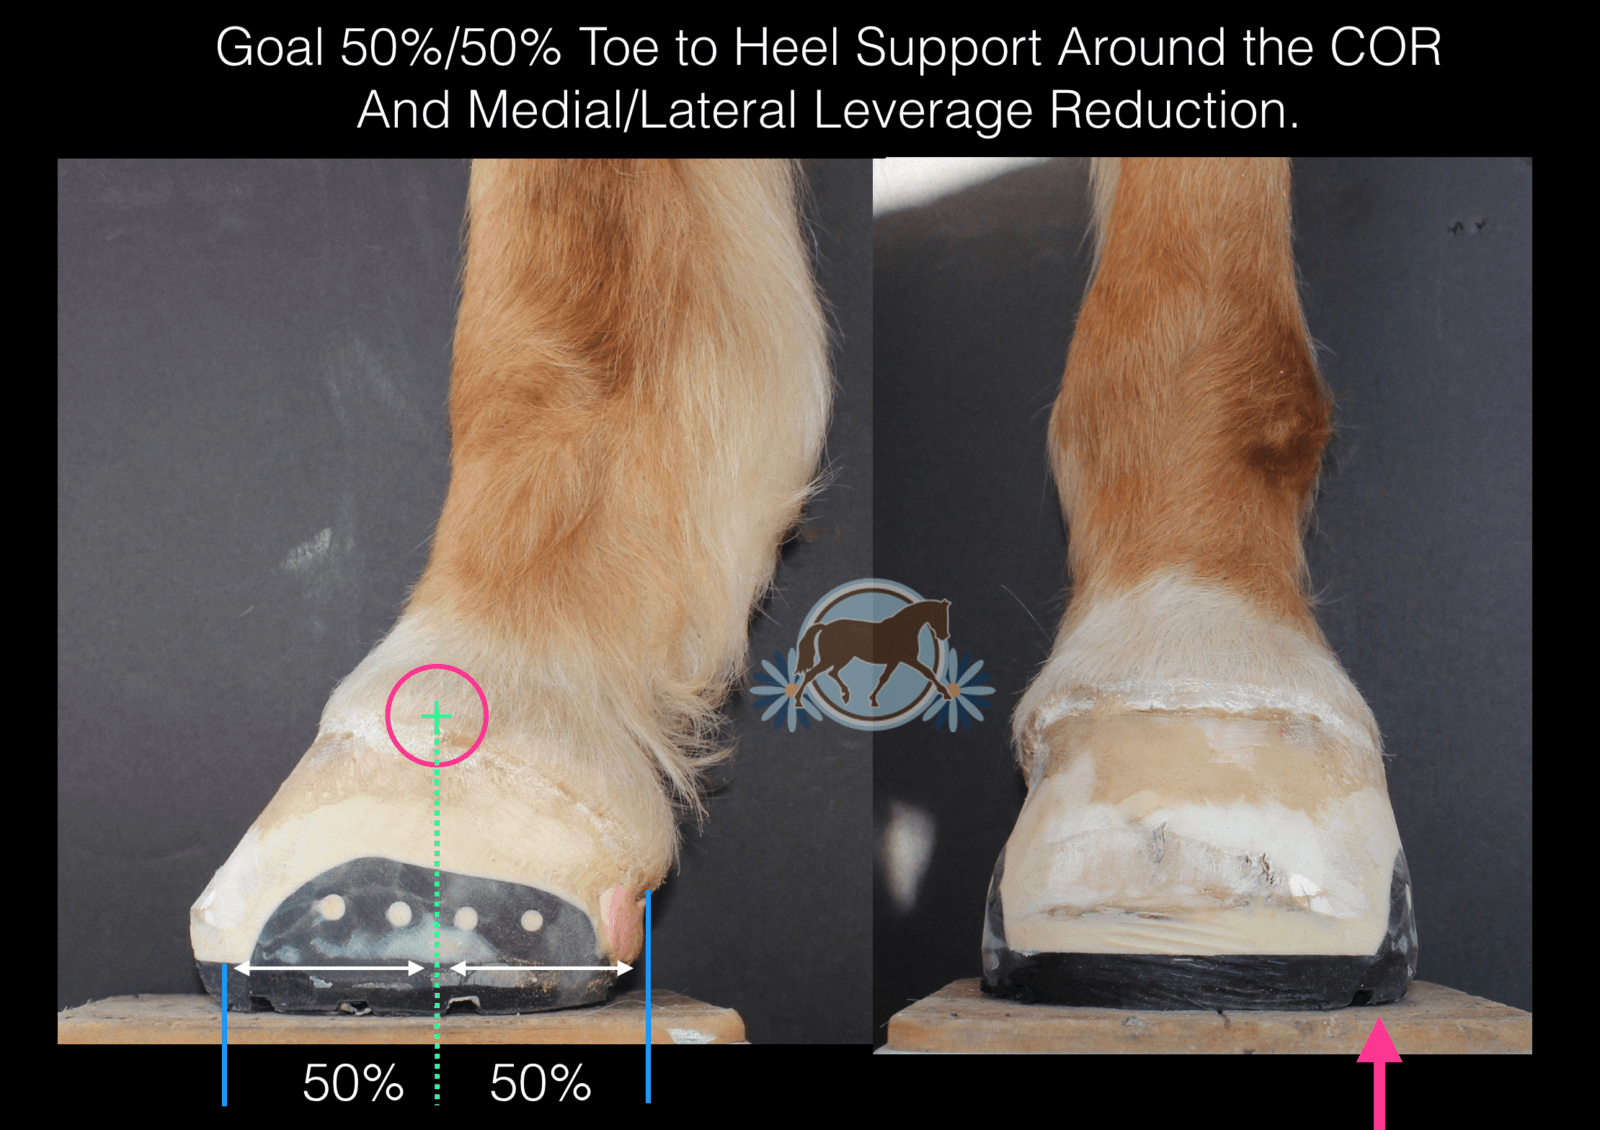
Here is an example of how a shoe can be easily modified to help prevent the break over from being too far forward. Remember because the foot is a cone, when you add height to the foot, the footprint moves forward as well. This horse has a very forward footprint, and the shoe can be applied to either continue the forward footprint, or help the footprint move back under the center of mass of the limb, assisting with leverage reduction:
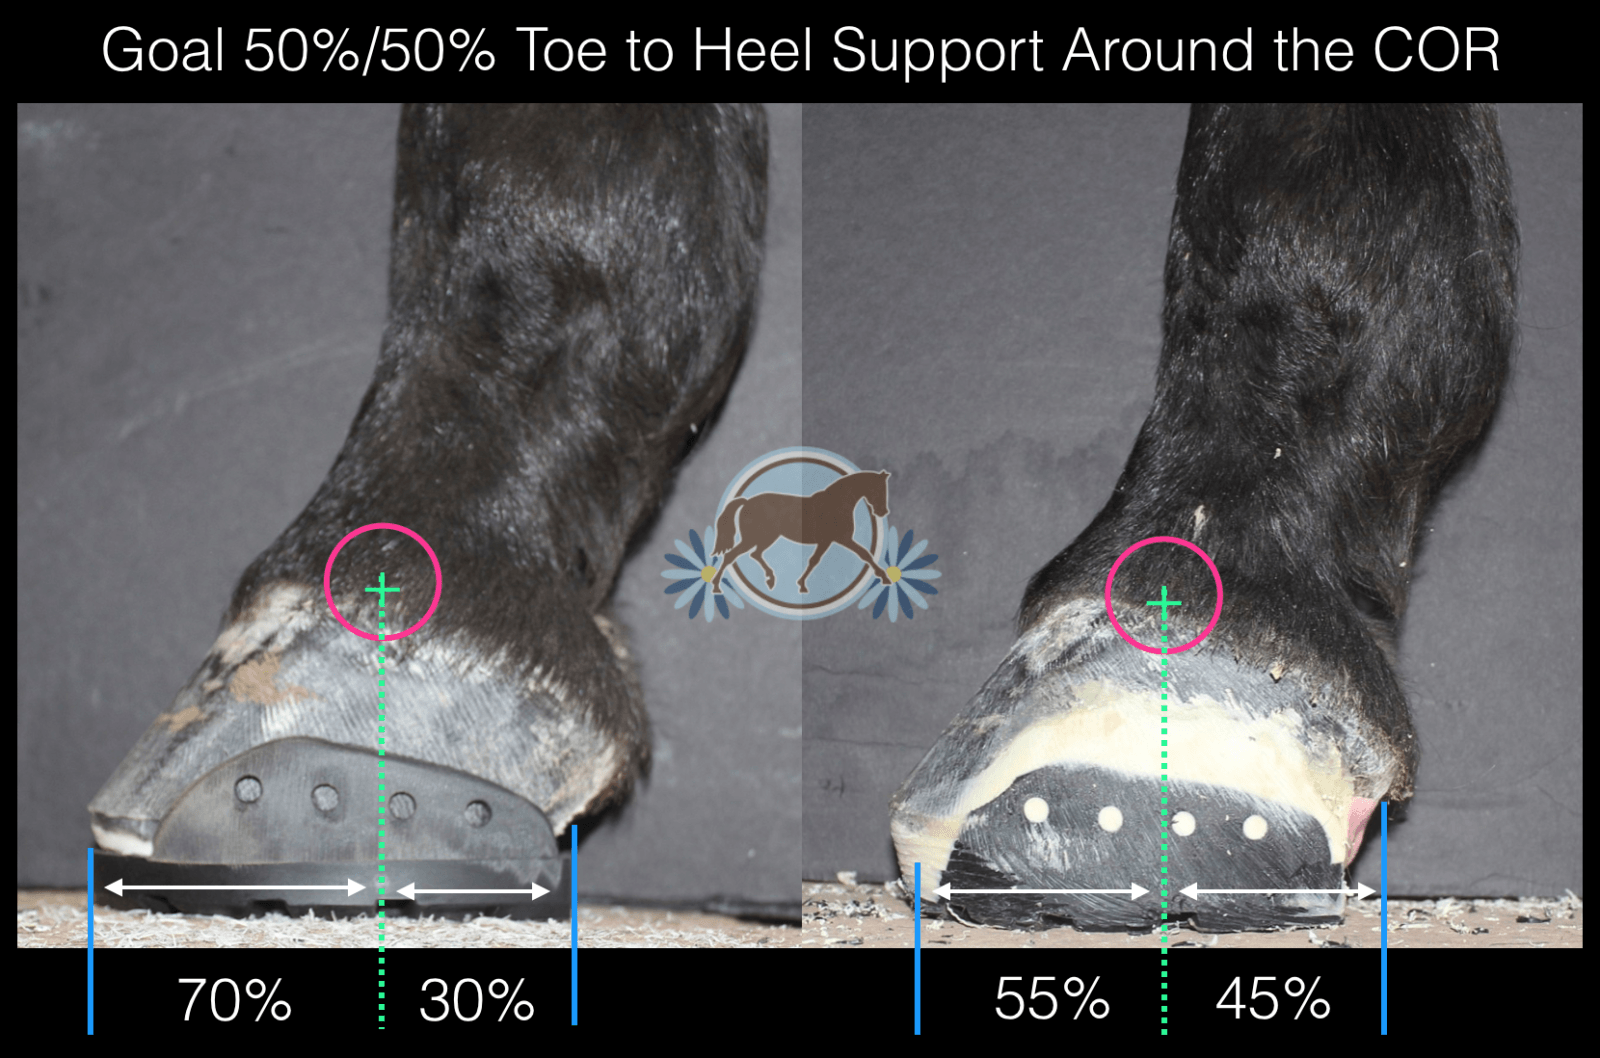
By rolling the toe of the shoe back, and extending the heel support with dental impression material we moved this horse’s footprint back significantly.
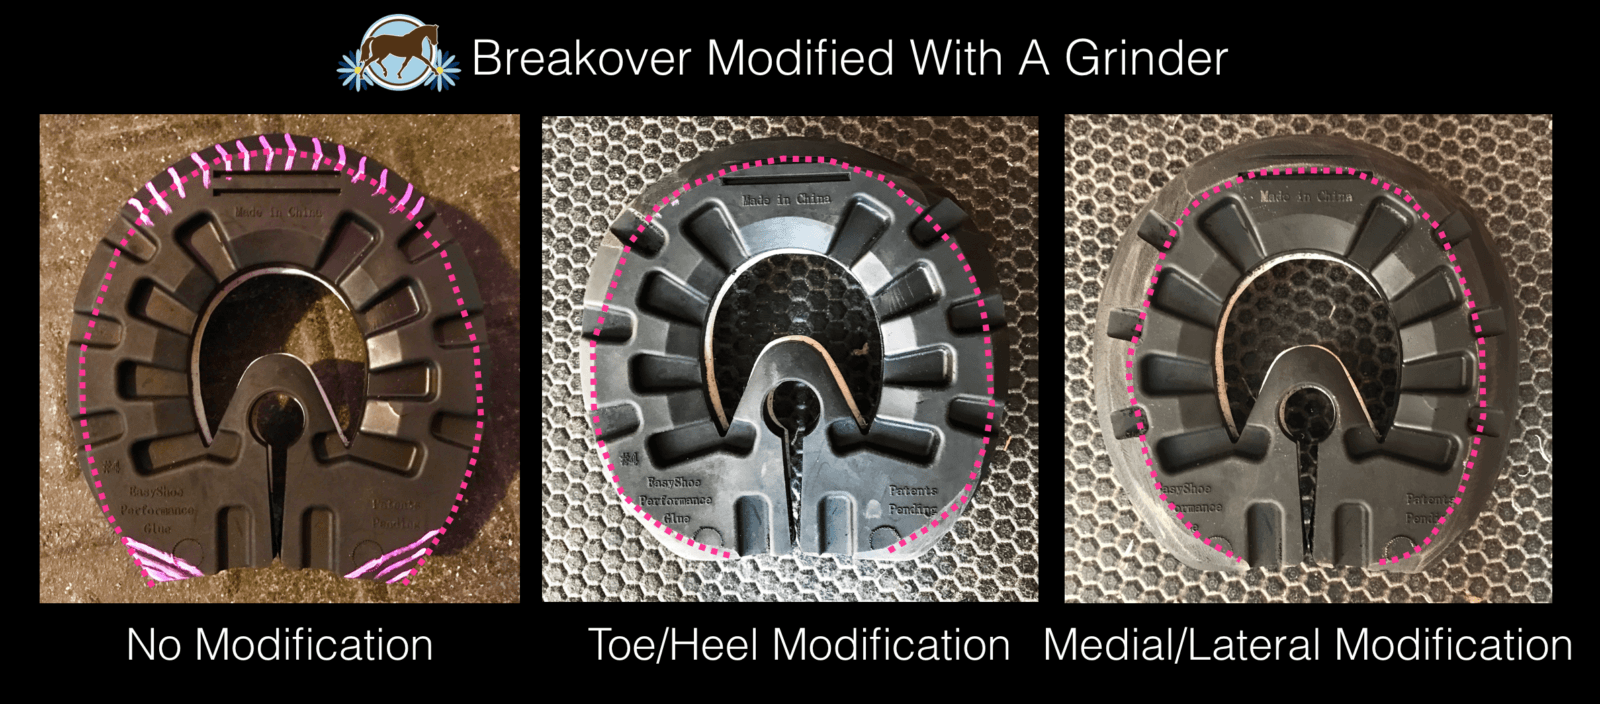
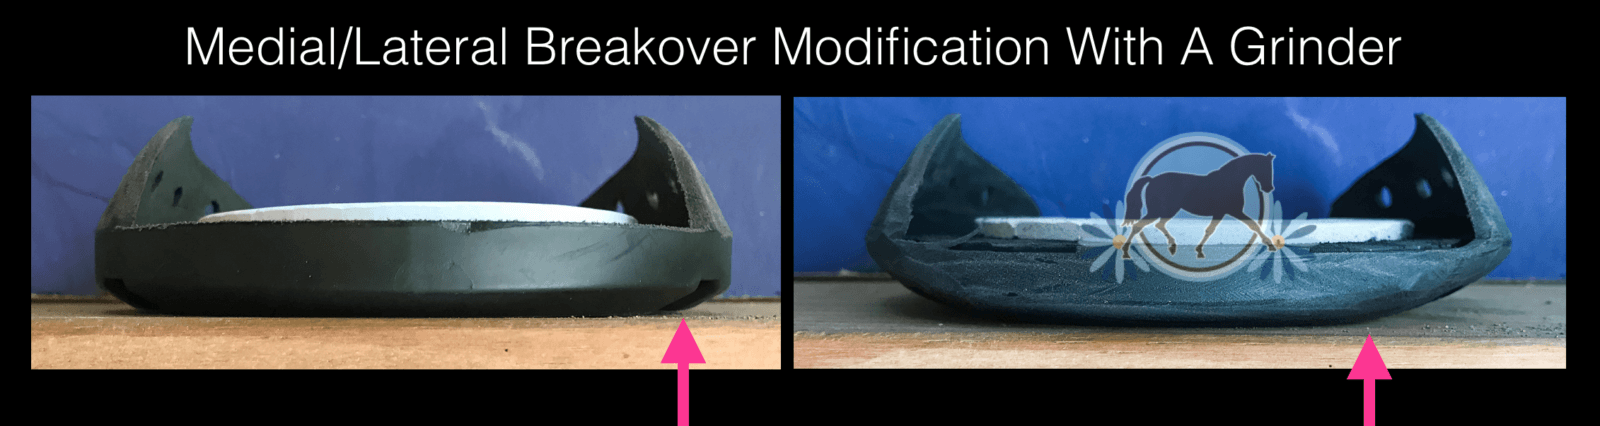
Because the shoe is composite material, the modifications can be easily done with a rasp or grinder.
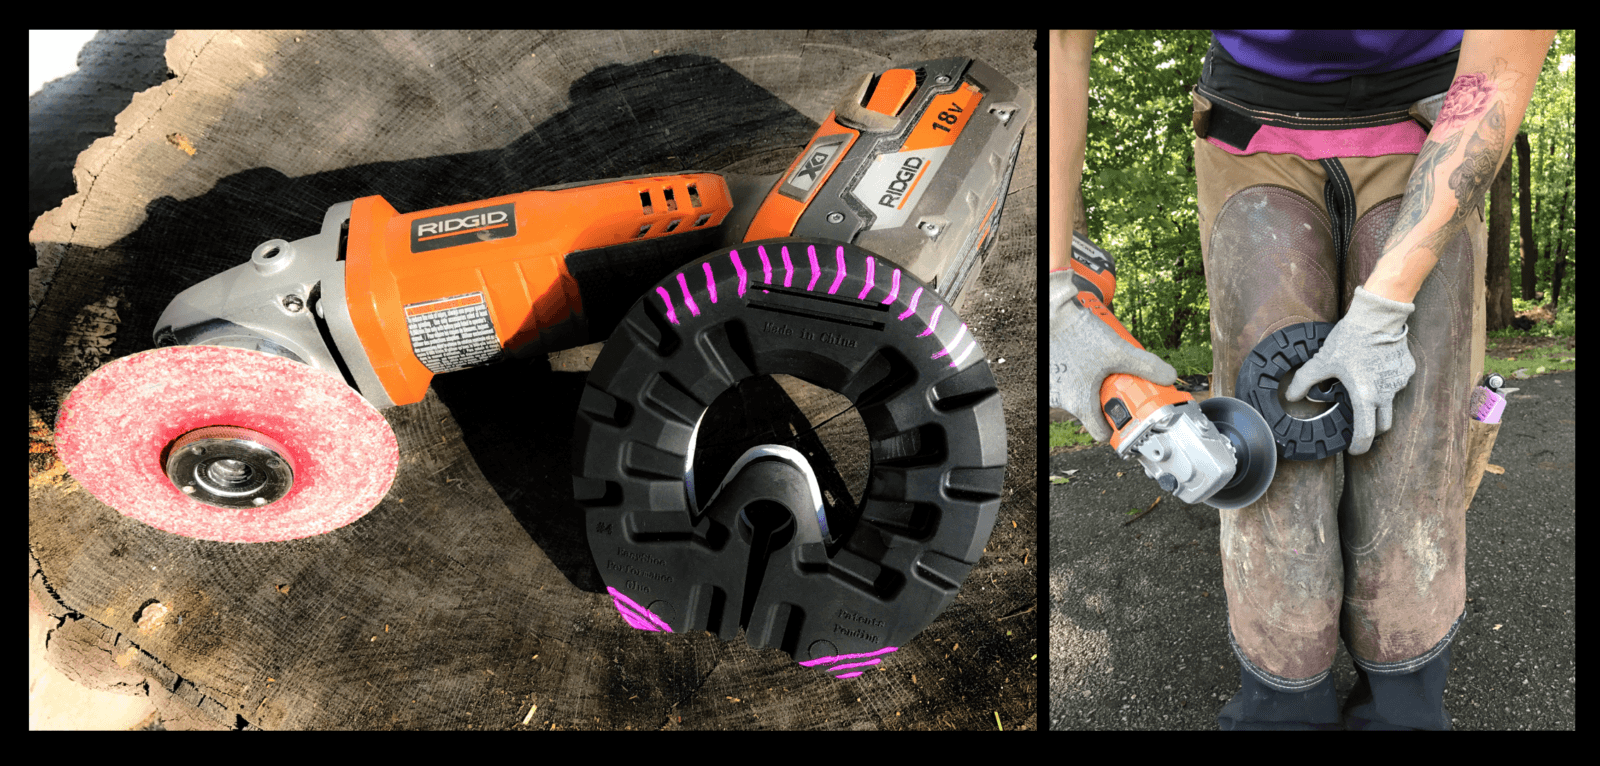
I’ll routinely bring the break over back in the toe, and soften the heel landing depending on the horse I’m working on. It’s also easy to add medial/lateral leverage reduction in the quarters. The pink dotted line here shows the change in where the shoe is contacting the ground. Even these small modifications can make a big difference in the comfort level and soundness of the horse.
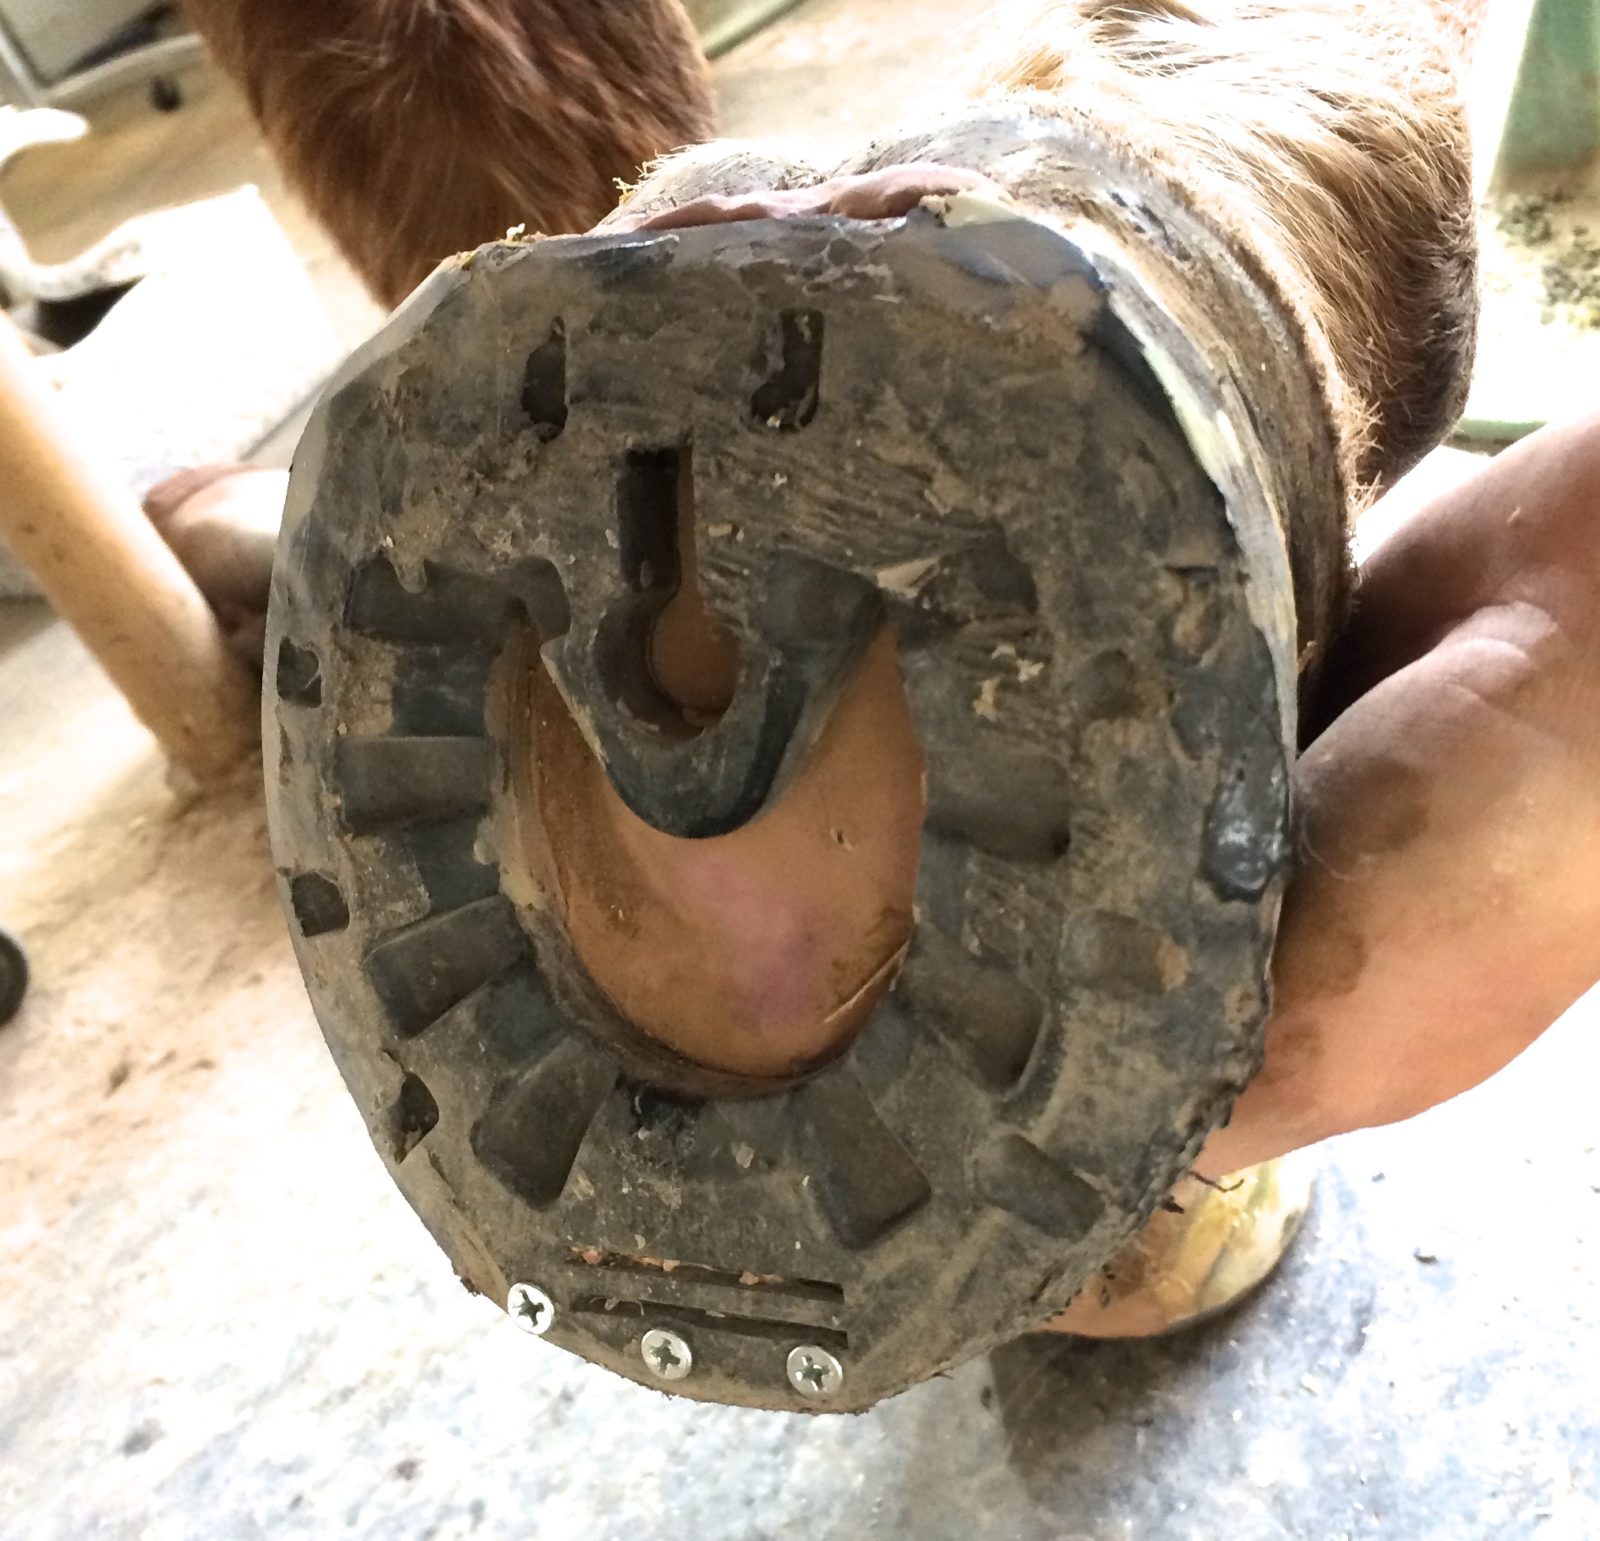
This is an example of a foundered horse from this blog here, who benefited from leverage reduction all around the entire shoe, creating a “ball bearing” effect. This helped minimize the torque on her very damaged laminae:
And don’t forget sometimes you want to prevent the break over from wearing too far back.
I hope this gives you some additional ideas on how the EasyShoe can be modified to help the horse you’re working on. Wedges and lifts can also be added to the bottom of the shoe, as well. In reality, you are only limited by your own imagination when it comes to modifying EasyShoes to help the horse.
For more information about this kind of work see our website:


