


Whether in a publication, on social media or on someone’s cell phone, we often need to be a sleuth when trying to figure out what’s going on with a picture of a horse’s hoof. Taking good photos of horses’ feet can be quite frustrating and even after a lot of work may not show what you’re hoping to demonstrate.
Here at Daisy Haven Farm, Inc. we have a serious commitment to documentation of our work. We have found taking digital photographs to be an invaluable tool in tracking our work and being objective in our care for the horse. Over the past ten years we have been photo documenting horses’ feet with great detail. Our database has over 200,000 images of horses’ feet over time, with many of the same feet documented over six to ten years. You can learn a lot about the effect of the trim, environment, diet, stress, illness etc. on the foot over time through this kind of documentation.
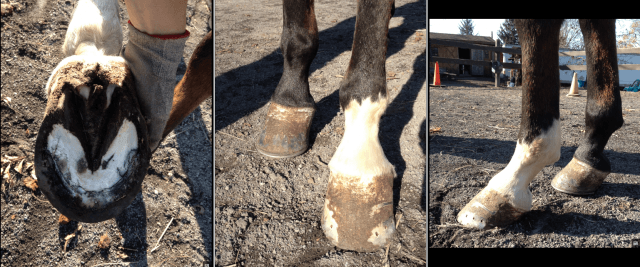
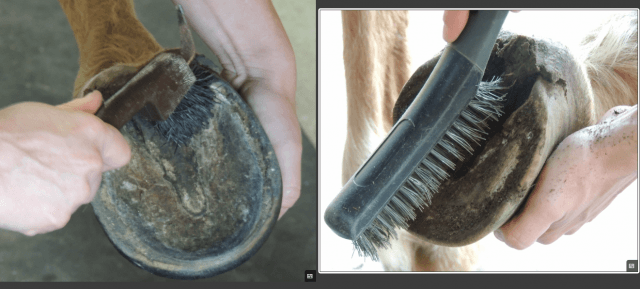
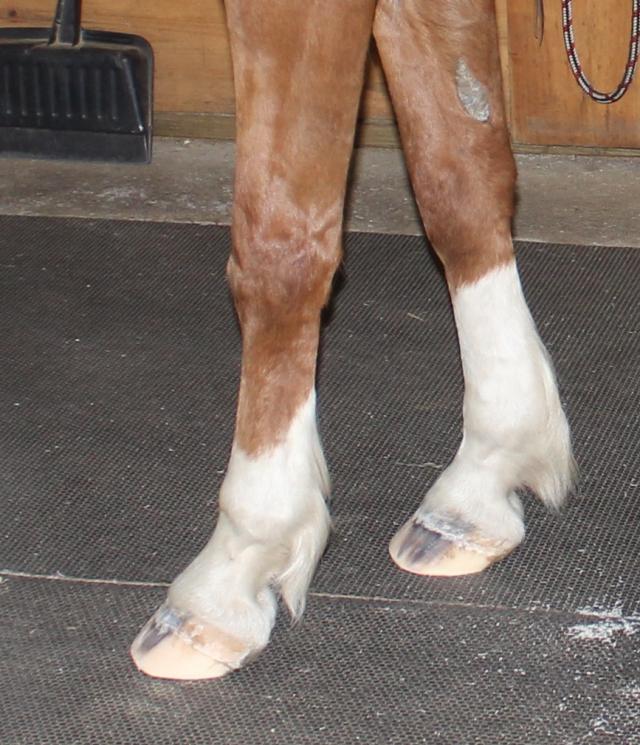
The photos above (taken by me) have harsh shadows, inconsistent angles, the feet are dirty and the ground surface obscures the foot. These are just a few of the examples of what can make your images difficult for others to interpret and prevent you from having consistent comparable quality. I’d like to share with you some of the techniques I’ve developed to get consistent and accurate photographs of horses’ feet, with a specific focus on quality of image, consistency of angle and elimination of distracting components.
1) The Camera
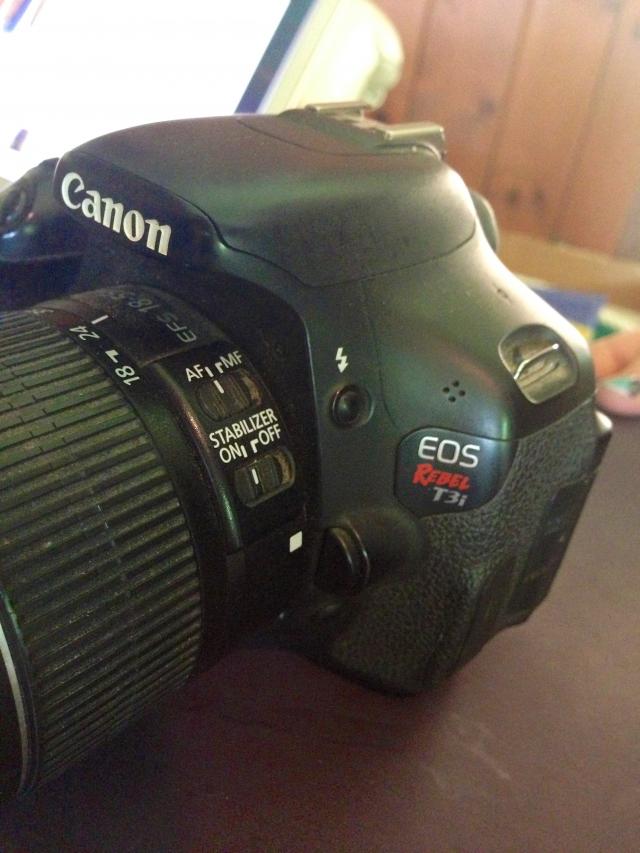
I started out with inexpensive cameras and over the years have upgraded until now I use an entry level DSLR camera. The ability to get high speed, high quality images is worth the money. I am currently working with an 18 mega pixel Cannon Rebel T3i with a general purpose 18-55mm lens which I absolutely love. The camera is fast, smart and can even get good quality images in low light situations in many of the barns we work in. An added benefit is the screen comes out and turns at multiple angles to ensure good alignment of camera and subject, and has a grid feature which helps with 3-dimensional positioning. On this camera I mostly use the P (Programmed Automatic) setting, but most cameras do quite well with the Macro setting. I prefer to use flash for my photos.
2) Your Workspace
Setting up your workspace and subject matter is critical to success. We are often tempted to snap images of feet on the fly, but in the end it’s worth the preparation time to ensure clear images. Select a workspace that has neutral lighting. Harsh sun and back lit aisles create difficult photographing situations. They can be managed and still get good images, but it makes things much more difficult. Your workspace has to be level, clean and dry. Wet surfaces, grass, many types of gravel, soft mats, all interfere with your ability to see the foot clearly. Make sure to sweep the area immediately before taking photos as random pieces of debris distract from the foot. While a nice cement aisle is always easy, a wide variety of surfaces will work including mats in a run-in or plywood on top of a gravel floor.
3) Preparing the Subject
It is also critical to make sure your foot and leg is thoroughly cleaned, top and bottom, brushed and dry. We will often use a wire brush if feet are really packed with dirt and debris.
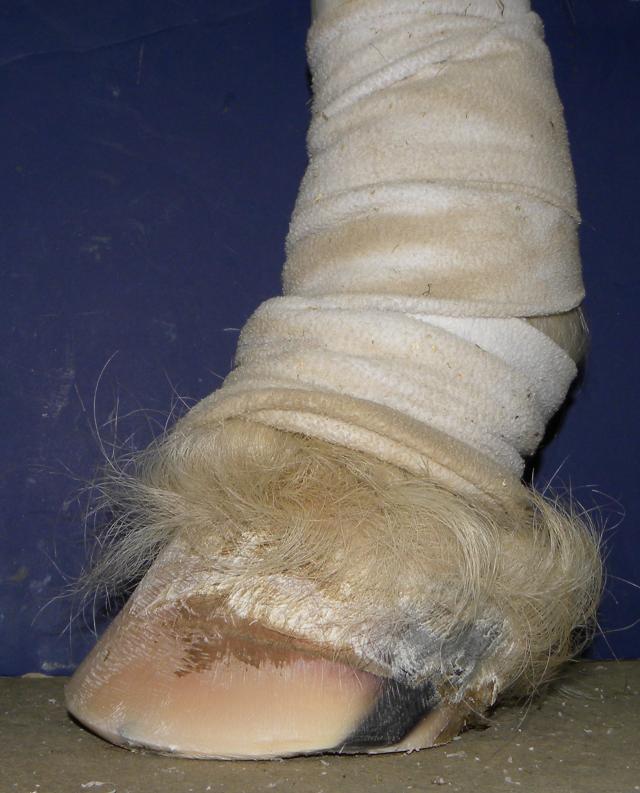
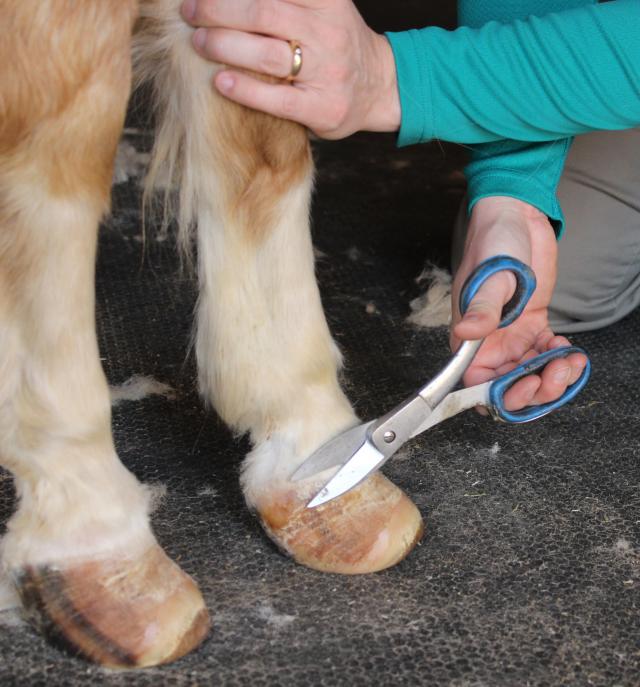
Horses with feathers and extra hair can be problematic due to obscuring the coronary band and hoof capsule. Feathers can be wrapped up and extra hair can often be clipped for ease of assessment of the hoof capsule in the image.
How the horse stands is important in assessing to the accuracy of the photographs. The horse should be standing as close to square as possible, and with cannon bones perpendicular to the ground. Ideally your pictures will be taken with the horse weighing all four legs evenly in the best position the horse can manage. Try to avoid taking pictures of hind legs when they are underneath themselves as it will skew your perspective on the hoof/pastern axis.
4) Minimizing Distraction
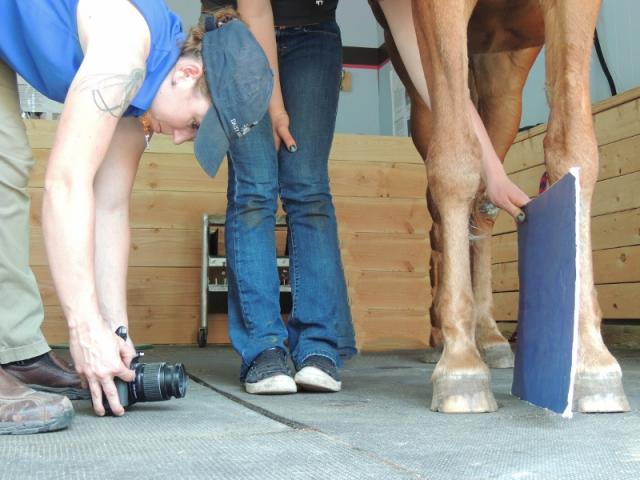
Another important component I like to use is a background in your images. A background of solid color placed behind the leg can prevent the foot from getting lost in the rest of the image. The background should be neutral in color. For example, a hot pink background with polka dots may not be the best choice to keep your image easy to look at! We use a colored foam board cut to size. Make sure the background is parallel to the limb, and the bottom edge of the board is in line with the ground plane of the foot. Also, if you are using a background handler, please keep them safe. Make sure the horse is ok with the background around his legs, and that your background holder does not stand in a kick zone.
5) Accuracy of Angle
Our standard procedure is to take pictures at “mouse-eye view”, in other words, ground level. Feet look totally different when viewed from ground level vs. standing and looking down.
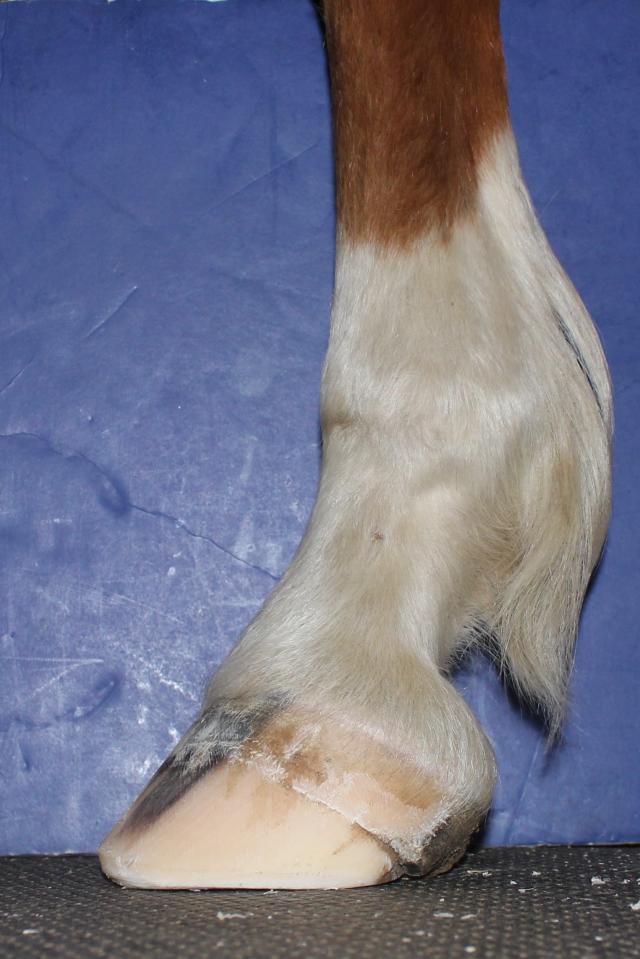
It is also very common to see photographs of horses feet that are oblique to the limb. A photograph taken at an oblique angle can really distort the appearance of the foot! The key to getting consistent angle on your images is to position yourself, the horse’s leg, and the background all in alignment with one another 3-dimensionally.
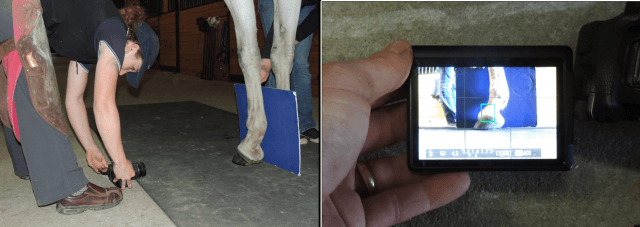
For accuracy of describing how I’m aligning my camera, it’s important to define the “planes” of the camera. The yellow line is the plane of the face of the lens. This plane will most often be parallel to the subject. I refer to this as the plane of the lens. The pink line is the midline of the camera body. This plane will most often be perpendicular to your subject. I refer to this plane as the midline of the camera.

To get accurate repeatable images that can you can reliably compare over time, let alone to images of other feet, a consistent repeatable procedure for photographing the foot must be followed.
Here are the key points in lining up the camera and subject to get accuracy of angle:
- Mouse eye view means I usually have the camera 1/2″ to 1″ off the ground with the camera parallel to the ground.
- The midline of the camera is aimed at the center of rotation of the hoof capsule and perpendicular to the subject.
- The plane of the lens, the horse’s limb, and the background are all parallel to each other.
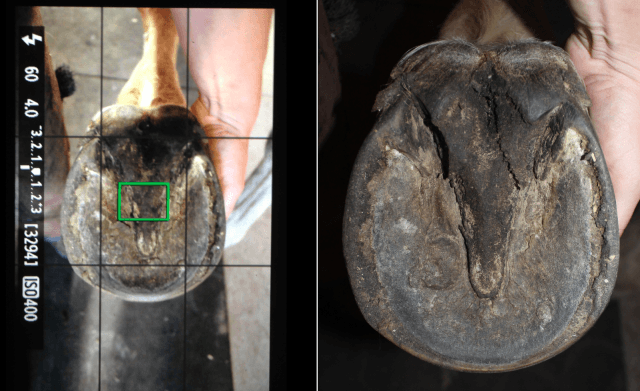
- In the screen, line up the bottom of the grid with the ground plane of the foot. I set the focus area of the camera on the screen at the approximate center of rotation of the hoof capsule.
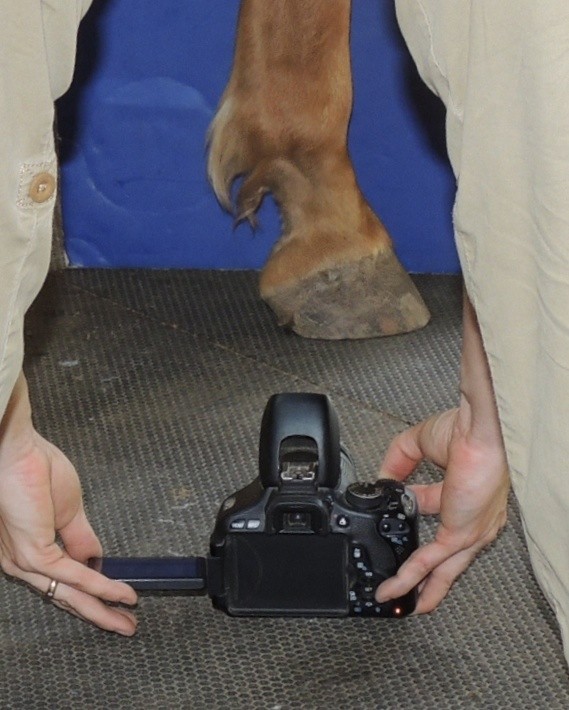
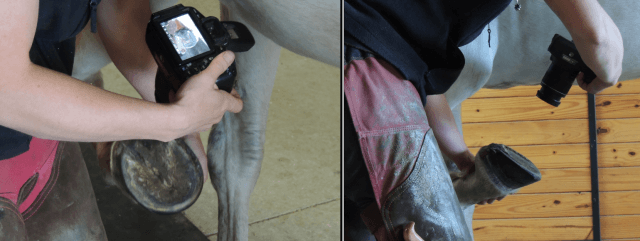
In the pictures below, you can see my position and the relative position of the blue background and horse’s leg. You can also see what I am viewing in the camera screen.
I’ve also included the the finished image so you can see the result of the photo taken this way.
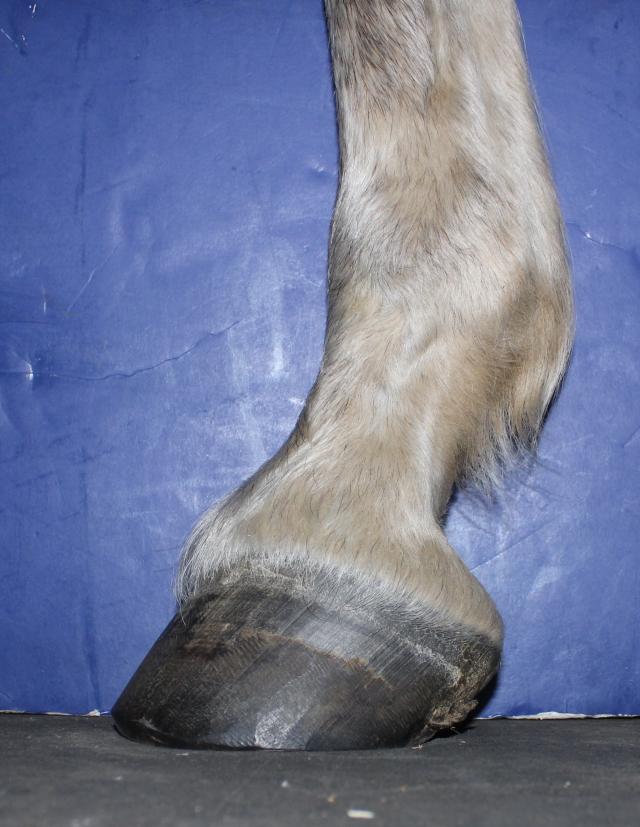
When taking images of the sole, be sure to keep the camera lens parallel to the sole. Point the lens at the widest part of the foot on the midline of the frog.
6) Final Image Preparation
Finishing photos after the images are captured is equally as important to the final product. There are many different computer software packages available that will allow you to process and often store your images in an organized way. Regardless of the software you chose to use, cropping your image, rotating, and some lightening or darkening may be necessary.
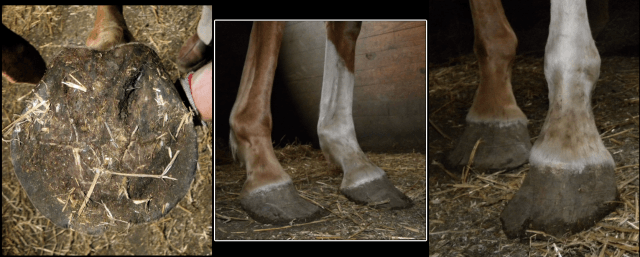
Below is an example of the type of photo documentation captured. By taking these images over time, you can clearly see how the foot progresses. Following these specific photograph documentation procedures has greatly facilitated communication between ourselves, the horse owner, the veterinarian and other hoof professionals. We can also assess, objectively, what is going on with the foot over time and make better decisions for the horse.

To see case studies produced by these photo documentation procedures and more information on our work, please see our website at:
www.DaisyHavenFarm.com

