Remember the good old times? I do have fond memories of foaming the Original Easyboots on horses’ hooves. In the 80s and 90s, we often foamed. And what a mess it sometimes was. Very few of us still foam Easyboots nowadays. But for old times’ sake and for this blog I decided to do it again. I also felt sorry for these boots sitting unused on the shelf. Most importantly, I wanted to see if I still can make a mess! You be the judge on that one.
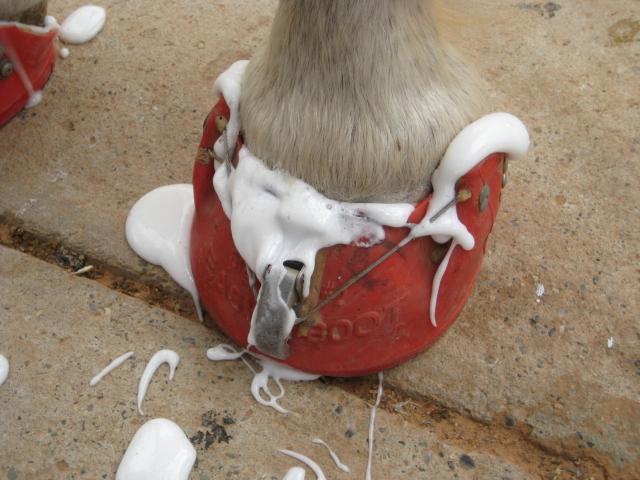
Actually, it hasn’t been all that long ago that we quit foaming boots. But when protective horse boots developed in such a revolutionary way, it seemed that the foaming days were waning for sure. The EasyCare Glue-On boots have been used and tested now for over two years. We all have learned a lot and we are still learning to improve our application of the EasyBoot Glue-Ons.
Quite frankly, no hoof protection on the market has fascinated me as much as the glue-on horse hoof boots and the whole glue-on procedure. Just something about being a hoof care provider and chemist at the same time.
It’s been over two years now since we started, cautiously, to glue on the first boots. It happened at a 3-day ride in December in Sonoita, Arizona; the start of a new ride season. Glue on horse boots were unheard of before then. Mistakes were made by us, we lost boots. I’ll spare you from listing all the mistakes we made, we would only reinforce them. What I want to share with you are the improvements we made, the lessons we learned, so you don’t have to make the same mistakes we did.
Most Important Lessons We Learned
- The hoof has to be totally dry and totally clean.
- The glue-on hoof boot has to be dry and clean.
![]()
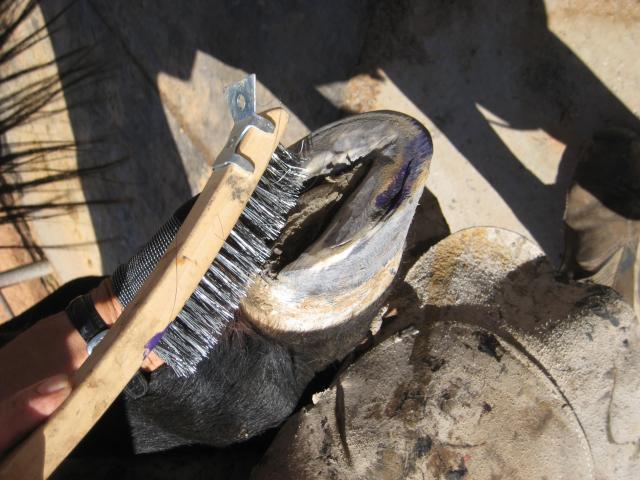
After using hoof picks, a wire brush, available in hardware stores, works great to clean the hoof. Notice how clean this hoof is, all dust, sand and dirt are absent. A white line separation was treated with iodine.
Drying can be accomplished with a heat gun. It will work the best. Thoroughly dry the hoof wall and the sole. If you do not have a heat gun available, a hair dryer will do as well, it just requires more time, because it provides less heat.
When the hooves are wet, dry the walls and soles several times. Capillary action will move moisture back to the hoof wall after drying it the first time. Nature always tries to balance things, so when there is a lot of moisture in the hoof, like after a rainy weather period, drying the outer periphery of the hoof wall will make the remaining moisture inside the hoof move to the now dry areas through this capillary action. Therefore it is really important to take the time to dry the hoof several times.
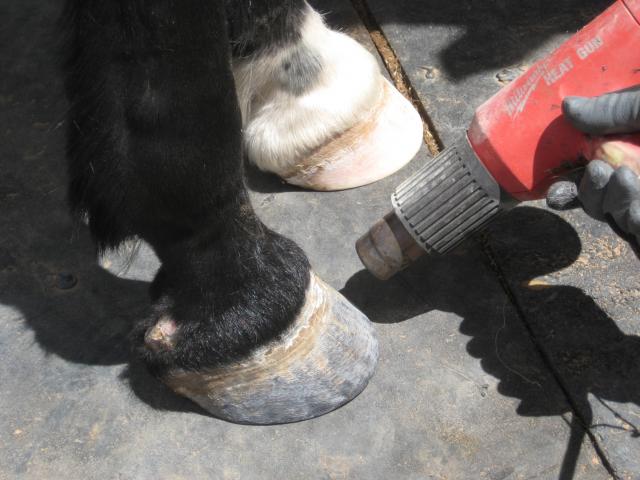
Lately, we have been using Goober Glue for padding the bottom of the hoof. If using Goober Glue, the actual sole does not have to be quite as dry as when using Equipak. However, keep in mind that bacterias thrive on moisture. So, by drying the sole really well, you are also taking care of any bacterial infestation. Literally, with a heat gun you can actually burn any fungi or bacterias. You do not have to worry about damage to the hoof. Farriers have hot seated steel shoes for centuries, the hooves can handle the heat for a short time without any damage.
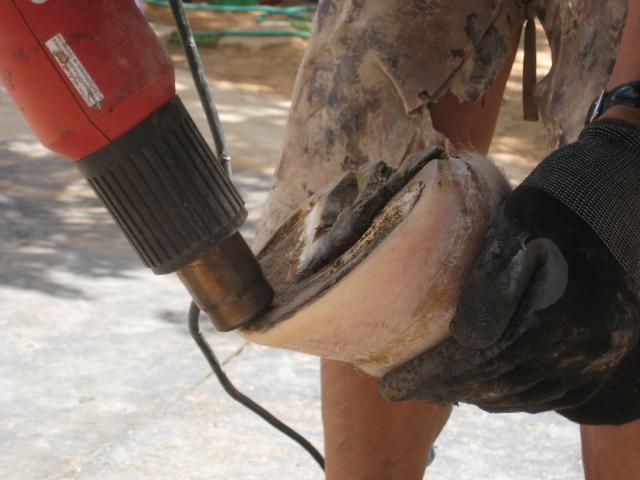
Notice the slight brownish color in the quarter area. We actually seared the sole slightly and killed any detrimental bacterial infestation. Not to worry, the hoof can easily handle it, heat dries, hardens and disinfects the sole.
Boot Preparation
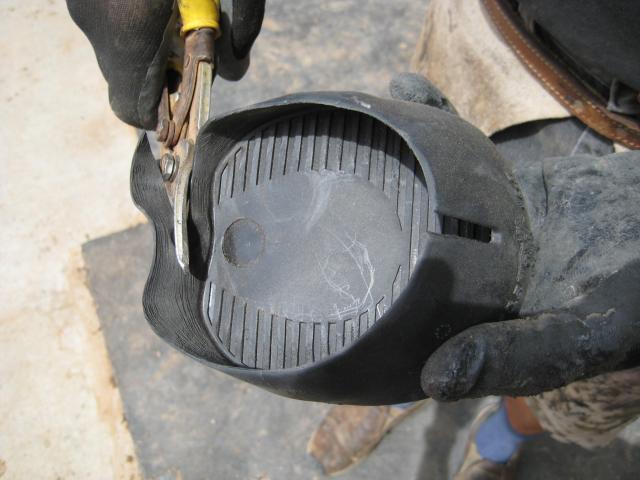
If the heel bulbs of your horse are fairly low, you can easily cut the back of your boot down. It will not compromise the structural integrity of the protective horse boot.
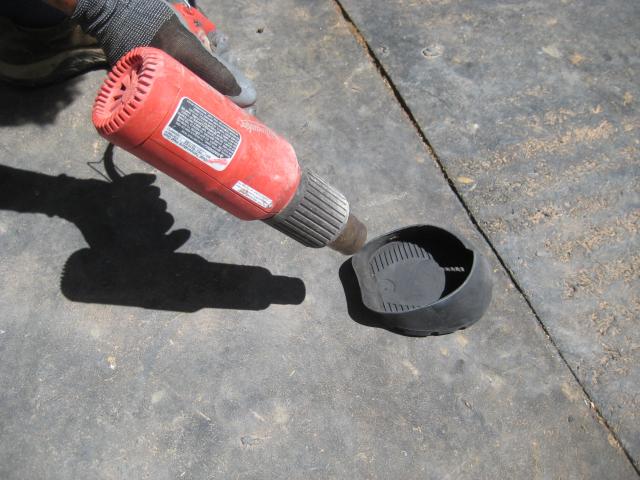
In cold weather, you may also use the heat gun to warm your boot up.
Once you have finished drying and cleaning the hoof and boot, you should only handle the hoof and glue on boot with gloves. EasyCare has gloves in their store, but you can also use simple latex gloves from the hardware store. This is of utmost importance, otherwise dirt, moisture and grease from your hands can easily contaminate the hoof wall and boot, thus compromising the adhesion of the Vettec Adhere.
Next, I like to apply Goober Glue to the bottom of the boot. Goober Glue remains very soft after drying and is a good cushioning for even tender footed horses. We apply the Goober Glue in the shape of the frog, more for hooves with deep concavity, less for flat footed horses. Goober Glue takes several hours to cure, so no rush with this application.
Vettec Adhere will work best for gluing the side walls of the boots onto the hoof.
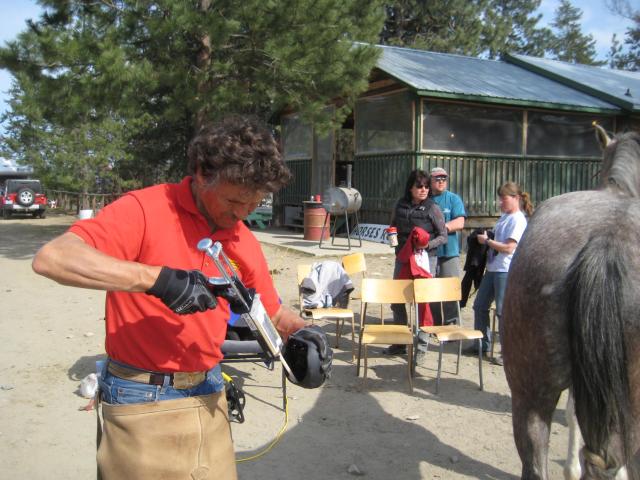
Always hold the boot on its side, so the glue does not run down inside the shell to the bottom of the boot, possibly causing undue pressure on the sole. Adhere is a very dense material once it is set, we do not want it on the bottom of the boot.
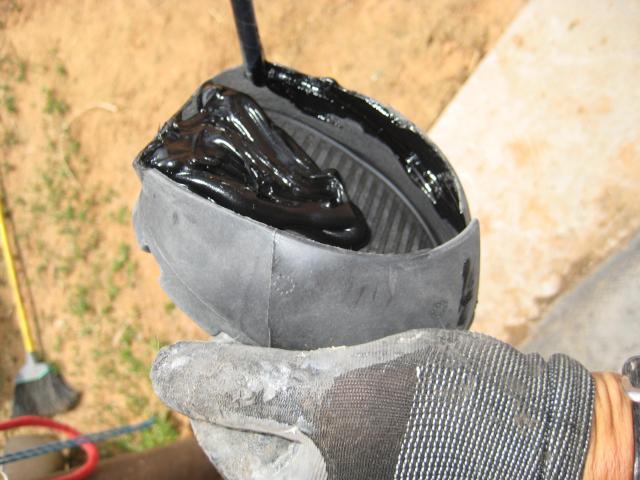
The Goober Glue has been applied in the shape of the frog to the bottom of the boot, then the Vettec Adhere is applied only to the top half of the boot shell. When pushing the boot onto the hoof, the Adhere will then get pushed down the remainder of the boot wall, but not as far as the bottom of the boot.
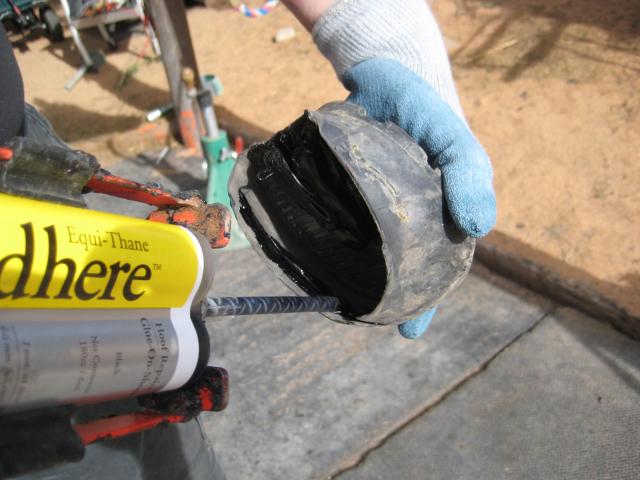
Notice again how I hold the boot almost upside down, in order to prevent the Adhere from flowing to the bottom. In warm temperatures, it could easily happen.
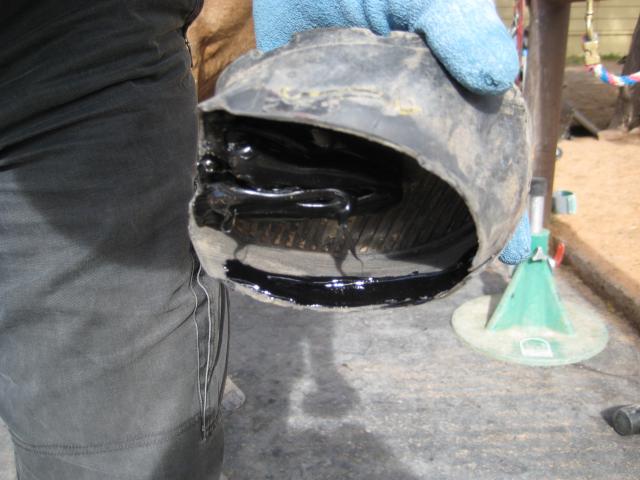
You do not need a lot of glue, this is plenty. Pushing the boot onto the hoof will spread the glue down the remainder of the shell wall.
Working with Adhere, one has to move fast and expedient. Adhere sets within one minute. If you work too slow, the Adhere will have set before you get the boot onto the hoof.
Just recently, Vettec brought a much small application kit on the market.
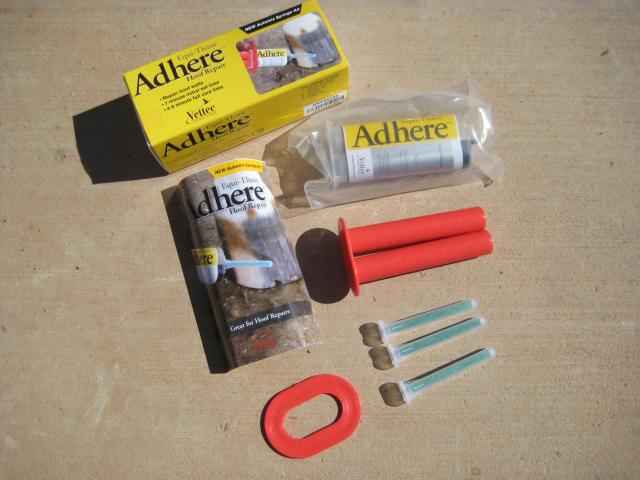
This kit is lightweight, has three mixing tips, a plunger with a finger ring. Easy to use, you can take this kit in your saddle bag, just in case you did not use good diligence at home when gluing and lost a boot. You can then easily re glue on the trail. Setting time in 1 minute, full cure in 5. Beats not finishing your ride because of a lost boot.
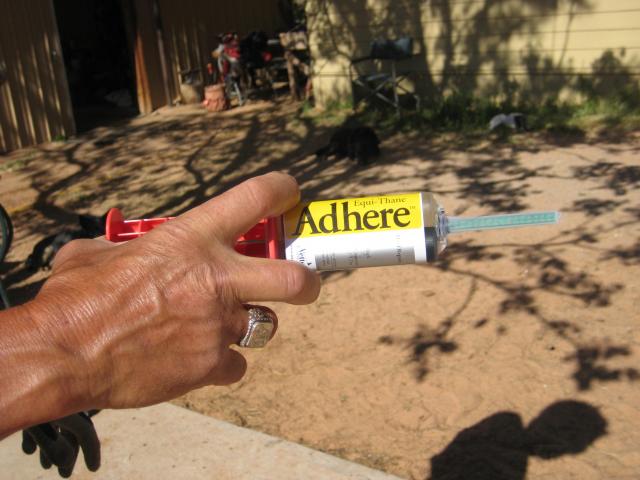
Again, tilt the boot while you apply the glue to the side wall, so it doesn’t run onto the bottom of the boot.
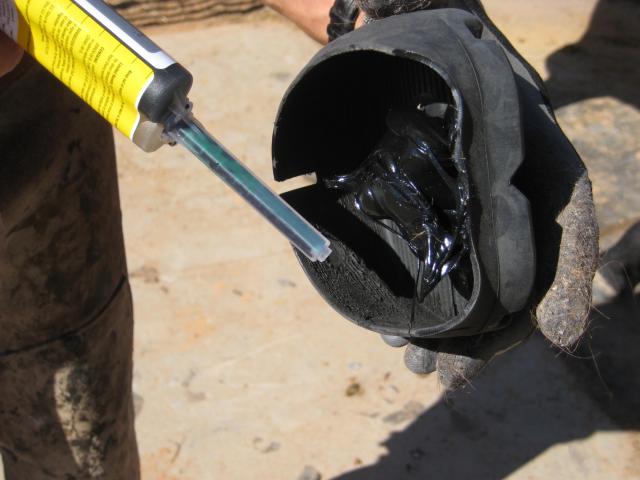
One 50 cc tube holds enough glue for 4 glue-on boots. Contact me at Global Endurance Training Center if you would like more information about it. After pushing the boot onto the hoof, it is highly advisable to seal the edges with a beat of Adhere. With your gloved finger, you should then smooth it out. You want to create a good seal all around the shell between the hoof wall and frog, so no moisture and debris can enter the boot.
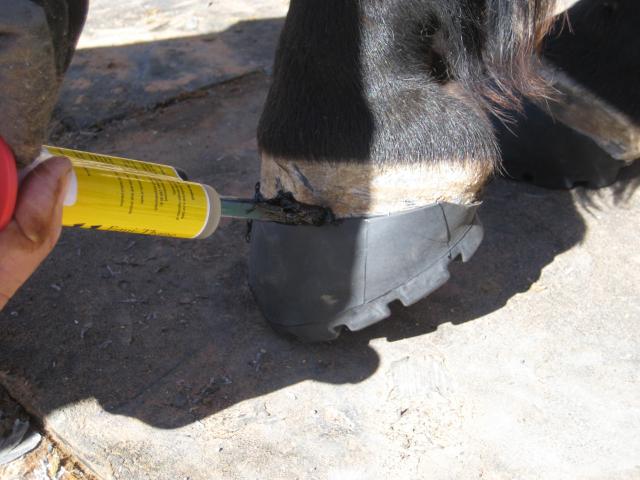
Here using the 50 cc applicator, below the 180 cc applicator gun
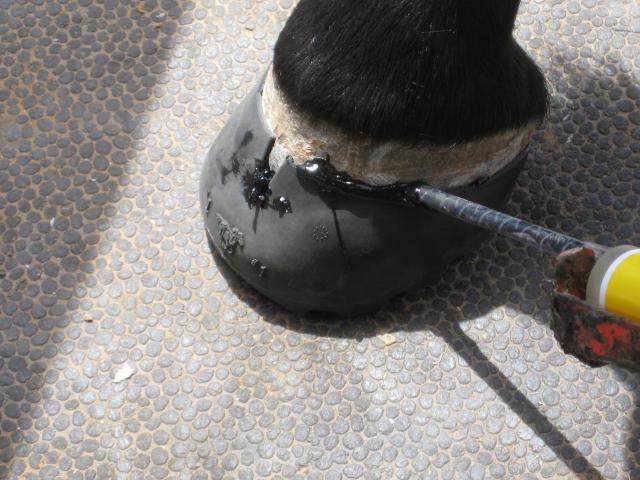
After applying Adhere to the edge of the boot, use your gloved finger to smooth it out.
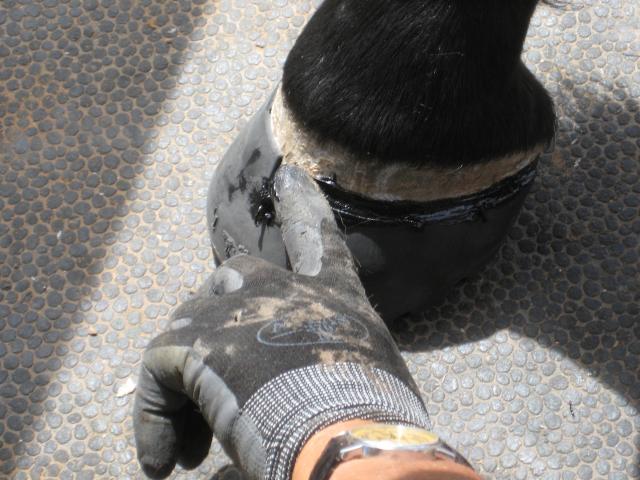
In the frog/bulb area, some Goober glue will have pushed out. We smoothen it out to create a good seal there as well.
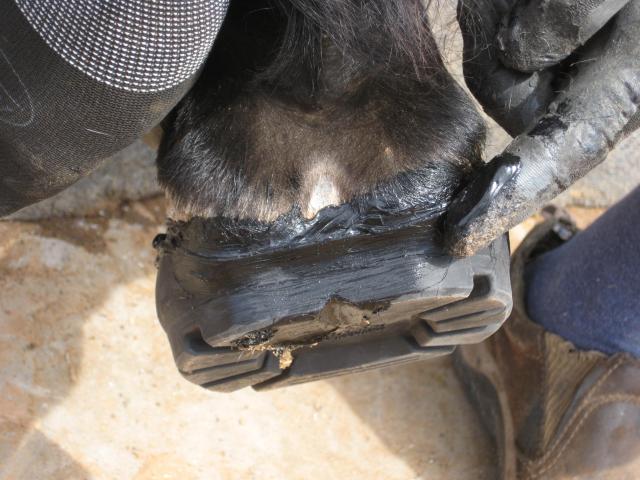
Now we have a complete seal around the edges of the boot.
A lot of questions have been asked regarding how long we safely can keep Easyboot Glue ons on our horse’s hooves. As often, the answer is: it depends.
If you did a great job drying and cleaning your hoof, have no bacterial invasion, or you took care of it through drying and various remedies, (see our previous blogs on Hypozin and Sore No More), diligently sealed the edge of the glue on boot all they way around the hoof, then you can leave these boots on for up to a whole trimming cycle.
Below a couple of photos of boots glued on the hooves now for 5 weeks. Notice that the seal is still intact. No foreign matter was able to enter these Glue on Horseshoes.
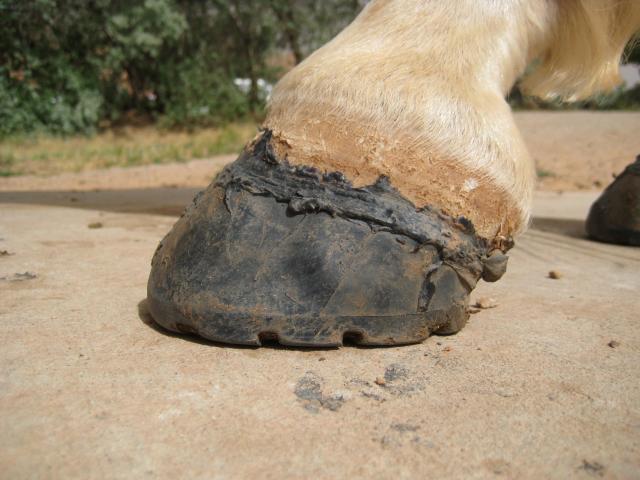
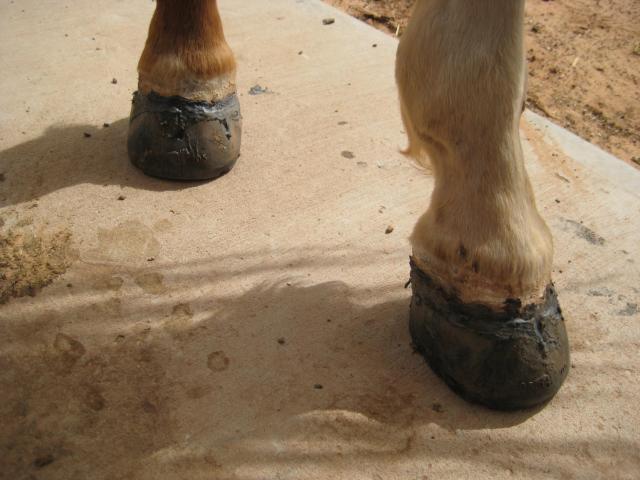
This horse did two 50 milers with these boots and over 100 miles of conditioning rides. All the seals are intact, no water, mud or sand was able to enter these boots.
Here are some more photos from different hooves after boot removal that had glue ons applied for about 6 weeks:
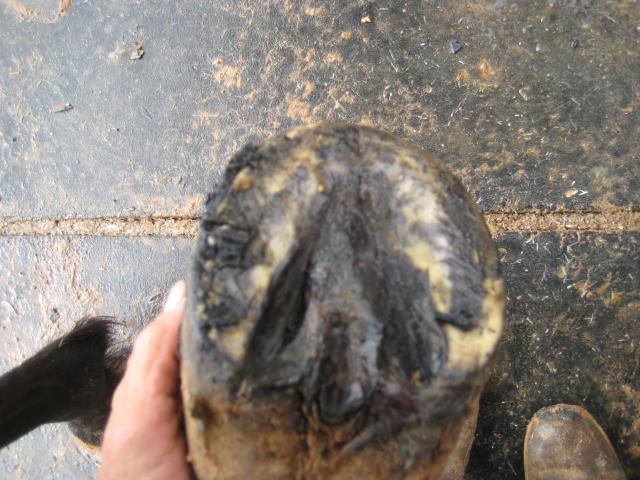
No thrush, no smell, no problems with this hoof. Residual glue still on the sole. After initial cleaning, glue removal and a slight trimming, (the trim is not completed) it looked like this:
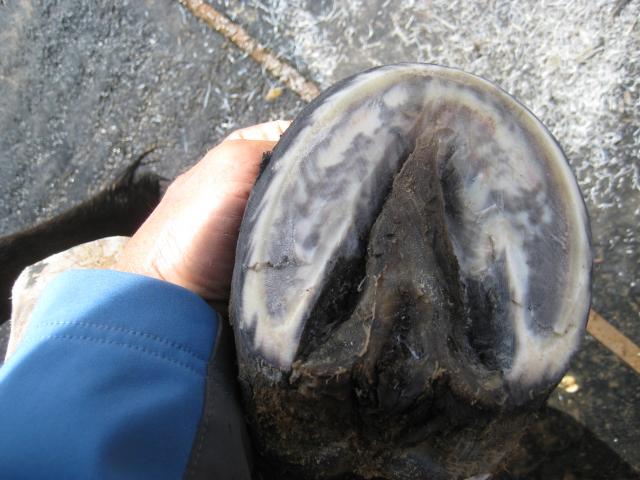
A photo of the hind hoof:
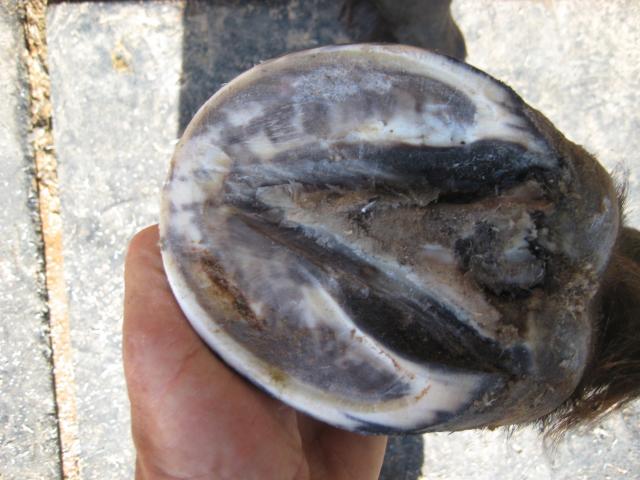
What’s remarkable here, no bacterial or fungal invasion and no white line separation anywhere.
After using EasyCare Glue ons now for over two years on most horses at GETC, the cases of white line separation have almost completely disappeared. When keeping the Glue on boots on the hooves for the full trimming cycle, (up to 6 weeks), we observed a notable decrease of white line separation. Could it be, that the shell gives the hoof capsule more stability? Could it be that there is less bacterial invasion because the sole is clean and sealed? Could it be that there is less peripheral loading when traveling with Easyboot Protective Horse Boots, thus weight bearing is more distributed over the whole foot instead of the hoof wall? Could it be, that we all are getting better at trimming? Or is it all of the above?
Whatever the answer, the results speak for themselves and they spell SUCCESS. We tried, practiced, learned and succeeded.
Working with Glue ons and Hoof Glue is fun, it works and helps your horses hooves.
From the Global Endurance Center:
Your Bootmeister


