


Submitted by Pete Van Rossum
Applying Easyboots using a heat fit method can enable hoofcare professionals to provide a higher level of customization in the fit and performance of EasyCare boots (Easyboot Gloves and Easyboot Epics). Tools needed: heat gun. rubber mallet
When fitting a hoof with the fit kit shells, the sizing should be as tight as possible at the heel. It is typical to select a boot that is one size smaller than would normally be used, as this will enable the toe portion of the shell to stretch without causing significant gapping at the heel. Too much space at the heel will result in undesirable fit and performance results.
Once the size is selected, use the heat gun to warm the shell. Folding the gaiter back and out of the way is advisable prior to beginning. Avoid heating any fabric or stitching as damage to those materials can occur. It is recommended that the tip of the heat gun be no closer than about three inches from the surface of the shell (FIG.1). Apply the heat while constantly and slowly moving the heat gun from side to side, (about the 10 o’clock to the 2 o’clock position). Alternate between heating the exterior and interior of the shell (FIG.1). It is not required or desirable to have the surface of the shell bubble or deform during the heating process. Rather, a glossy, shiny almost wet appearance is the visual indication that the shell is warm enough for heat fitting.
Because the shell will cool rapidly, it is important to quickly transition to the following: secure the leg in the same manner as if trimming the foot for this entire process. Put the boot on by slightly rotating it into place. Be sure to seat the heel into the shell. Once the boot is on, it is now time to stretch the boot into the desired position – as determined by the hoofcare professional. Using the rubber mallet, firmly hit the toe of the shell, centering the mallet at the seam between the base and cuff (FIG.2). Then proceed to firmly hit the shell at about the 1 o’clock and 11 o’clock positions (FIG.3 & 4), followed by two firm hits on each heel section (FIG.5 & 6). More or fewer hits may be necessary to achieve the desired results, but remember that the boot will only stretch, it will not shrink. Next, place the booted foot on the ground and visually check the fit. Attach the gaiter and allow the boot to cool.
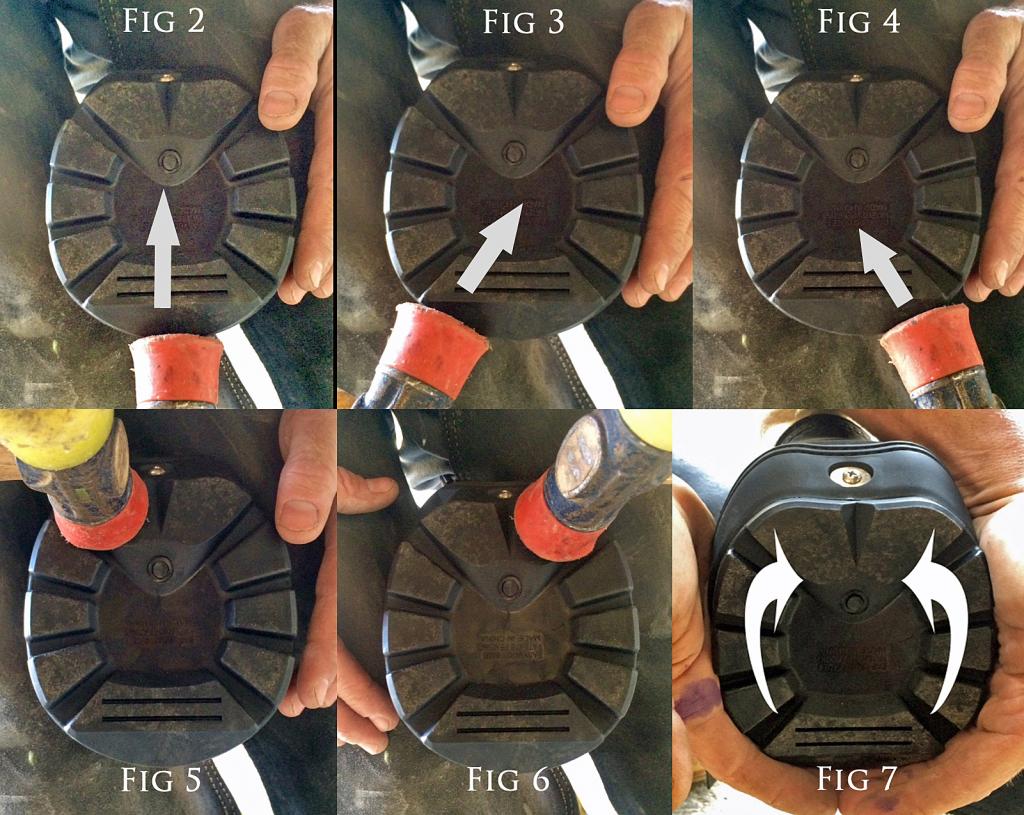
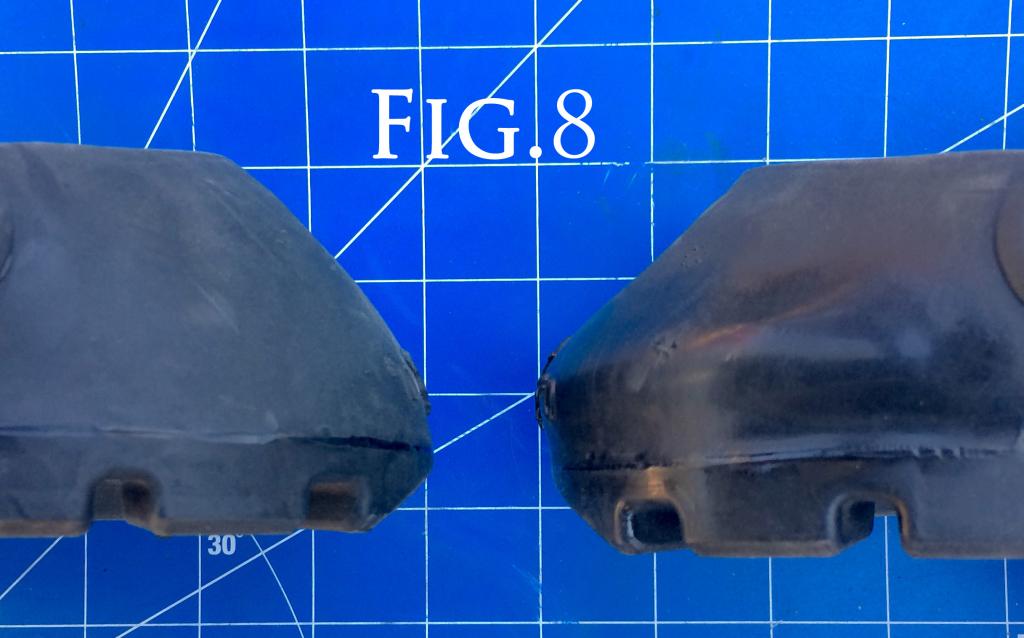
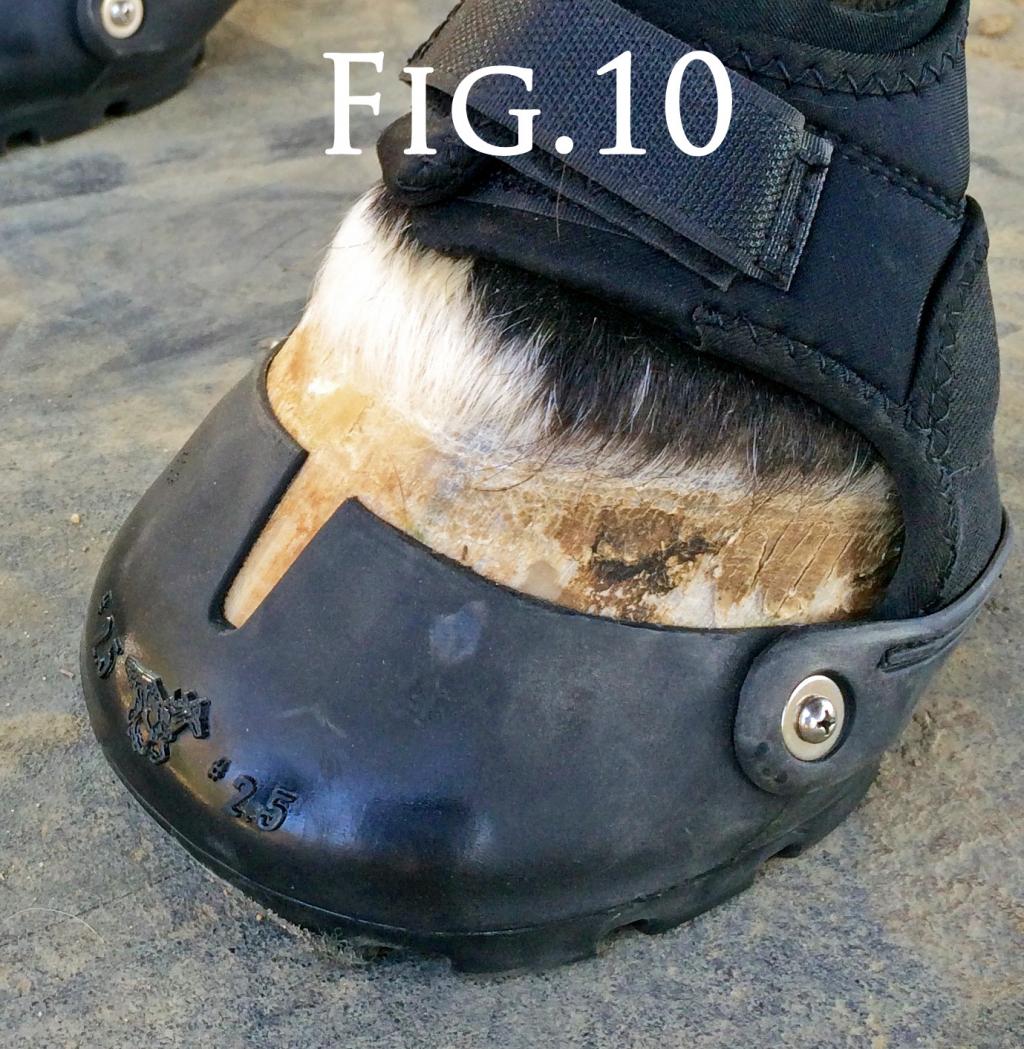
Next, check the fit. Undo the gaiter and inspect the heel fit of the shell. There should not be enough space for the heel to move freely. Next, and most importantly, lift the foot and check for any spin, or rotation of the boot (FIG.7). The boot should not move at all when applying significant rotational pressure. If desired, the hoofcare professional may customize the bevel, rocker and breakover with rasp or grinder (FIG.9). A comparison of a heat fitted and non-heat fitted boot is provided in FIG. 8. Once finished, the boot may look similar to the example in FIG.10.

Note: heat fitting is recommended only on new boots, as results with used and older boots can be inconsistent. Overheating can damage the shell material, heating the gaiter, neoprene and stitching can damage those materials. Using too much or too little force while fitting can result in undesired results. It is strongly recommended that hoofcare professionals experiment and practice prior to application in the field.


