


Submitted by Philip Himanka, Not Only Barefoot LLC
The preparation before the application of a Glue-On is what makes a difference in longevity and strength of bond between product and the hoof. Contained in this blog are some things to take in consideration.
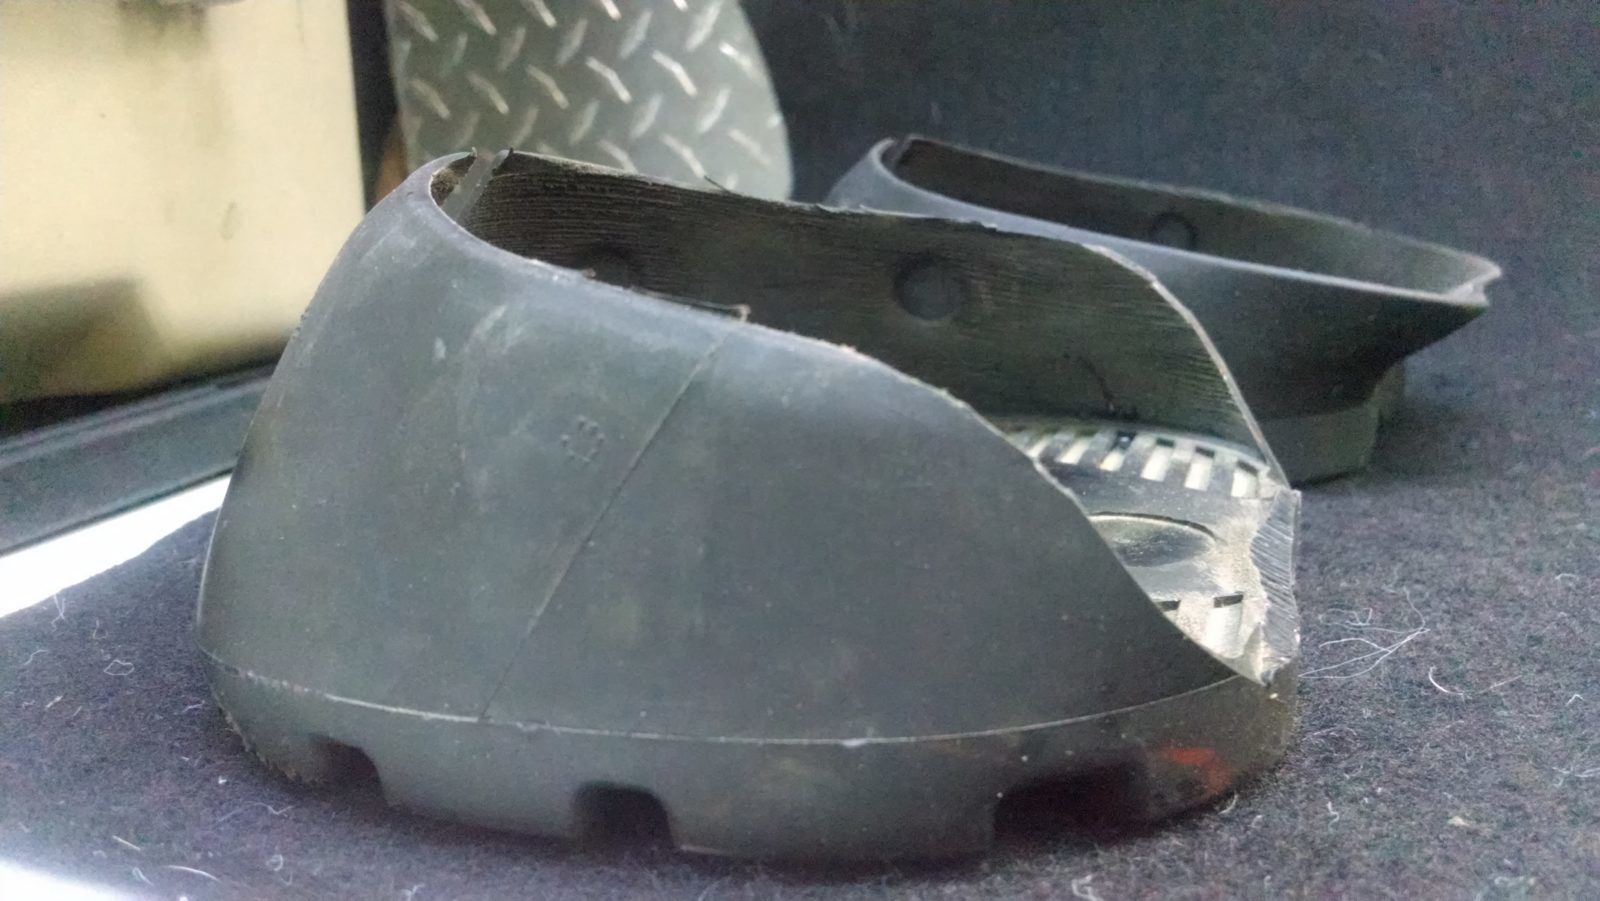
I will start with at the end with the removal process: If you are not thinking about how difficult it is going to be to remove the Glue-On shells, then you will do a better job gluing. I’ve found that the best way to pull them off is with a pair of dull nippers. If you take your time and your horse does not wiggle then the shell might peel off intact enough to reuse it. Usually, when you are ready to pull/peel them off, there will be a small separation towards the heels.
First, get the corner of your nippers and wedge it in. If its not cracked you might need to rasp the edge a bit.
Second, close your nippers and use the leverage outwardly in a peeling motion.
 Third, the edge of the shell will start to separate so work your way forward until you get to the center. Go back and keep peeling deeper until the rim at the lower edge of the shell pops. You will usually hear a sound. Move yourself to the other side of the limb and repeat the process.
The shell has more flexibility than the glue so if you peel it off instead of prying it will leave the glue adhered to the hoof wall and then you can just buffer out the glue gently.
I think this process is very important in order to conserve the integrity of the hoof wall. I find that if you buffer/sand instead of rasping you can do consecutive gluing applications without taking a significant layer of thickness of the hoof wall. Note: This process will work also for the gluing of shoes like the EasyShoe Performance.
Now I will discuss the application process. It is important for you to consider, regardless of the kind of riding you will be doing, the length of time you are planning to leave them on.
If you are planning to leave them on for less than one week you can use either glue types such as acrylics, EasyShoe Bond and urethanes, Vettec Adhere. For sole protection and comfort a silicon base or dental impression material, such as Shufill dental impression, is a good idea. Note: For short periods of time, the Sikaflex has proven to be the best in any kind of condition because of its sticky, flexible and sealing properties.
If you are going to leave them glued for 6 weeks or so, the process I recommend is more specific (leaving the shells/shoes glued more than 7-8 weeks can be detrimental to the angles of the hoof). My experience has been that the acrylic works best for longer applications due to the following properties:
– It’s more flexible and is less likely to crack or become brittle over time, so it moves with the hoof. This is great because you want the heels to expand and move independently from each other (that is what I love about the Love Child).
– Seals better from water and moisture.
– You can add copper sulfate when you are mixing the glue in order to prevent thrush.
I’ve also found it is very important when you are going to leave them glued for a longer time to consider this:
– Leave the back of the foot open so the softer caudal tissue can be in contact with air.
– If you are applying any kind of sole support including pads, it is important to apply thrush prevention products. What I do is after the glue is set, I sprinkle some copper sulfate powder or granules in the heel, then I pack in a clay based anti-thrush product, Artimud is a good option.
You really want to use clay based products regarding thrush not only because they have a better prevention effect but they also keep their properties longer. Note: If you want to be successful regarding thrush and your horse lives in a wet environment it will be very helpful to pack anti-thrush clay at least once a week from the heel into the collateral groves of the frog and central sulcus.


