


Gluing boots is probably the biggest concern I hear from friends and acquaintances wherever I go. While there are plenty of ways gluing can turn into a disaster, there are a few simple steps that can make the process pain-free and downright easy!
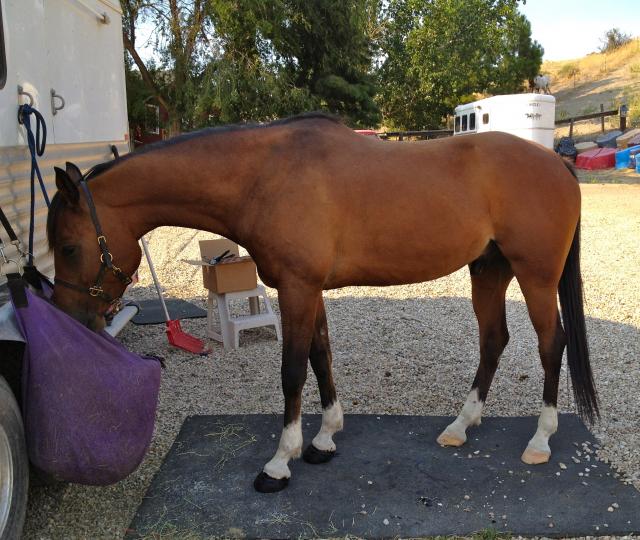
Yesterday I decided to glue boots on Topper for the upcoming City of Rocks endurance ride. We have been having trouble with him this summer as he has been abnormally sore-footed. I was concerned enough to have digital radiographs taken a while back, which showed very thin soles. On a positive note, his angles looked GREAT and his coffin bones are lovely. While I can probably be blamed for his thin soles, I can also take credit for balancing him nicely, keeping his toes back and his angles correct. I can be pretty hard on myself so it is a good thing his feet weren’t a total disaster! He has since grown some foot and with some pointers from a few different and very talented trimmers, we’re looking better and better all the time. I still wanted to offer him as much protection, concussion relief and stability as I could, so gluing it was! I don’t know what I ever did without Easyboot Gloves and Glue-Ons! Oh right, I had someone else shoe them. Those days I do not miss.
Unfortunately, the weather didn’t get the memo. Like many parts of the country, we are suffering through a pretty significant heat wave, on day five of 100+ temps. No worries, we could do this! The biggest thing I was concerned about was my Adhere setting up in .002 seconds, instead of the normal .2 seconds. To prevent this, I put the cartridge of Adhere in a box with an ice pack to keep the temperature cooler. It worked like a charm and my Adhere set up at a reasonable rate without giving me any anxiety attacks.
While gluing takes a little work and preparation, the more organized and prepared you are, the better the outcome. I repeat- get yer shit together first! Running around like a chicken with its head chopped off is not ideal!
Here is how I make things work:
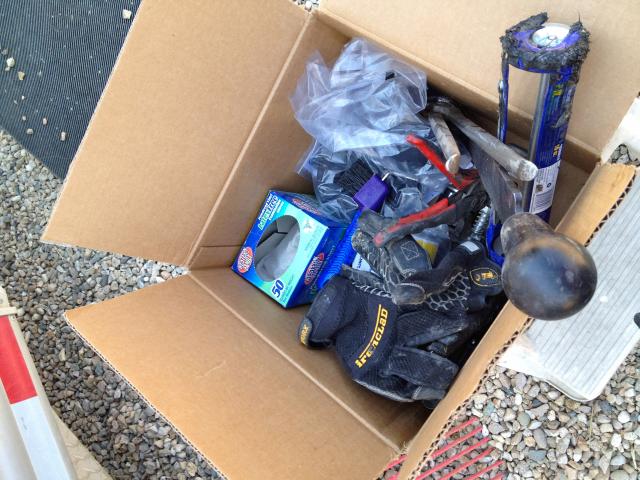
First off, gather all of your supplies. By all, I mean *all.” The last thing you want is to realize you forgot your mallet as the Adhere is drying in the boot and you have no way to fully seat it on the foot. No bueno! My box has the shells I need (extras if you’re really good, sometimes you just never know what’s going to happen!), a tube of Adhere, Vettec gun, plenty of tips, a tube of Sikaflex, a box of latex gloves (never underestimate how many you might need. For real.), hoof pick with brush, rasp to prepare the foot, hoof knife to trim up necessary frog/bars/etc, nippers to open the glue, rubber mallet to whack on the boot, a towel to wipe up and a partridge in a pear tree.
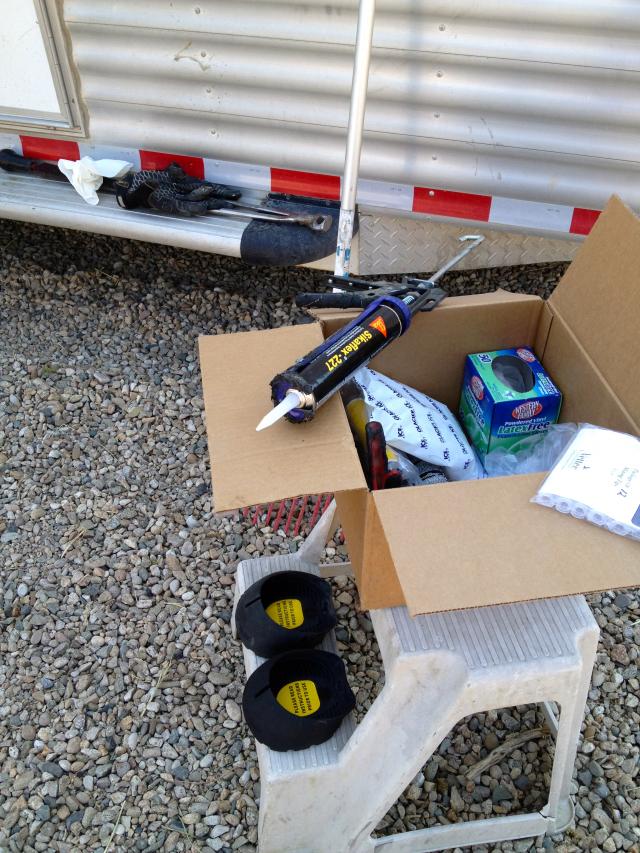
The next thing I do is prepare my area. I like to glue on a flat surface with rubber mats, and obviously today, shade was NECESSARY! Thanks Sally, the use of your trailer for shade was muuuuuuch appreciated. I owe you. I also hang a full hay bag, put out a bucket of water and sweep up all the debris that mostly just irritates me. After preparing the horse part, I lay out all my stuff so it’s within easy reach and do a double check to make sure I have everything. Today on my double check I realized I forgot to bring over my mallet and my gloves! After my third check, I go get my horse.

Ready to rock! You can DO IT!
I set right to work when I bring the horse over by thoroughly cleaning up the feet that are going to be glued, and after cleaning the feet, I score the hoof wall with the edge of the rasp in a diagonal pattern to create a better bond between the glue and hoof wall. I then try on my shells, to make SURE they fit! I was incredibly embarrassed when EasyKev was gluing boots on Nero at the Owyhee Fandango ride and I realized the size boots I thought fit his back feet didn’t actually fit! The last thing you want to do is find this out with a boot full of glue. Not ideal! After confirming your fit, you are good to go and on the downhill slope.

The first thing I do when I’m ready to actually start gluing, is put on four pairs of latex gloves. Serious guys, I put two pairs on each hand, which makes it really easy to just peel one layer off for a fresh layer if necessary. I abhor glue on my hands! I then open up my Sikaflex and apply a thick bead around the inside where the wall of the boot connects to the sole, as well as a frog-shaped triangle on the sole of the boot. Then I squish the Sikaflex on the wall making sure there is enough, and peel off that first layer of glued gloves. The beauty of Sikaflex is that it takes forever to cure, so doing this all at once doesn’t hurt anything. I then take whichever boot will be going on first over to the side of the horse, as well as my ready-to-go Adhere. Squeeze some Adhere onto the upper wall of the boot and get ready to move fast.
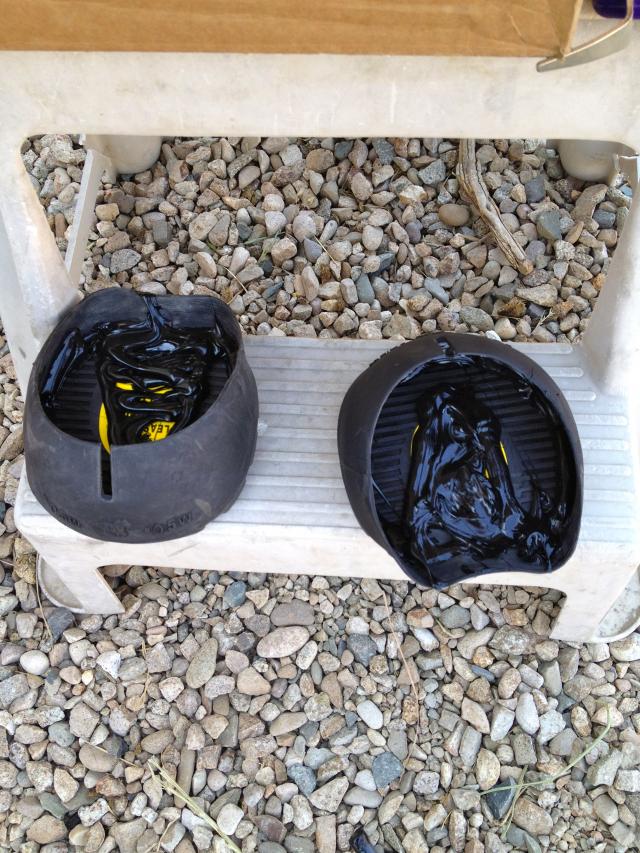
Boots with Sikaflex. I leave the yellow stickers in for good luck!
Place the boot on the foot, taking care not to let the toe of the foot drag the Adhere further down, twist on and whack with your mallet. I like to make sure the boot is fully set on the foot and then put the foot down and immediately pick up the opposite foot. When watching the EasyCare crew glue, I saw they hold the foot up until the Adhere cures, which may be a better method, but I’ve always put the foot down. While holding up the other leg, I spread the oozing Adhere around the top of the boot, creating a seal. If there isn’t enough at this time, I’ll do a seal on all my boots when I’m done with the gluing process, in order to save Adhere tips. I can be cheap when I want to be! Rinse, repeat and set.
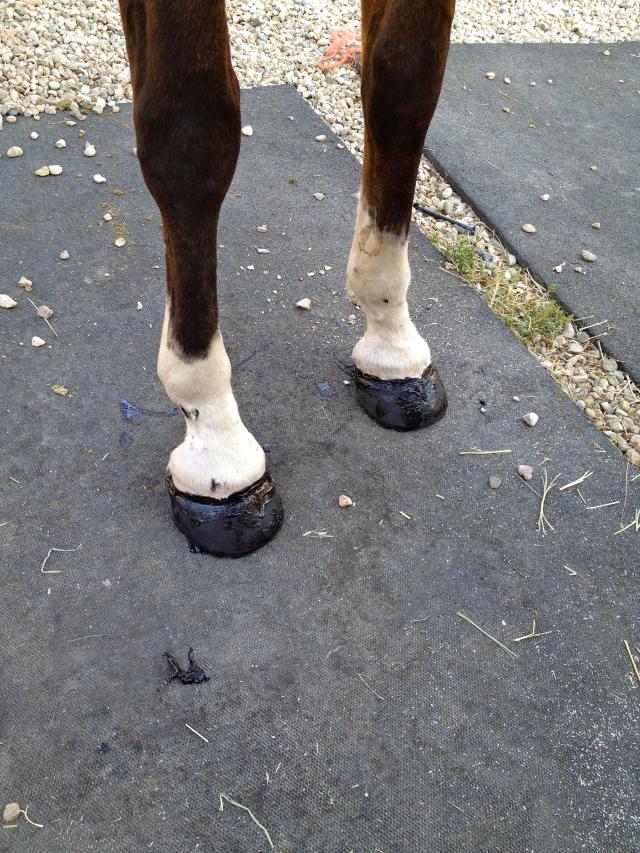
The actual gluing process takes minutes and goes quickly. I know I’m not the only one with ridiculously impatient geldings, so in order to save patience I like to get the horse right before I’m ready. Because the horse needs to stand quietly (HAH!) tied for about an hour or so after your done gluing, it can make for a long time tied and crabby ponies if you get them out too soon. If you were short on time or heavy on fidgety horses, you could increase the amount of Adhere used to really set that boot. Luckily, when it’s over 100*, even impatient young geldings stand quietly in the shade munching their hay. Positives in everything, ya’ll!! After letting Topper stand for an hour and a half, I turned him out and cleaned up my small mess.
I know I said this before, but it deserves to be repeated: A little PRE-organization and preparation can make or break your day. Make it! Don’t break it! You can do this!


