


Numerous applications of the EasyShoe have now been performed and tested. EasyShoes have been used in endurance races, track races, driving competitions, dressage, eventing and trail riding. They have been applied in clinics and seminars within North America and Europe. In my blog last month, I outlined the Global Endurance EasyShoe Clinic schedule. I encourage anyone interested in the EasyShoe to attend at least one clinic with EasyCare or Global Endurance. There is a lot of information passed on and shared and they provide great opportunities to practice under a watchful eye.
There are four different kind of EasyShoes available: Sport, Compete, Performance, and Performance N/G.
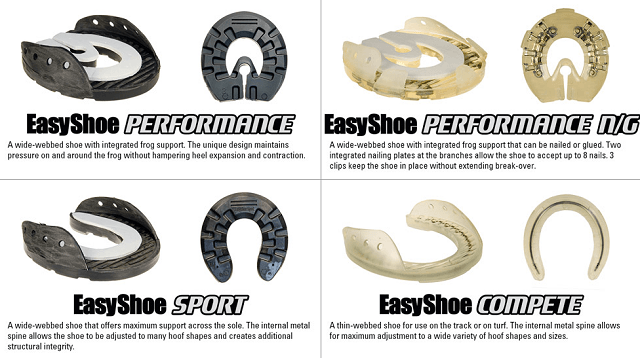
While the Sport, Compete and Performance models applied with glue, the Performance N/G can get glued or nailed. EasyCare has created several videos covering the proper application of each. It is advised to watch these videos and adhere to these application methods. Otherwise failure will be inevitable.
In today’s blog, I want to discuss a few options you can use in your application. After application of any of the four EasyShoe models, you may fill the sole area with packing material. I have seen excellent results by using Vettec Equipak (regular, CS or soft) for this purpose. Most of the time this step might not be necessary, but if you want to guard against any possibility of a stone bruise or want to provide some more sole protection, this is a viable option. Below an example of a Sport where I filled the sole area with Equipak CS.
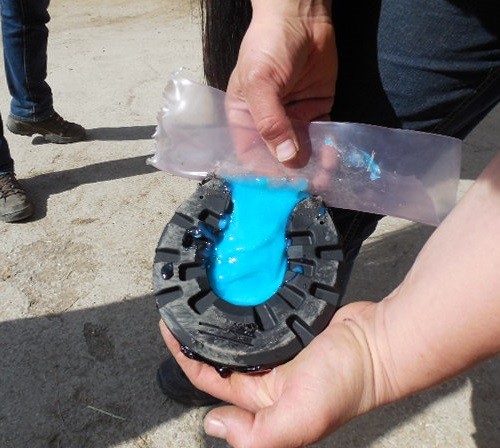
This option provides frog support with the EasyShoe Sport.
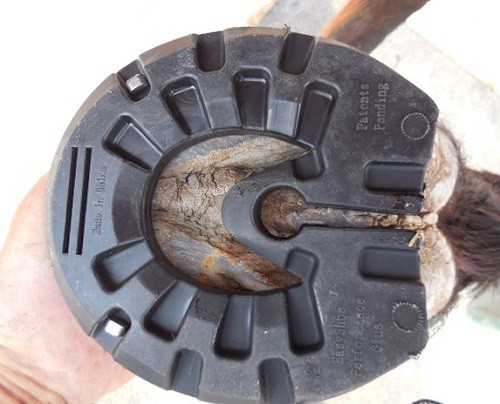
Another option is to add nails for peace of mind when applying the Sport and Performance. Let’s say you do not have enough experience with gluing and/or do not trust your glues. Maybe the glues are a little old or it has been a cold day so you decide you want to add some insurance to your application. You can add a couple of nails to the shoes even though they are designed primarily for gluing. Below is an example of a shoe with two nails applied in addition to the glue:
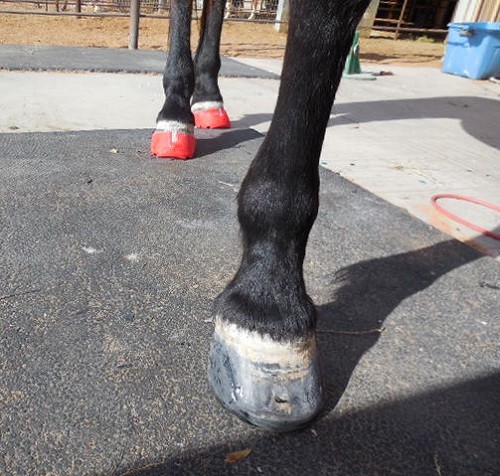
What if you only want to use the EasyShoes for the front or the hind? No problem. In the picture below, I applied the the EasyShoe in the front and Easyboot Glue-Ons on the hind. You could also substitute the Glue-Ons for Gloves or any other Easyboot.
When nailing or gluing to a hoof that is wider than the shoe selected, you can use an EasyShoe Spacer. EasyCare has five different sizes of Spacers available, size 8,10,12,14 and 16. The numbers refer to the width in mm. Select the proper size to make the shoe fit before attaching it to the hoof by either glue or nail. After the shoe is applied, the spacer can get pulled out with a hoof pick and then used again.
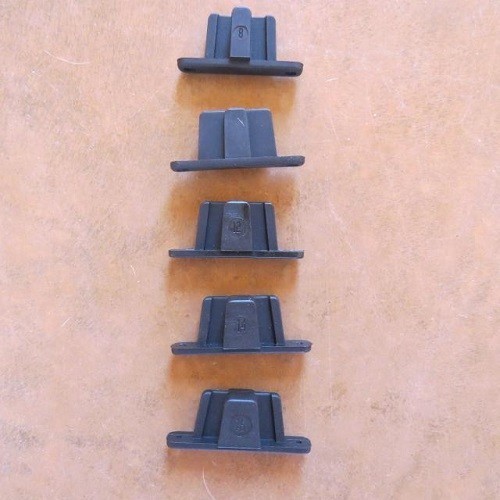
If the hooves are weak (thin lateral cartilage and/or thin and soft digital cushion) or the horse has to race in a 100 miler over difficult terrain, these spacers can be left in place and secured with small screws.
This spacer gives the shoe less flexibility and the hoof more support.
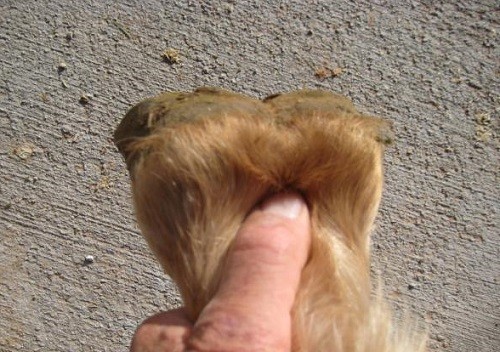
Below is an example of a weak hoof: soft and thin digital cushion, thin lateral cartilages. This hoof would benefit from a spacer to give it more support in an event. For conditioning hooves like these, it is best to leave the hoof bare for training to strengthen it, but I digress.
The EasyShoes can be set back on the hoof for more breakover and more heel support. You also can rasp the shoe after application to increase breakover or, if the heels are too long, you can rasp them down in the heel area. The image below is an example of setting the shoe back to the white line. It shows also a little heel extension for support of the movement apparatus. The trailers could be as long as half the distance from the heel to the end of the heel bulb.

Here, all the clips and glue tabs have been removed but EasyCare recommends you leave either the toe clip or the side clips. When leaving the clips in place, you might want to set that nail above the clip a little higher but that is for a future blog.
The EasyShoes allow a lot of flexibility. Only your imagination is the limit. Evaluate the whole horse, then the hooves, then the purpose and task the horse has to perform. Then decide which EasyShoe to apply, how to apply it, and which option to choose.
Next month we will discuss nailing options of the EasyShoe Performance and I will share some tips and tricks with you. So stay tuned!
Your Bootmeister
Christoph Schork
Global Endurance Training Center


